
Flaky Buttery Croissants with Fresh Milled Flour
This post may contain affiliate links. Please read our Disclosure Policy.
There’s something almost magical about fresh croissants straight from the oven—the delicate layers breaking apart with a gentle touch, revealing a buttery, flaky interior that melts in your mouth. Fresh milled flour adds a subtle complexity that makes these delicious croissants a special treat worth the effort. If this is your first time baking croissants, this recipe gently walks you through the process without rushing, so you can enjoy that lovely aroma filling your kitchen without the kitchen chaos. Don’t worry if your first attempt isn’t perfect—the process itself is part of the joy, and every buttery, flaky bite is a celebration of homemade goodness. So go ahead, give your kitchen a little bakery magic.

What Makes This Recipe Great
Flaky, buttery perfection.
Achieving that signature flaky texture with buttery layers of dough is the heart of any great croissant. This recipe ensures you get that satisfying crunch, paired with a tender, soft inside, thanks to careful lamination and fresh ingredients.
Fresh milled flour elevates flavor.
Using freshly milled flour introduces a rich, natural nuttiness and depth that pre-ground flour simply can’t match. It transforms these croissants from ordinary to extraordinary, offering a taste experience that is subtly complex and incredibly satisfying.
Step-by-step guidance for home bakers.
While croissants are a labor of love, this recipe breaks down each phase clearly and warmly, making it accessible whether you’re a curious beginner or a confident home baker. It encourages you to enjoy the process as much as the result, so there’s no pressure—just delicious rewards.
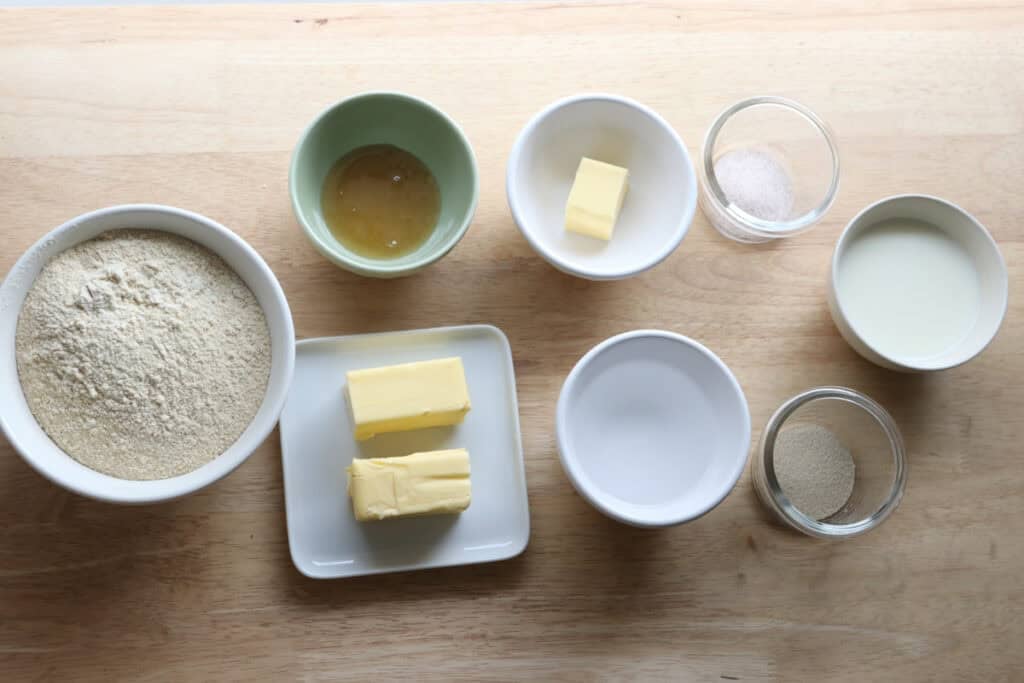
Overview of Ingredients
Fresh Milled Flour
Freshly milling your flour brings out oils and flavors that give these homemade croissants a uniquely vibrant taste. If milling isn’t an option, opt for high-quality unbleached all-purpose or bread flour to maintain good structure and crumb.
Butter
Butter is essential for that rich, flaky texture. European butter is necessary here because of the low moisture content. Standard store bought butter has a higher moisture content and will not produce those flaky layers.
Instant Yeast
Yeast is the magic behind the rise and lightness.
Milk
Milk adds moisture and tenderness to the dough. Whole milk is preferred for a richer flavor, but you can substitute with any milk you have on hand—even plant-based milk like almond or oat will work, though it may change the texture slightly.
Honey
A touch of honey adds a slight sweetness without overpowering the layers of butter. If you prefer, you can reduce the sugar for a less sweet croissant, or swap for maple sugar, sugar, or coconut sugar in a pinch.
Salt
Salt balances the flavors and strengthens the dough. Use fine sea salt or kosher salt for even distribution. Avoid table salt with additives that might affect yeast performance.
For more freshly milled recipes, try these sourdough garlic breadsticks or these delicious English muffins!

Tips for Success
#1 Make sure you have cold butter.
For perfectly laminated dough, your butter should be cold but workable—not rock hard or melted. When butter breaks or melts into the dough, your layers won’t form properly, so chilling between folding steps is the most important thing to remember.
#2 Don’t rush the resting periods.
Patience pays off when making great croissants. Letting the dough rest and chill between folds helps relax gluten, making it easier to roll out thin layers and preventing shrinkage during baking.
#3 Roll evenly with consistent pressure.
Try to maintain an even thickness when rolling the dough; uneven rolling leads to uneven layers, which can mean dense or doughy spots. A light touch and consistent pressure make all the difference.
#4 Use a sharp knife or pizza cutter.
Cutting the dough with a dull blade can squish those delicate layers. A sharp knife or pizza cutter gives clean edges, helping croissants hold their shape as they rise and bake.
#5 Bake on a parchment-lined sheet.
Croissants can stick easily, so a parchment-lined baking sheet ensures they slide off effortlessly and have a nice bottom crust.
#6 Brush with egg wash for a golden finish.
An egg wash adds a beautiful sheen and helps these perfect croissants brown evenly, making them look as delicious as they taste.
Helpful Tools & Supplies
Whether you’re just dipping your toes into the world of fresh milled flour or you’re a seasoned home baker, I’ve taken the guesswork out of what you truly need. All of these tools and resources are available in my shop, designed to help your journey be smooth and nourishing:
Grain Mills
- NutriMill Classic Grain Mill – My go-to for fine, consistent milling; perfect for sandwich breads and everyday baking.
- NutriMill Harvest Grain Mill – Stone-ground elegance: this model delivers whole-grain flavor with a beautiful appearance.
Mixers
- Ankarsrum Mixer – A powerhouse kitchen companion with multiple speeds and attachments—ideal for kneading bread dough effortlessly.
Baking & Bread Tools
- Bread Bow Knife – Artisan-made with a high-carbon steel blade and cherry wood handle—this knife slices loaves with ease.
- Sourdough Essentials Kit With Starter – Complete starter kit that includes dehydrated sourdough starter, banneton baskets, a dough whisk, scoring lame, and more.
Cookbooks & eBook Bundles
- Everyday Whole Grains Vol. 1 & 2 (printed & digital) – Packed with 70+ recipes built around fresh milled flour, from breads to snacks and desserts.
- The Fresh Breads Bundle – A comprehensive set including eBooks like The Perfect Loaf, the Cookie Jar, bulk baking guides, and a sourdough mini‑course—all centered on fresh milled flour.
- Freshly Milled Made Simple Guide – A video-based guide that walks you through milling and baking basics, making the process feel easy and approachable.
Specialty Items
- Dehydrated Sourdough Starter – Just add water and flour to rehydrate this starter—perfect for bakers without an active sourdough culture.
- I Knead Fresh Flour Mug – A charming, handmade 12 oz ceramic mug—great for coffee breaks during dough rising!
Why These Are Worth It
Every tool in this collection has been personally vetted to support you in baking with fresh milled flour. From the grain mills that make your flour, to mixers that knead dough, to resources that teach you every step—it’s all here to make sure your homemade bread journey is joyful, nourishing, and successful.
➡️ Explore all of these items and more in the Generation Acres Farm Shop — your one-stop spot for fresh milled flour baking essentials.

Equipment:
Rolling Pin
Mixing Bowls
Bench Scraper or Knife
Plastic Wrap
Pastry Brush
Baking Sheet
Parchment Paper or Silicone Mat
Cooling Rack
How to Make Flaky Buttery Croissants with Fresh Milled Flour
Ingredients:
- 2 ¼ cups freshly milled hard white wheat flour, finely milled (292 grams)
- 1 ½ teaspoons salt
- 1 ½ teaspoons instant yeast
- 2 tablespoons softened butter
- 2 tablespoons honey
- ½ cup warm whole milk (126 grams)
- ⅓ cup warm water (72 grams)
Butter Layer:
- ¾ cup butter (173 grams)
Egg wash:
- 1 egg
- 1 teaspoon water
Directions:
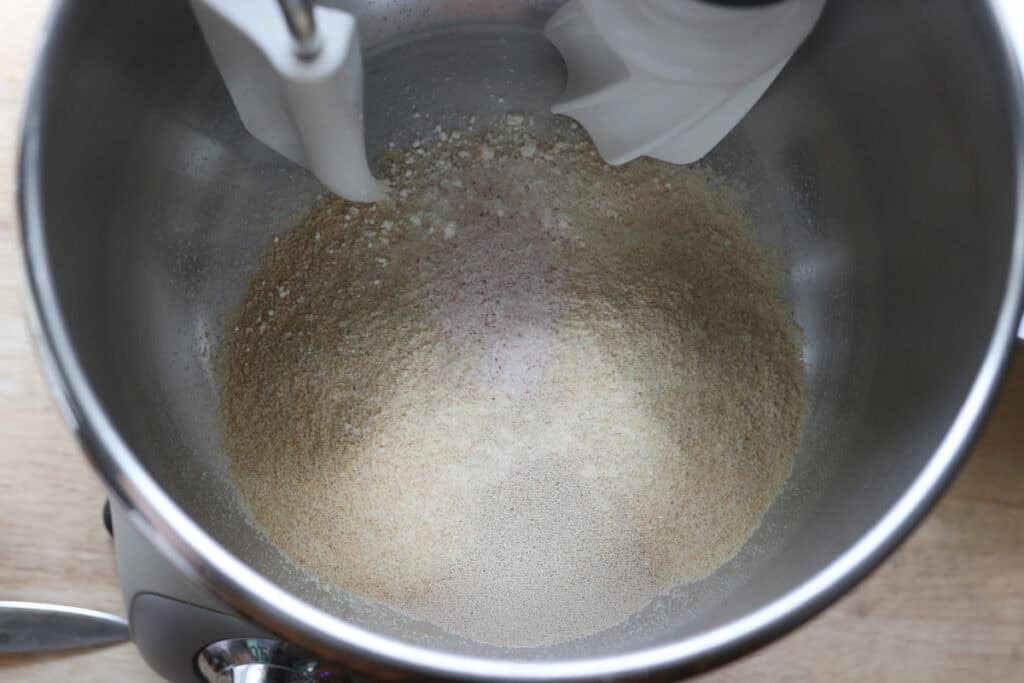
- In the bowl of a stand mixer, add the flour, salt, and yeast and mix.
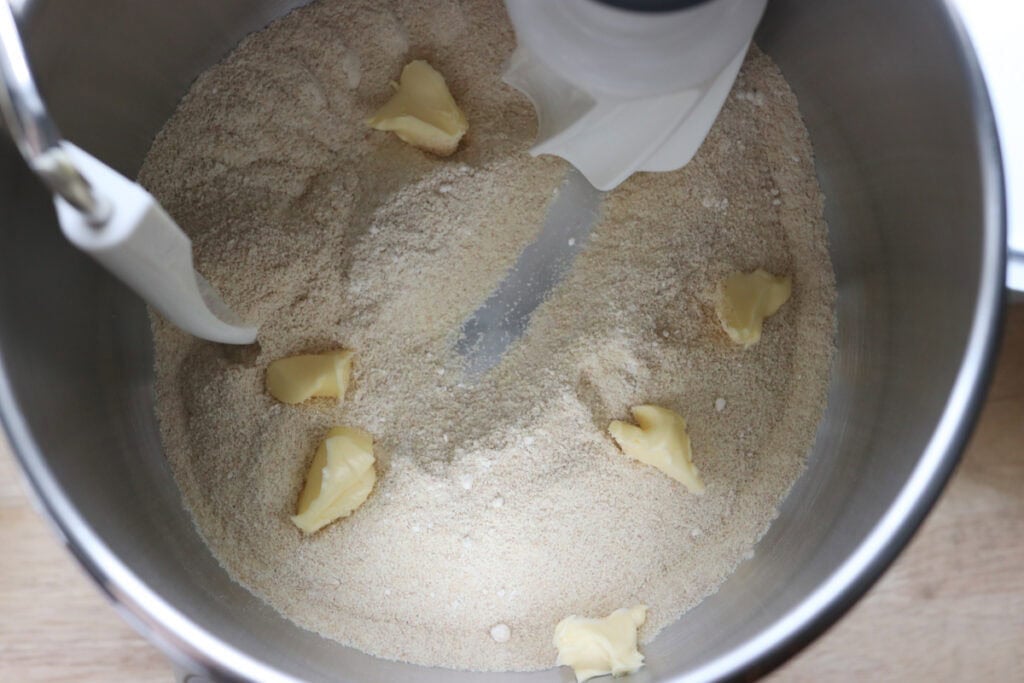
- Cut the 2 tablespoons of butter into a few pieces and mix it into the flour using your hands to pinch it together, or a fork to work it into the dough into small pieces.
- Add the honey, milk, and water and combine.
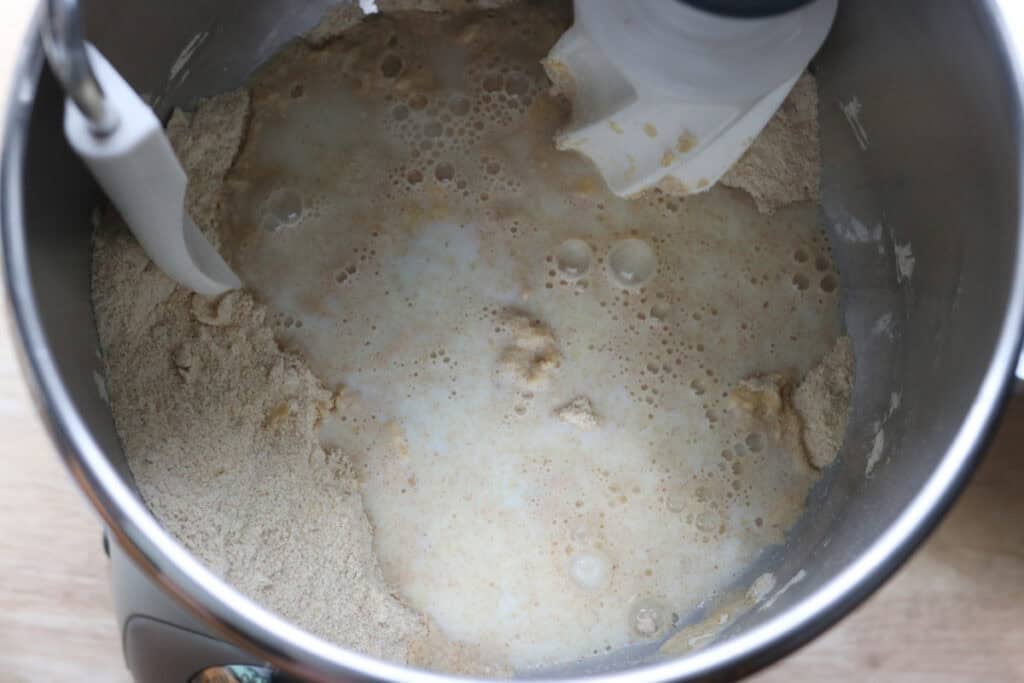
- Let the dough rest for 20 minutes.
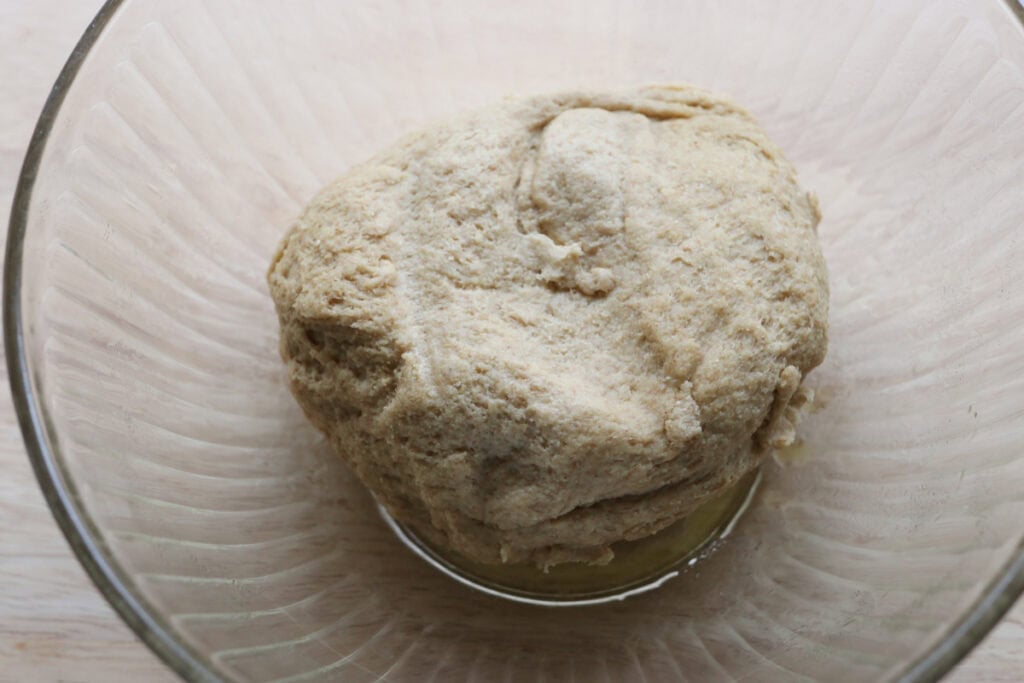
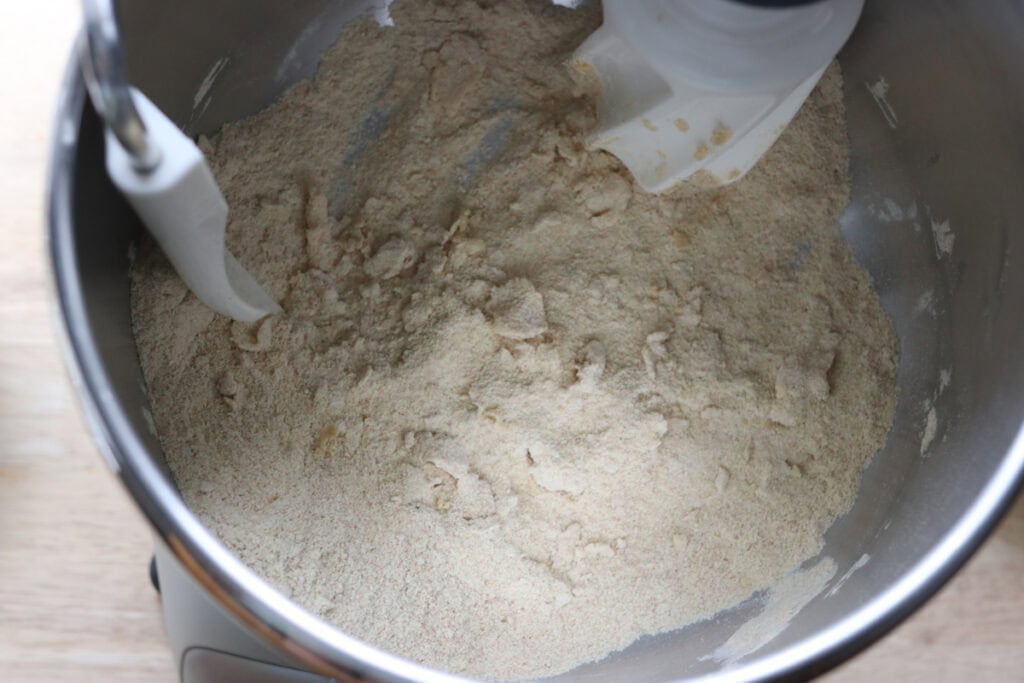
- Knead the dough for 5 minutes. It should pull away from the sides of the bowl. When you poke it, it should spring back just a little. The dough should be somewhat wet, but not really sticky. It will not look like normal bread dough.
- Once kneaded, place in a greased bowl, cover tightly, and place in the fridge overnight.
- Freeze the butter, then grate it, and freeze it again.
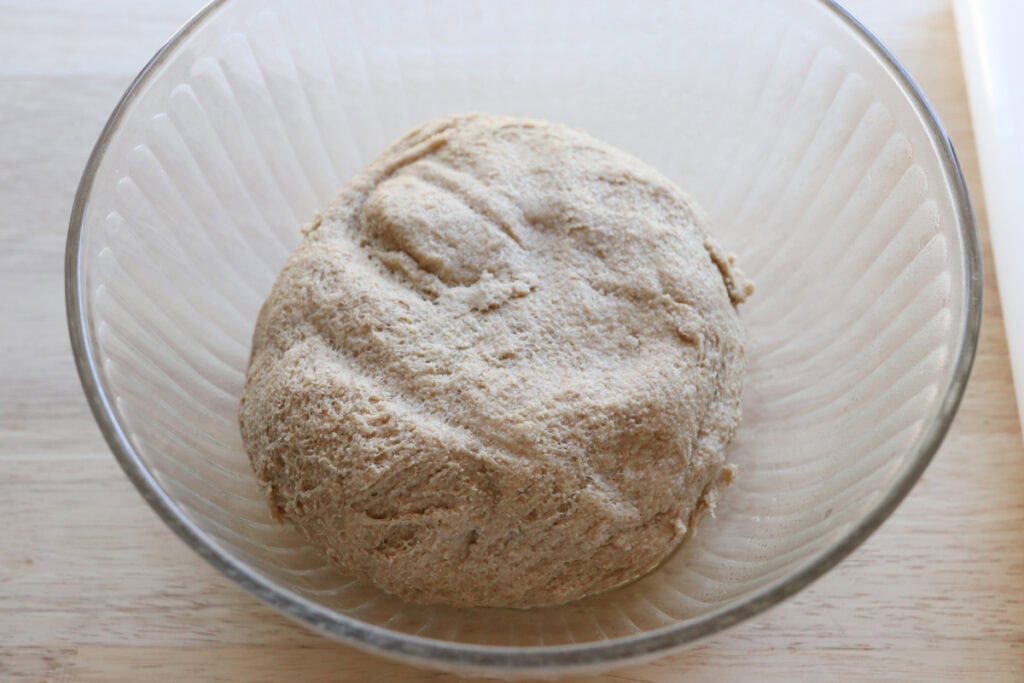
- The next day, the dough will have risen just a little bit but not much. Turn the dough out on a lightly floured work surface. Roll the dough into an 8 x 12 inch rectangle, about ½ inch thick.
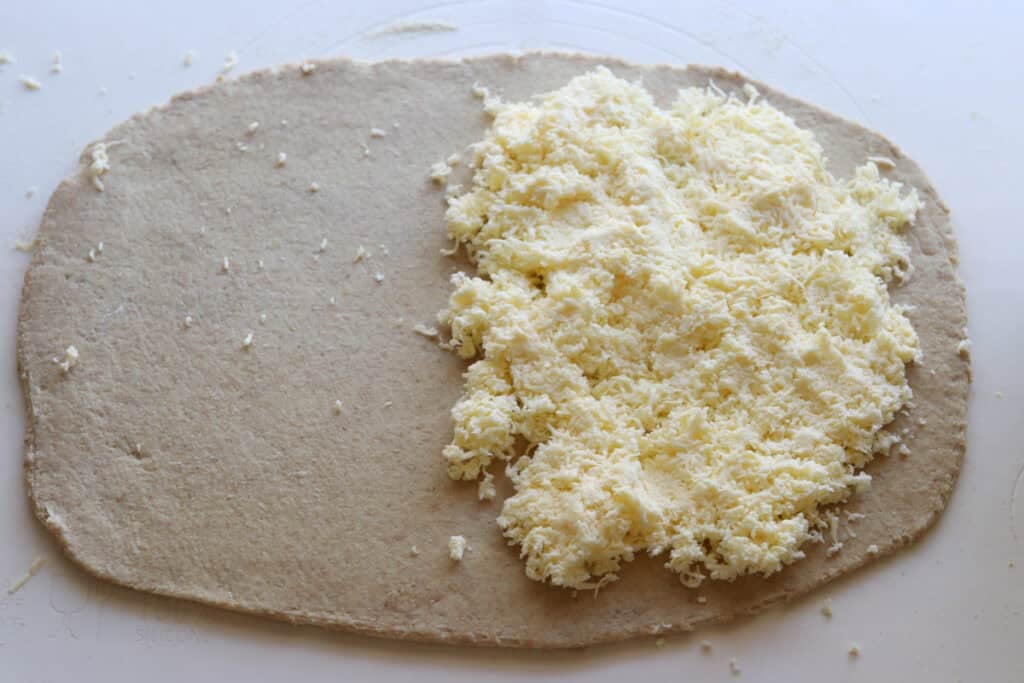
- Place the grated butter on the right half of the dough and press it down, leaving a little bit of room from the edges. Then fold the left side of the dough over top of the right side, like a book, and pinch the seams together.
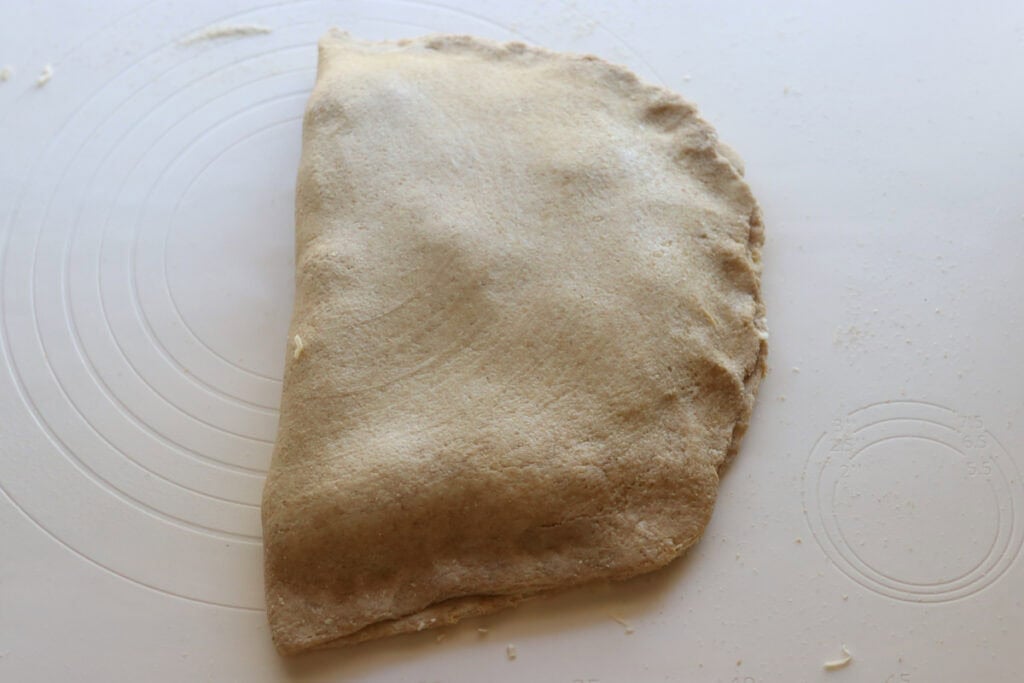
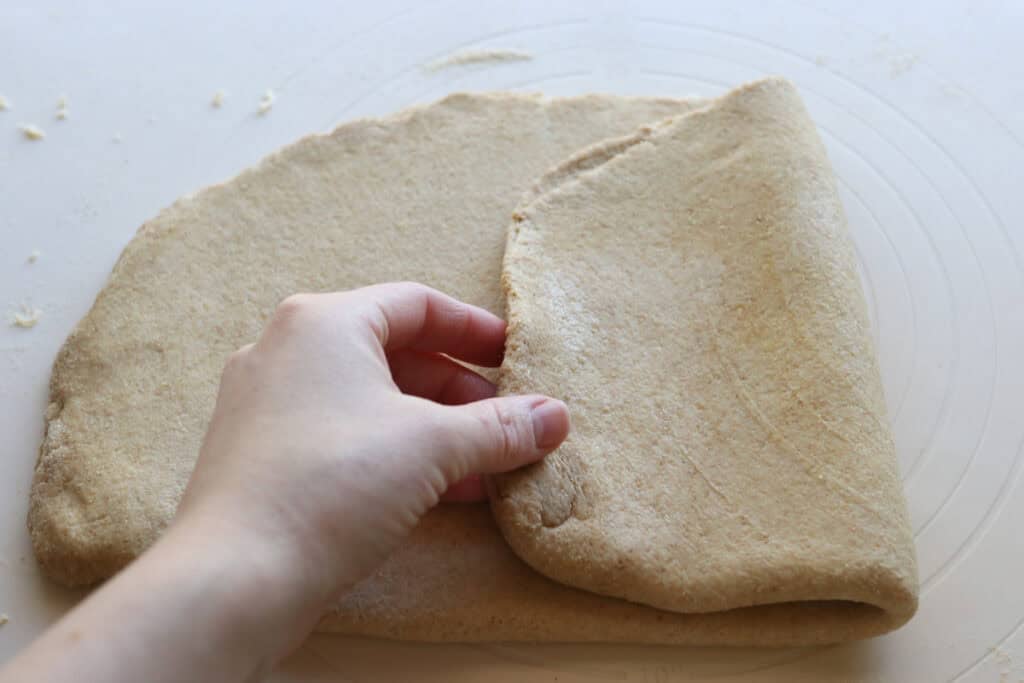
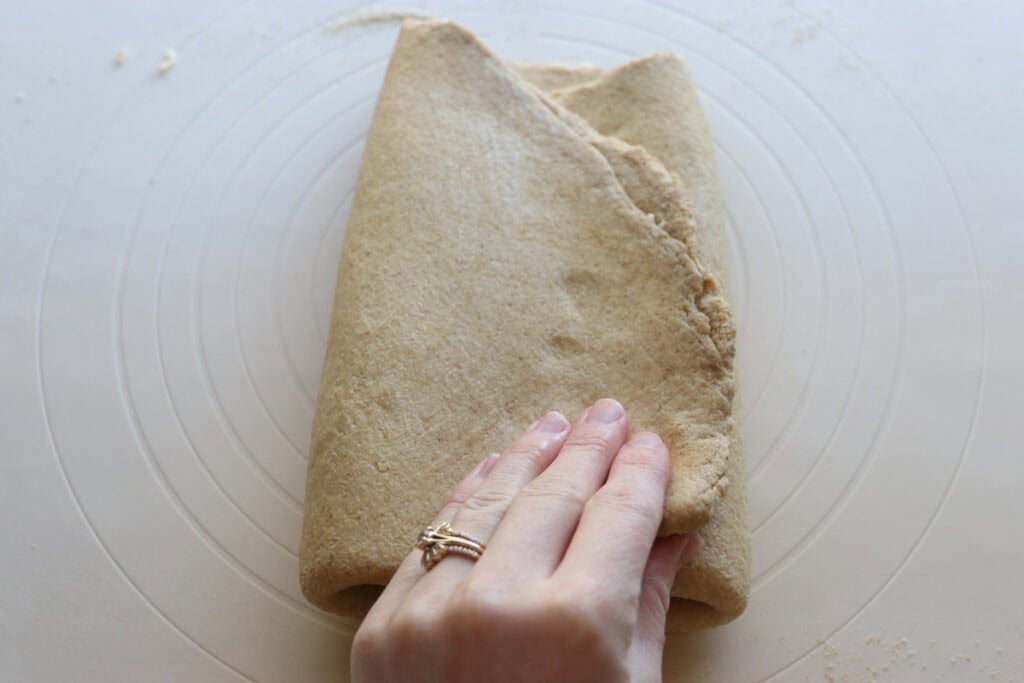
- Turn the dough 90 degrees, then roll into an 8 x 15 inch rectangle. Take the right side and fold it into the middle, then fold the left side and fold it over top, creating a letter fold.
- If at any point the dough starts to warm up, place it in the fridge for 20 minutes. It is important that the dough does not get warm during the this process or you will not get flaky layers.
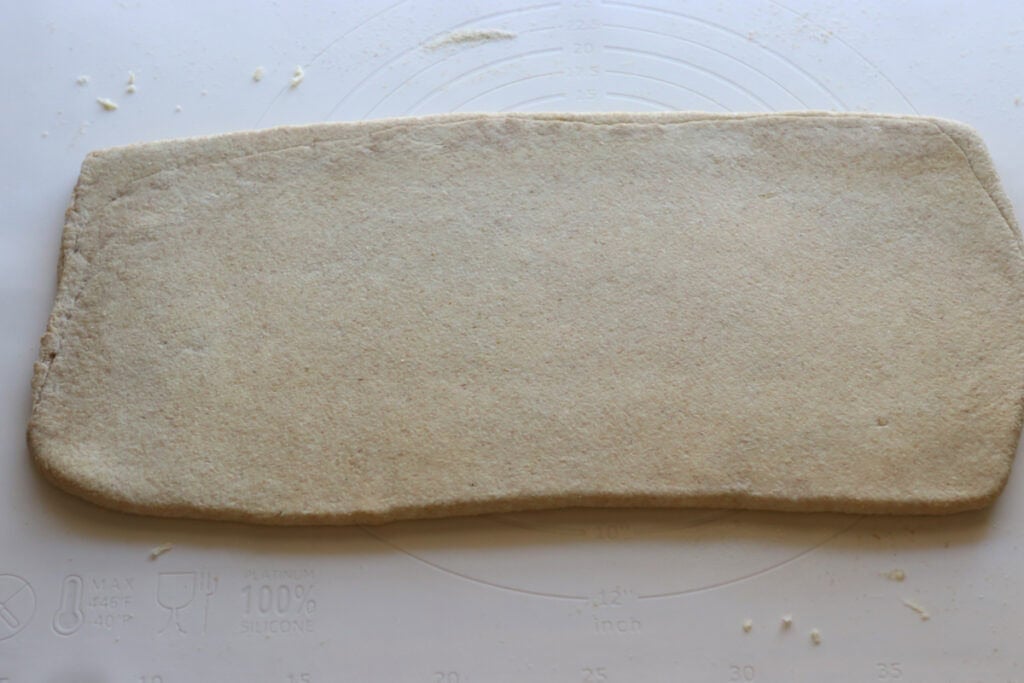
- Rotate the dough 90 degrees, then roll it out again in an 8 x 15 inch rectangle and perform a letter fold.
- Wrap in plastic wrap and chill for 25 minutes.
- Remove the dough, roll out in a 7 x 15 inch rectangle, and perform a letter fold. Wrap up and chill for another 25 minutes.
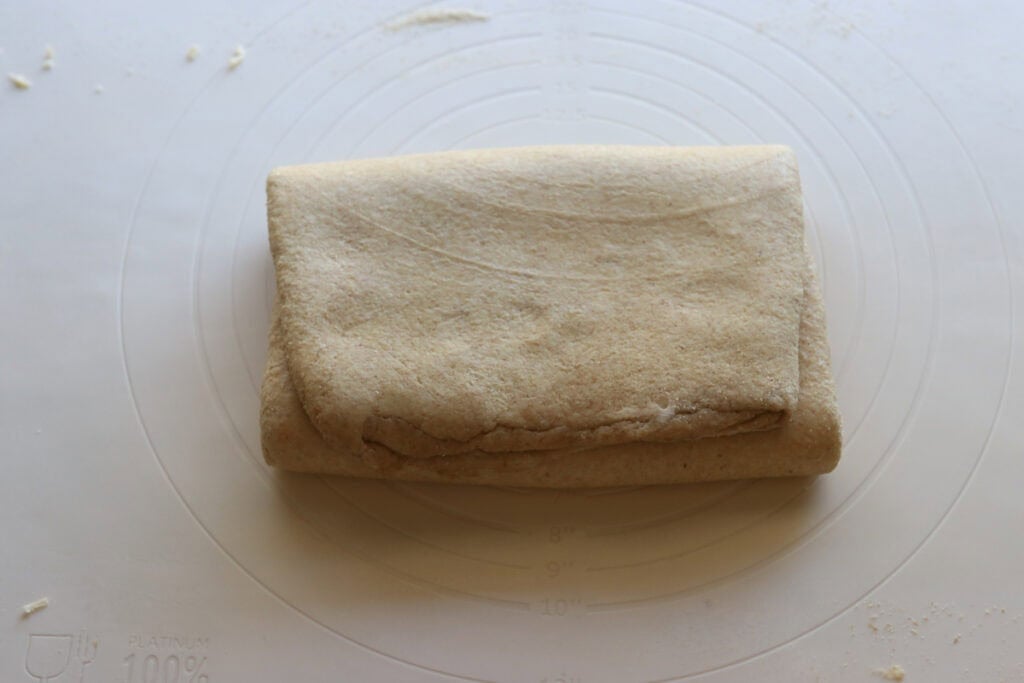
- Remove dough from fridge, roll out into a 6 x 15 inch rectangle and perform a fourth letter fold for the last time. Wrap well in plastic wrap and chill for at least 4 hours, but overnight is best.
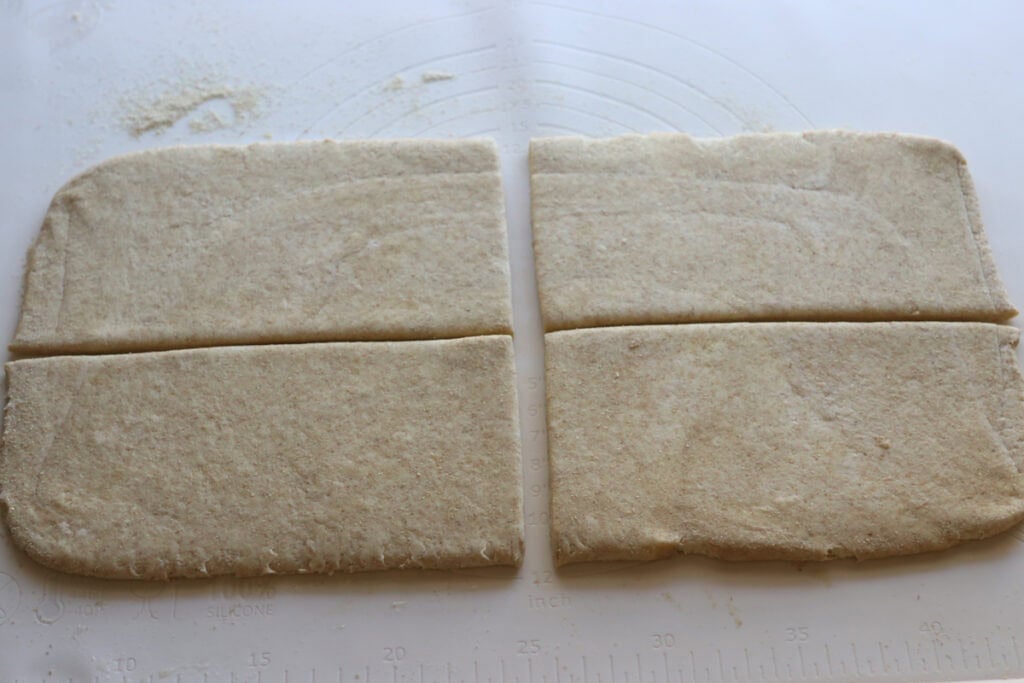
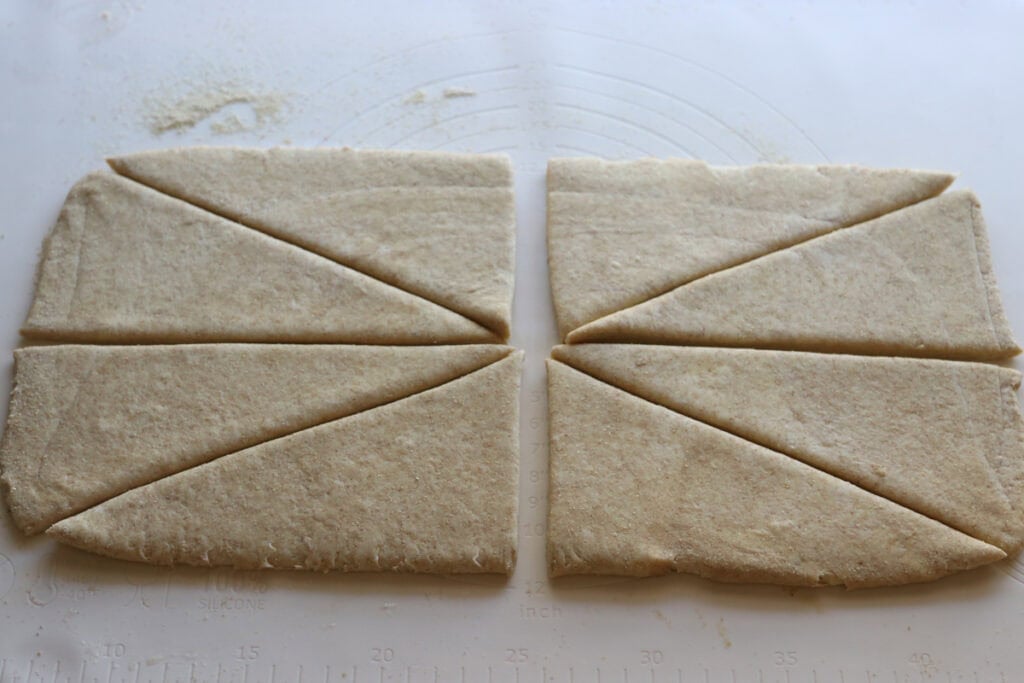
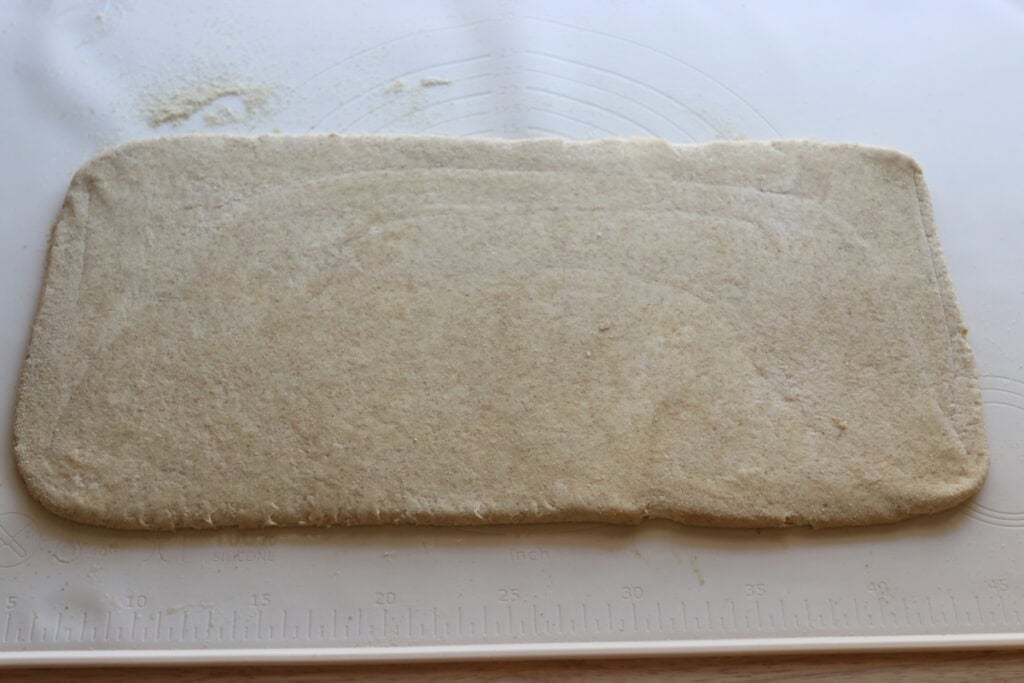
- The next day, remove the dough from the fridge and place on a lightly floured surface. Roll out into an 8 x 16 inch rectangle. Cut the dough into 4 equal, smaller rectangles. Then cut those rectangles diagonally to create 8 triangles.
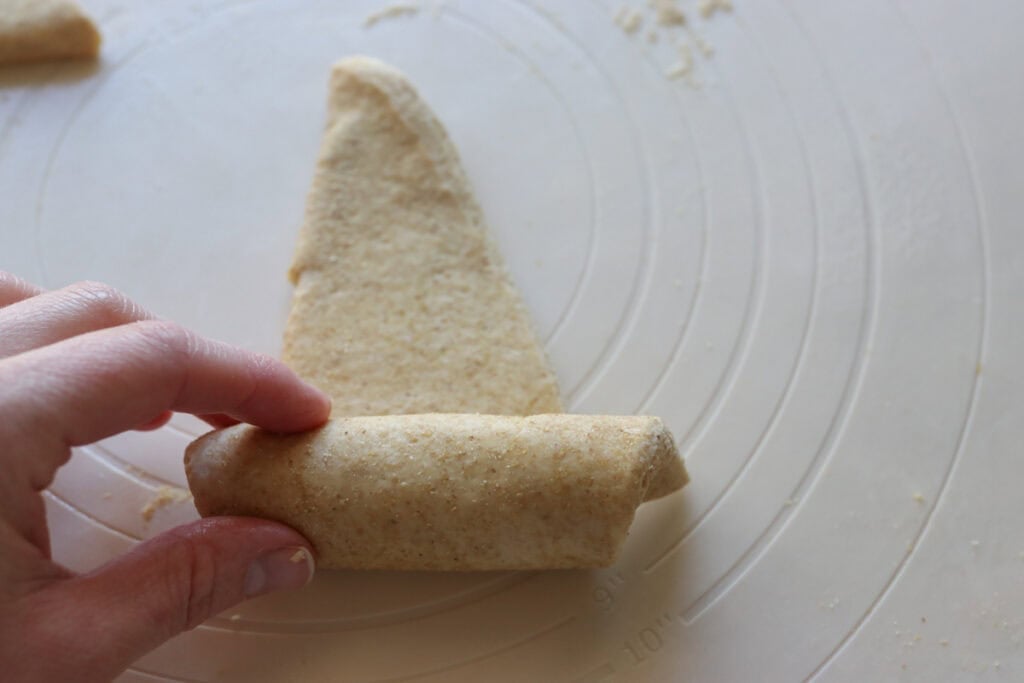
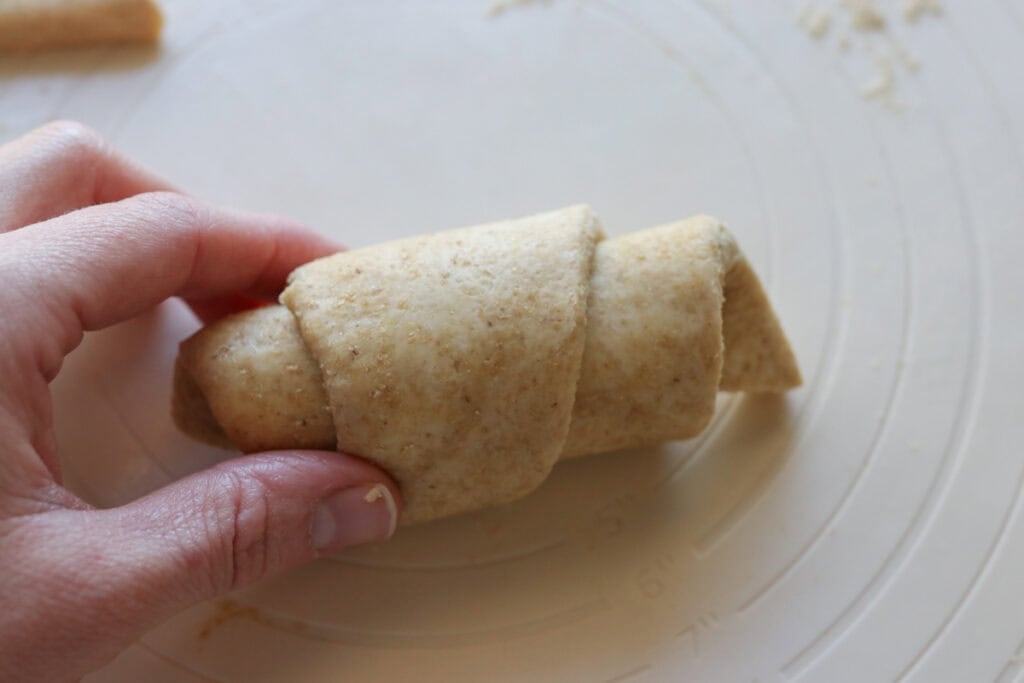
- Take each triangle and roll it out just a little bit. Then take the back end of the triangle and roll it up to the tip. Gently pinch the tip into the dough and make sure it’s on the bottom when you place them on the pan.
- Place the croissants on a baking sheet lined with parchment paper, cover and let rise for 1 ½ hours at room temperature (they will not rise too much, should just look puffy).

- Prepare the egg wash and brush it on the croissants thoroughly.
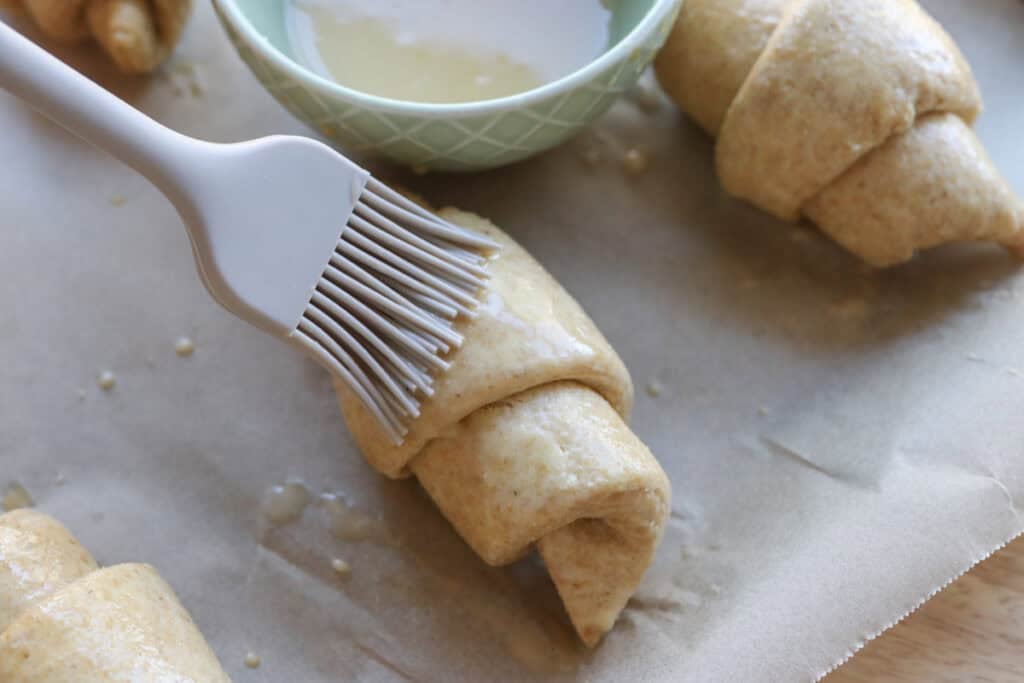
- Preheat the oven to 400 degrees F. and brush the croissants a second time with the egg wash before placing in the oven.

- Bake for 15-17 minutes until a deep golden brown, or until the internal temperature reaches 190 degrees F.
- Best served warm!

Recipe Variations
Chocolate Croissants:
Add a strip of dark chocolate in the center before rolling the dough for a luscious, melty surprise.
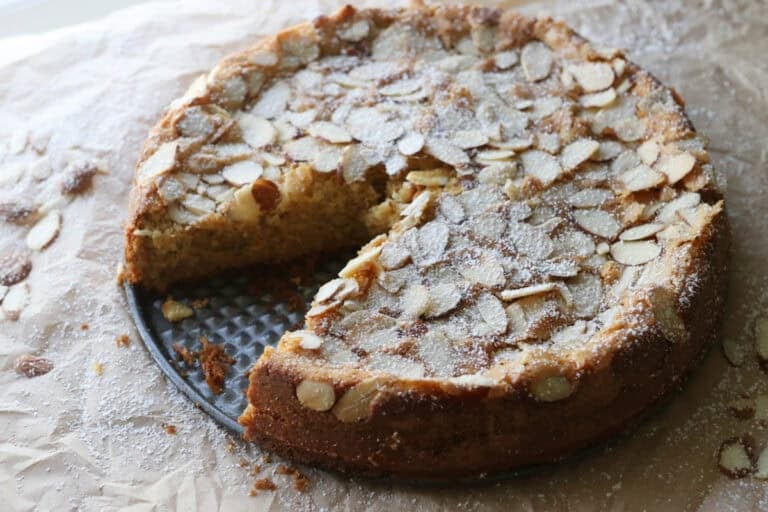
Almond Croissants:
Once baked, brush croissants with simple syrup and sprinkle sliced almonds on top, or fill with almond paste before rolling.
Savory Croissants:
Try filling with ham and cheese or spinach and feta for a savory twist that’s great for breakfast or snacks.
Whole Wheat Flour Blend:
Substitute part of the fresh milled flour with whole wheat flour for a nuttier, earthier taste and a bit more fiber.
Gluten-Free Option:
Use a gluten-free all-purpose flour blend, but be mindful it will affect the texture and rise, so handle the dough gently.
Troubleshooting Common Problems with this Recipe
Croissants Are Dense Instead of Flaky
Make sure your butter was kept cold throughout the process—warming up the butter causes layers to merge, resulting in a dense dough.
Croissants Don’t Rise Enough
Check your yeast is fresh and active. Avoid adding salt directly to the yeast mixture as it can inhibit its action.
Butter Leaks During Baking
This often happens if the butter is too soft or warm when rolling, so next time, chill your dough thoroughly between folds. Also, rolling out your dough too thin can cause butter to escape while baking.
Croissants Taste Bland
Make sure to include enough salt in your dough for balanced flavor, and use fresh milled flour to bring that deeper, richer taste to your croissants.

Storing Leftovers
Storing:
While best served after baking, you can keep leftover croissants in an airtight container at room temperature for 1-2 days. For longer storage, refrigerate for up to a week, but warm them gently before eating to revive flakiness.
Extra FAQs
Can I make the croissant dough in advance?
Yes, this dough requires a minimum of two days to prepare. This slow fermentation often improves flavor and makes the dough easier to handle.
Can I use frozen butter for lamination?
Yes, this butter uses frozen and grated butter for the lamination.
Can croissants be made without yeast?
Traditional croissants rely on yeast for rise and texture, so skipping yeast would change the croissant recipe significantly.

Flaky Buttery Croissants with Fresh Milled Flour
Ingredients
Dough:
- 2 ¼ cups freshly milled hard white wheat flour finely milled (292 grams)
- 1 ½ teaspoons salt
- 1 ½ teaspoons instant yeast
- 2 tablespoons softened butter
- 2 tablespoons honey
- ½ cup warm whole milk 126 grams
- ⅓ cup warm water 72 grams
Butter Layer:
- ¾ cup butter 173 grams
Egg wash:
- 1 egg
- 1 teaspoon water
Instructions
- In the bowl of a stand mixer, add the flour, salt, and yeast and mix.
- Cut the 2 tablespoons of butter into a few pieces and mix it into the flour using your hands to pinch it together, or a fork to work it into the dough into small pieces.
- Add the honey, milk, and water and combine.
- Let the dough rest for 20 minutes.
- Knead the dough for 5 minutes. It should pull away from the sides of the bowl. When you poke it, it should spring back just a little. The dough should be somewhat wet, but not really sticky. It will not look like normal bread dough.
- Once kneaded, place in a greased bowl, cover tightly, and place in the fridge overnight.
- Freeze the butter, then grate it, and freeze it again.
- The next day, the dough will have risen just a little bit but not much. Turn the dough out on a lightly floured work surface. Roll the dough into an 8 x 12 inch rectangle, about ½ inch thick.
- Place the grated butter on the right half of the dough and press it down, leaving a little bit of room from the edges. Then fold the left side of the dough over top of the right side, like a book, and pinch the seams together.
- Turn the dough 90 degrees, then roll into an 8 x 15 inch rectangle. Take the right side and fold it into the middle, then fold the left side and fold it over top, creating a letter fold.
- If at any point the dough starts to warm up, place it in the fridge for 20 minutes. It is important that the dough does not get warm during the this process or you will not get flaky layers.
- Rotate the dough 90 degrees, then roll it out again in an 8 x 15 inch rectangle and perform a letter fold.
- Wrap in plastic wrap and chill for 25 minutes.
- Remove the dough, roll out in a 7 x 15 inch rectangle, and perform a letter fold. Wrap up and chill for another 25 minutes.
- Remove dough from fridge, roll out into a 6 x 15 inch rectangle and perform a fourth letter fold for the last time. Wrap well in plastic wrap and chill for at least 4 hours, but overnight is best.
- The next day, remove the dough from the fridge and place on a lightly floured surface. Roll out into an 8 x 16 inch rectangle. Cut the dough into 4 equal, smaller rectangles. Then cut those rectangles diagonally to create 8 triangles.
- Take each triangle and roll it out just a little bit. Then take the back end of the triangle and roll it up to the tip. Gently pinch the tip into the dough and make sure it’s on the bottom when you place them on the pan.
- Place the croissants on a baking sheet lined with parchment paper, cover and let rise for 1 ½ hours at room temperature (they will not rise too much, should just look puffy).
- Prepare the egg wash and brush it on the croissants thoroughly.
- Preheat the oven to 400 degrees F. and brush the croissants a second time with the egg wash before placing in the oven.
- Bake for 15-17 minutes until a deep golden brown, or until the internal temperature reaches 190 degrees F.
- Best served warm!
Nutrition


SO GOOD! !
This is a great recipe!!! I have attempted to make croissants one other time using store bought flour. The butter melted all over my oven, burned, and it was a disaster. This recipe was SO much easier, especially spread out over a few days! I was so grateful to use my good flour. I would suggest using a baking pan with parchment vs baking sheet as I did have some butter seepage while baking. But they turned out so tasty! Will be making again.