
Delicious English Muffins with Freshly Milled Flour
This post may contain affiliate links. Please read our Disclosure Policy.
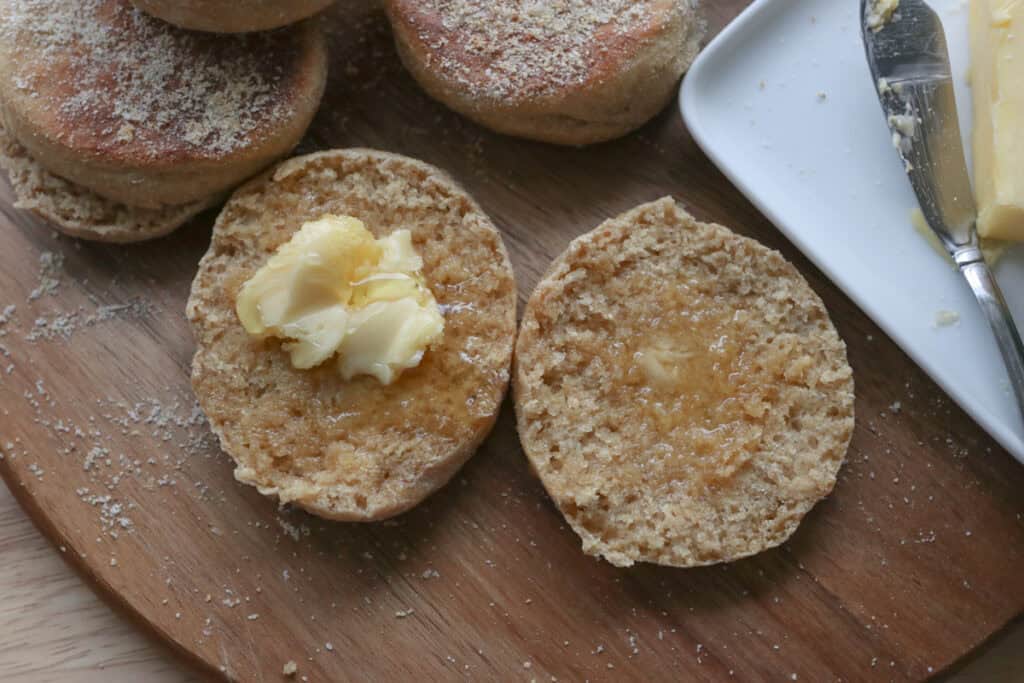
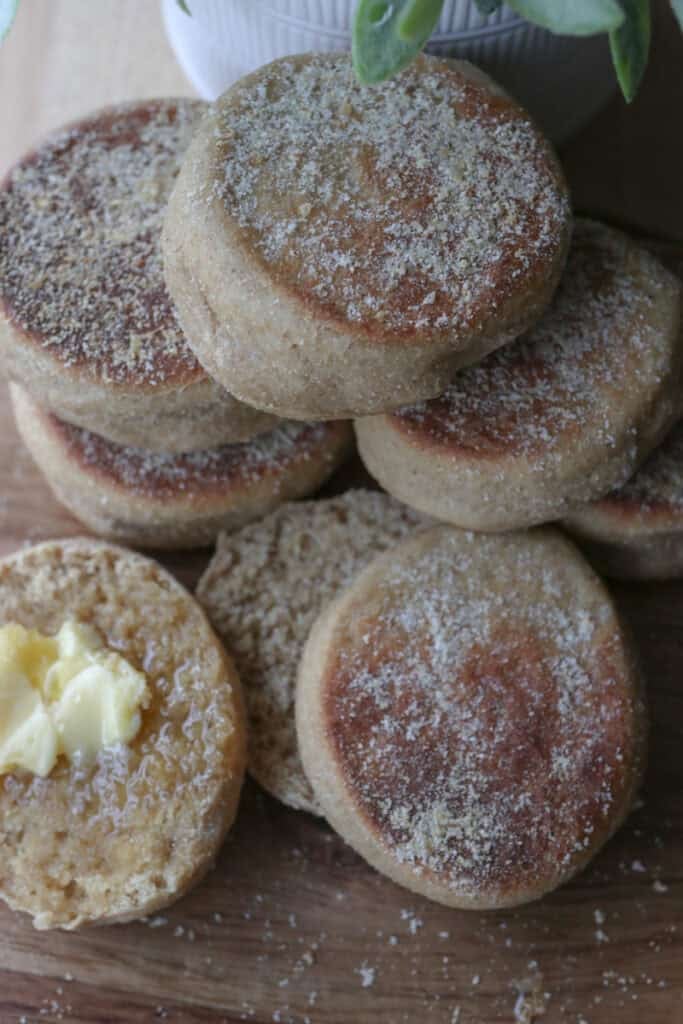
There’s something enchantingly satisfying about freshly made homemade English muffins, especially when crafted from freshly milled flour. The process sort of transforms the kitchen into a mini bakery, filling the air with that inviting, warm aroma that promises great things to come. If you’ve ever wrestled with store-bought muffins that felt a bit too gummy or bland, making your own might just become your new favorite weekend project. These fresh milled English muffins are perfect topped with peanut butter, homemade jam, and even make the best, hearty breakfast sandwiches. So, next time you’re craving something cozy and homemade, this english muffin recipe might just become your go-to comfort food.
What Makes This Recipe Great
The unique texture
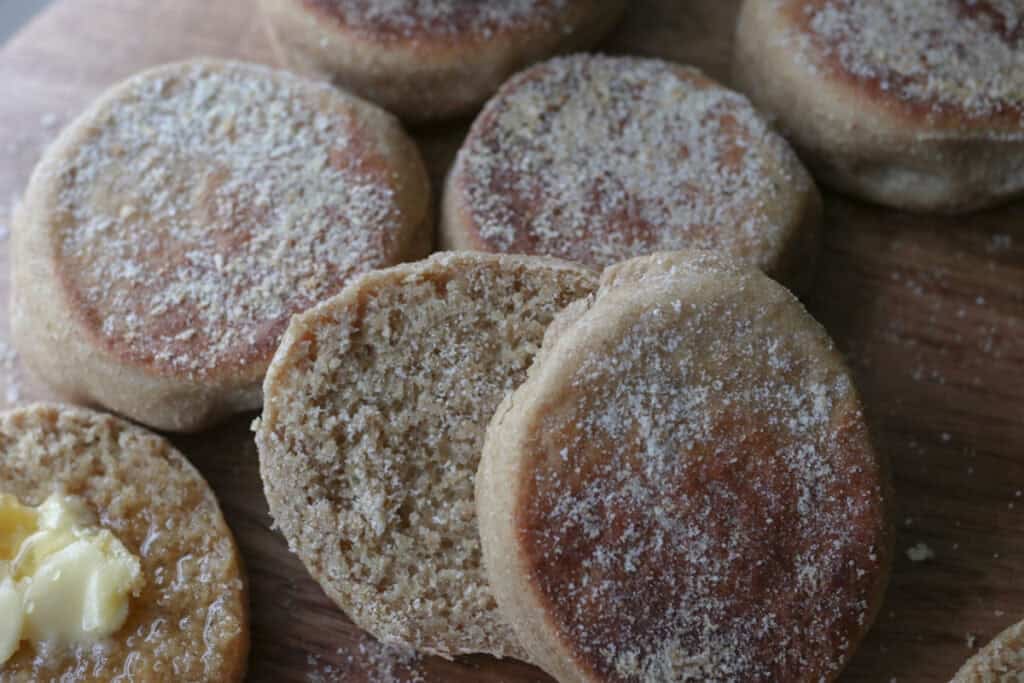
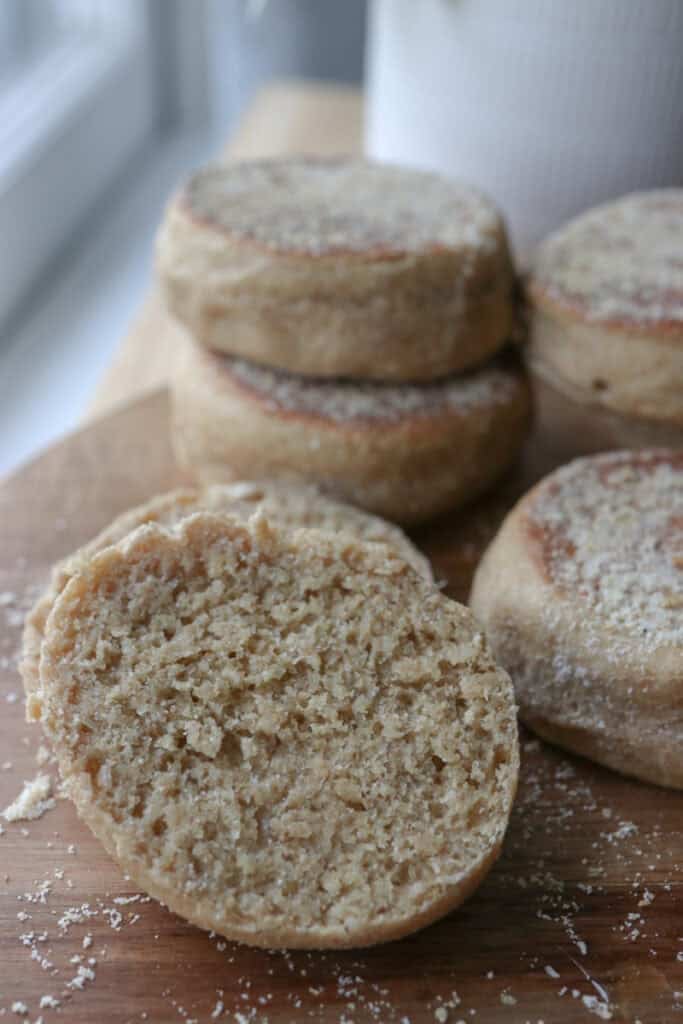
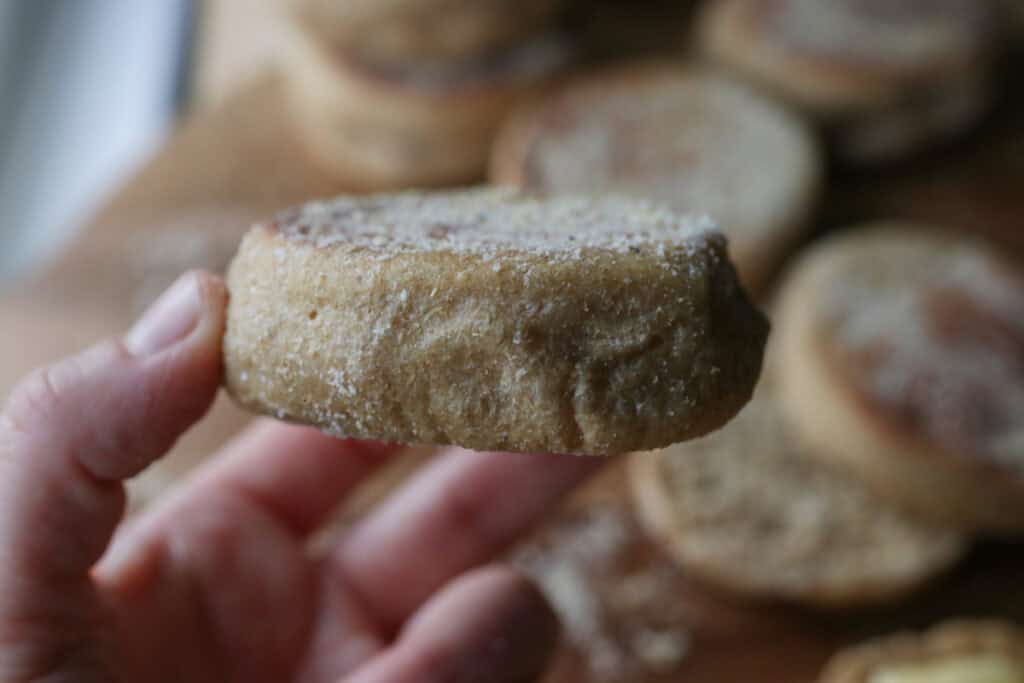
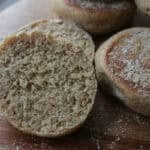
The slightly coarse, nubby texture of freshly milled flour creates those classic little nooks and crannies that hold butter and jam like tiny, tasty pockets of joy. This delightful texture sets these muffins apart from ones made with regular flour.
Simple ingredients, big impact
With just flour, yeast, milk, and a few kitchen staples, this recipe delivers a surprisingly complex flavor profile. Freshly milled flour introduces subtle nutty and earthy tones that elevate the muffins without any extra effort.
Perfect for customization
Because the base recipe is so straightforward, you can experiment by adding herbs, seeds, or even a touch of cinnamon for a sweet twist. The natural flavor of the freshly milled grain serves as a perfect canvas for your creativity.
For more fresh milled flour recipes, try these fluffy dinner rolls or this garlic herb focaccia!
Overview of Ingredients
Freshly Milled Flour
Freshly milled flour is the star here, giving these English muffins their distinctive taste and tender crumb. If you don’t have a grain mill, you can substitute with high-quality whole wheat or unbleached all-purpose flour, but don’t expect quite the same vibrant flavor.
Yeast
Instant yeast helps these muffins rise beautifully and develop that airy texture.
Milk
Milk adds softness and richness to the dough, enhancing the crumb’s texture. You can use any kind of milk—whole, skim, or even a dairy alternative like almond or oat milk—though the taste and softness might slightly vary.
Sugar
A small amount of sugar feeds the yeast and provides a gentle sweetness. Honey or maple syrup can be lovely natural substitutes here, adding their own subtle notes to the final product.
Salt
Salt is essential for balancing flavors and controlling yeast activity. Sea salt or regular table salt will work fine, but avoid reducing it too much since it helps bring out all the other wonderful flavors.
Tips for Success
#1 Let the dough rest sufficiently
Giving your dough ample resting time after mixing encourages better gluten development, resulting in muffins that are both chewy and tender. Don’t rush this step—even though it tests your patience, it’s absolutely worth it for the texture.
#2 Toast to bring out flavor and texture
Once your muffins are cooked and cooled, slicing them in half and toasting is where the magic happens. Toasting accentuates the nooks and crannies, crisps the edges ever so slightly, and enhances the nutty aroma of the fresh flour.
#3 Watch your cooking temperature closely
English muffins cook best over medium-low heat. Too high, and you could end up with a burnt bottom and raw inside; too low, and they might dry out. Patience here makes a big difference.
#4 Flour your work surface generously
Freshly milled flour can be a bit stickier than commercial flour. Don’t skimp on flouring or oiling your workspace and rolling pin to avoid frustrating dough sticking that slows down your progress.
Helpful Tools & Supplies
Whether you’re just dipping your toes into the world of fresh milled flour or you’re a seasoned home baker, I’ve taken the guesswork out of what you truly need. All of these tools and resources are available in my shop, designed to help your journey be smooth and nourishing:
Grain Mills
- NutriMill Classic Grain Mill – My go-to for fine, consistent milling; perfect for sandwich breads and everyday baking.
- NutriMill Harvest Grain Mill – Stone-ground elegance: this model delivers whole-grain flavor with a beautiful appearance.
Mixers
- Ankarsrum Mixer – A powerhouse kitchen companion with multiple speeds and attachments—ideal for kneading bread dough effortlessly.
Baking & Bread Tools
- Bread Bow Knife – Artisan-made with a high-carbon steel blade and cherry wood handle—this knife slices loaves with ease.
- Sourdough Essentials Kit With Starter – Complete starter kit that includes dehydrated sourdough starter, banneton baskets, a dough whisk, scoring lame, and more.
Cookbooks & eBook Bundles
- Everyday Whole Grains Vol. 1 & 2 (printed & digital) – Packed with 70+ recipes built around fresh milled flour, from breads to snacks and desserts.
- The Fresh Breads Bundle – A comprehensive set including eBooks like The Perfect Loaf, the Cookie Jar, bulk baking guides, and a sourdough mini‑course—all centered on fresh milled flour.
- Freshly Milled Made Simple Guide – A video-based guide that walks you through milling and baking basics, making the process feel easy and approachable.
Specialty Items
- Dehydrated Sourdough Starter – Just add water and flour to rehydrate this starter—perfect for bakers without an active sourdough culture.
- I Knead Fresh Flour Mug – A charming, handmade 12 oz ceramic mug—great for coffee breaks during dough rising!
Why These Are Worth It
Every tool in this collection has been personally vetted to support you in baking with fresh milled flour. From the grain mills that make your flour, to mixers that knead dough, to resources that teach you every step—it’s all here to make sure your homemade bread journey is joyful, nourishing, and successful.
➡️ Explore all of these items and more in the Generation Acres Farm Shop — your one-stop spot for fresh milled flour baking essentials.
Equipment:
Mixing Bowl
Measuring Cups and Spoons
Large Cast Iron Skillet
Ring Molds or Biscuit Cutters (optional)
Cooling Rack
Rolling Pin
How to Make Delicious English Muffins with Freshly Milled Flour
Ingredients:
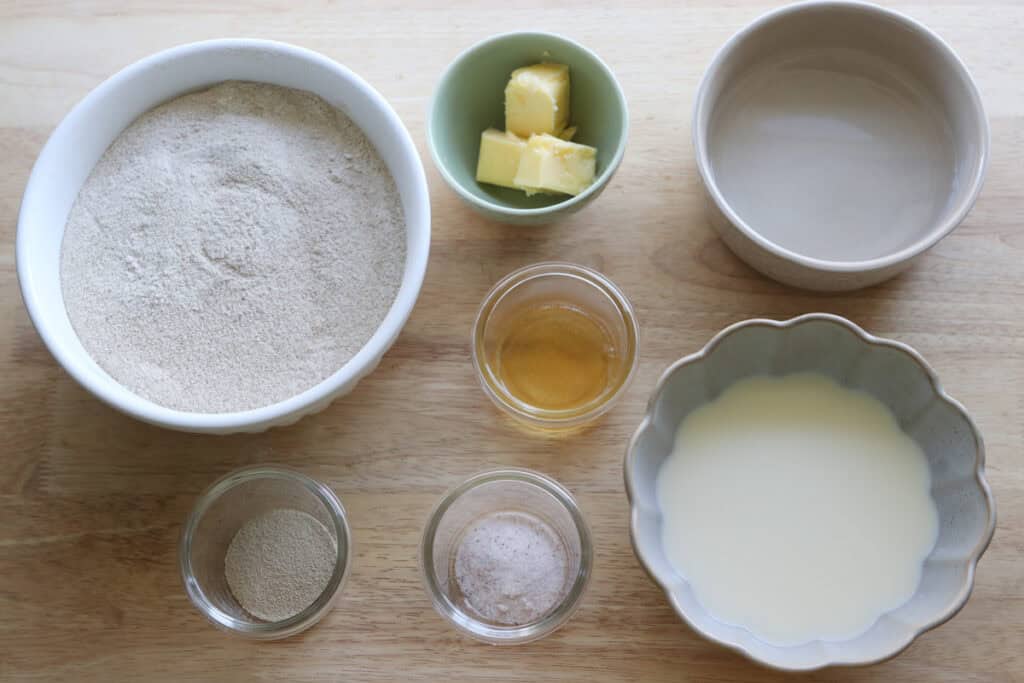
- 4 – 4 ½ cups freshly milled hard white wheat flour, finely milled (520-585 grams)
- ¾ cup warm water (170 grams)
- 1 cup whole milk (244 grams)
- 3 tablespoons melted butter
- 2 tablespoons honey
- 2 teaspoons salt
- 2 ¼ teaspoons instant yeast
- cornmeal for dusting
Directions:
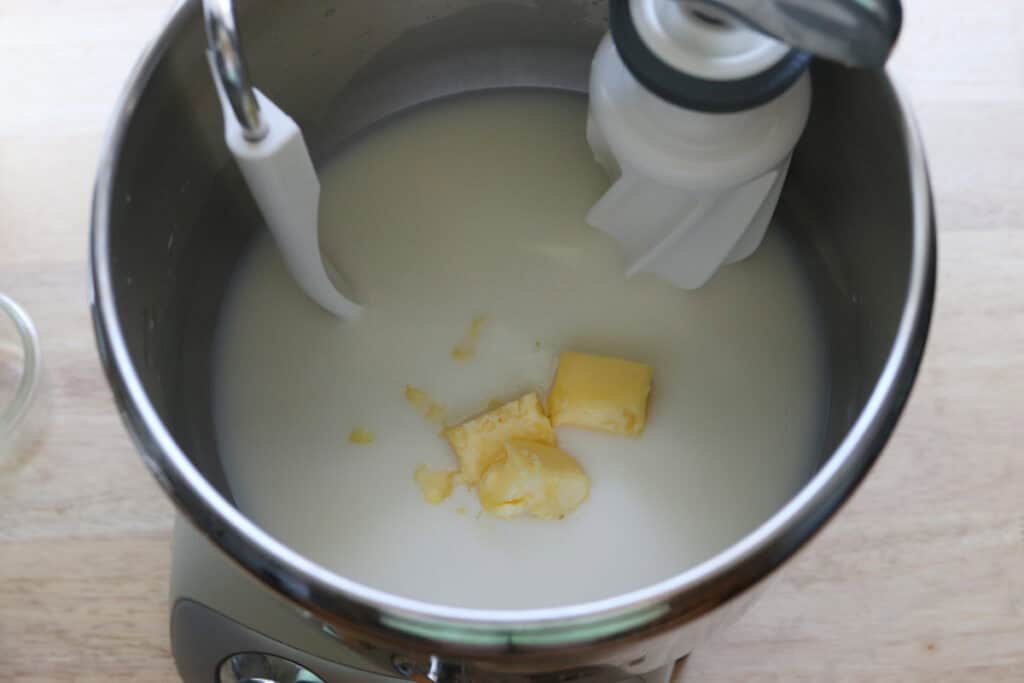
- In the bowl of a stand mixer, combine the water milk, butter, honey, and salt.
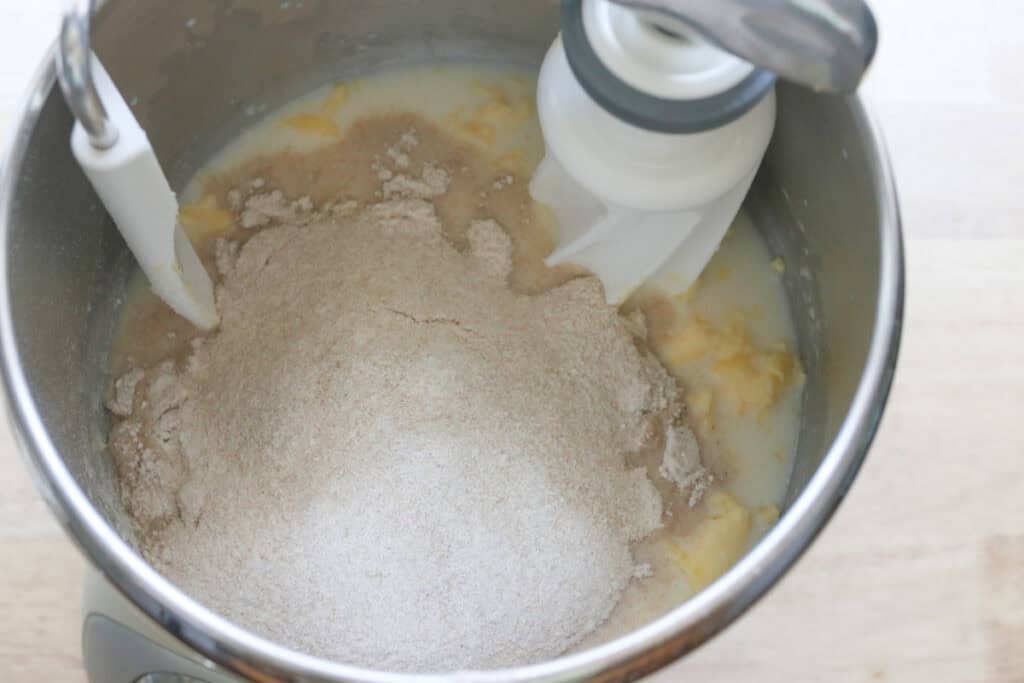
- Add 3 ½ cups flour and combine. Let it rest for 15 minutes.
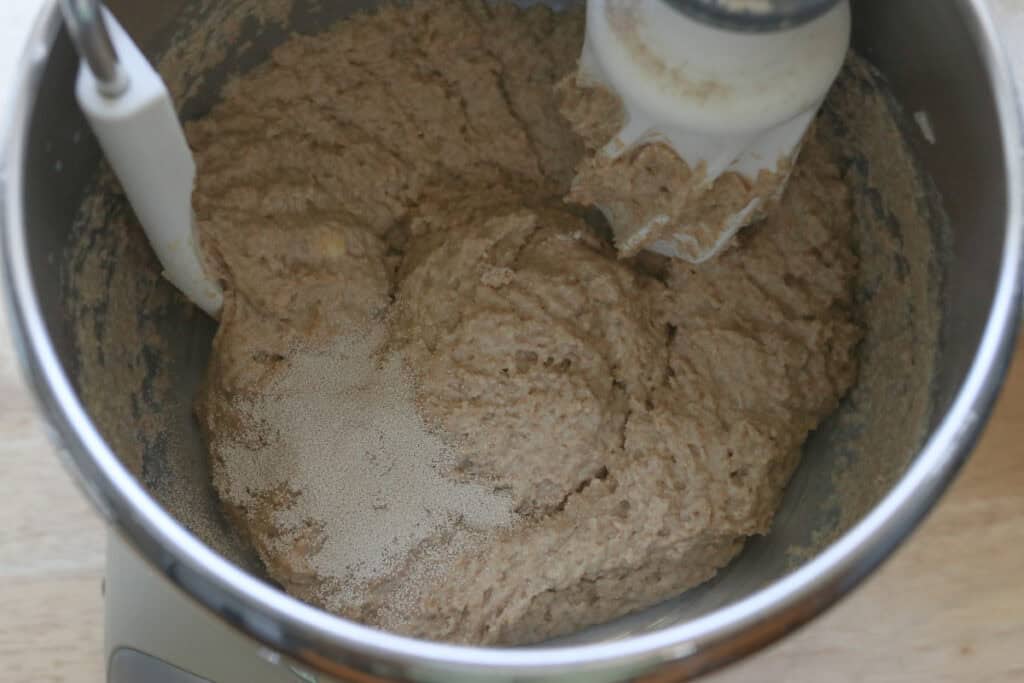
- Add the yeast and remaining flour, if needed. Add a half cup at a time, watching to see when it starts to pull away from the sides of the bowl. Do not add anymore flour once it starts doing this.
- Knead until the dough is smooth and you reach windowpane. The dough will be wet and moist, but not super sticky.
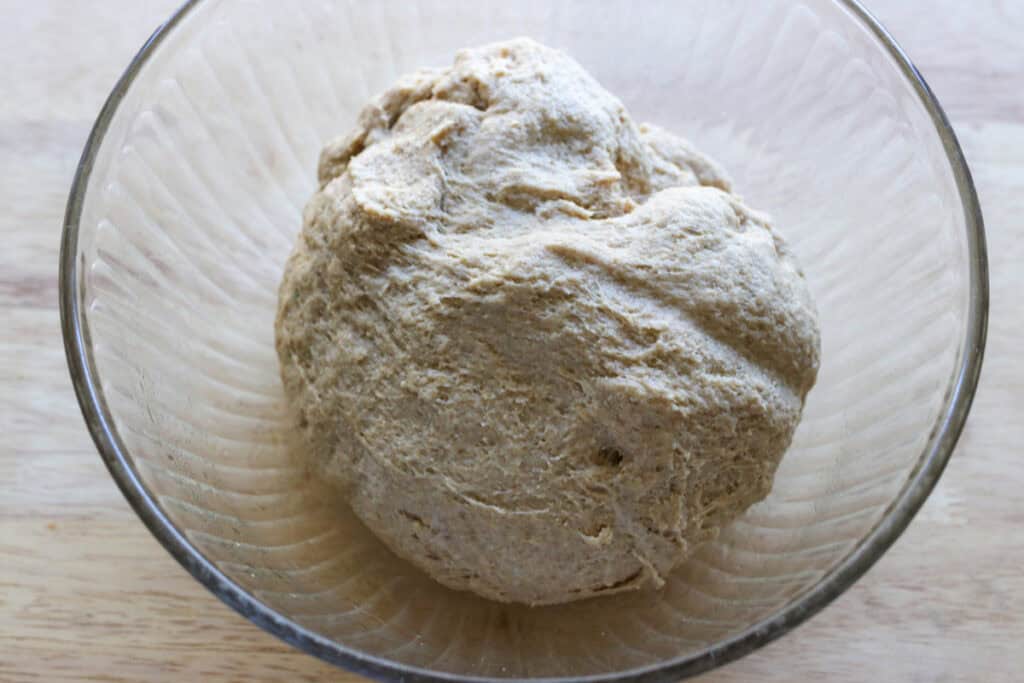
- Place in a lightly greased bowl and cover to rise in a warm place until doubled, 1-1.5 hours.
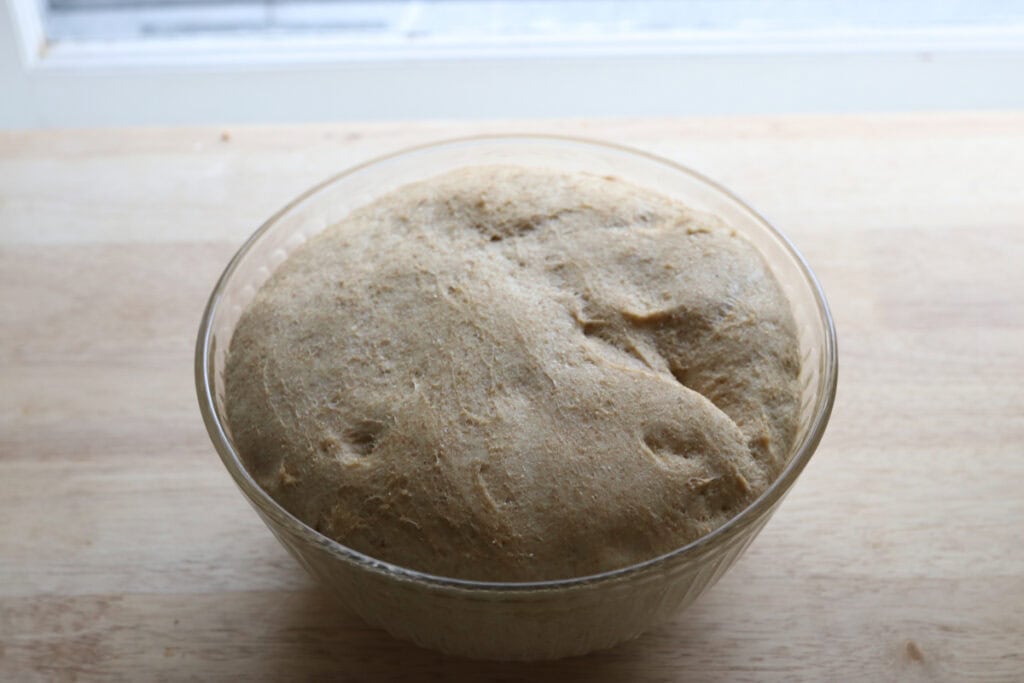
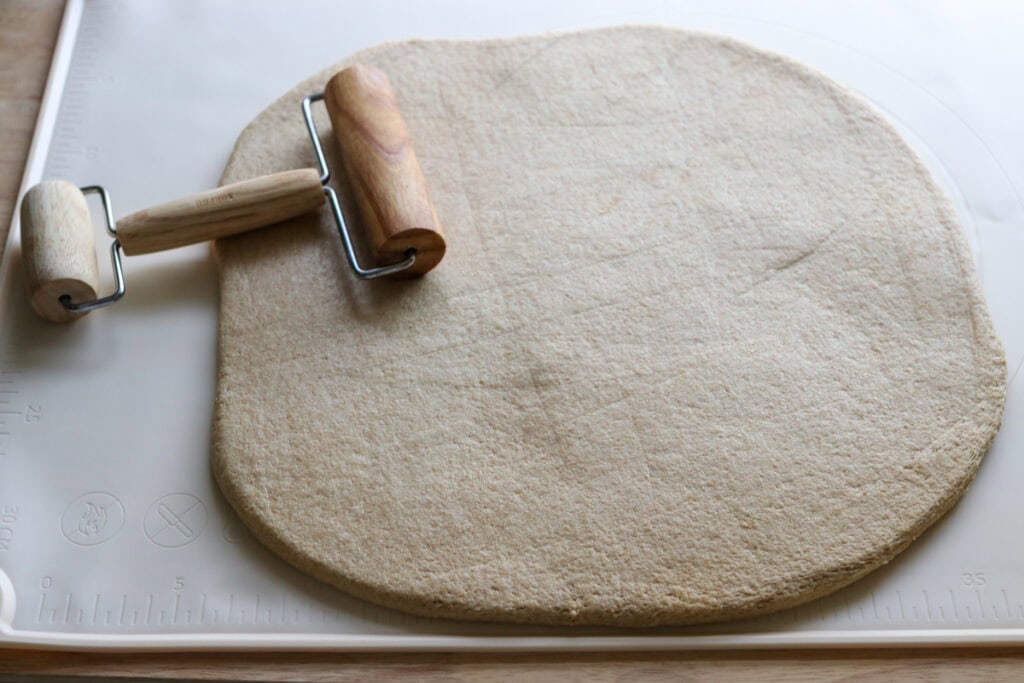
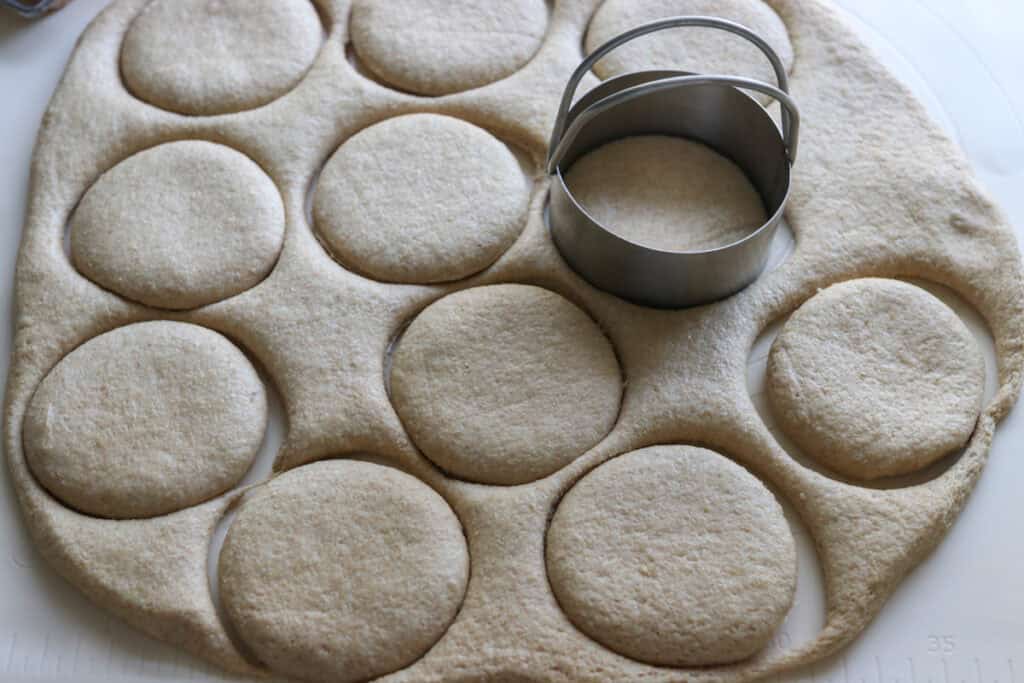
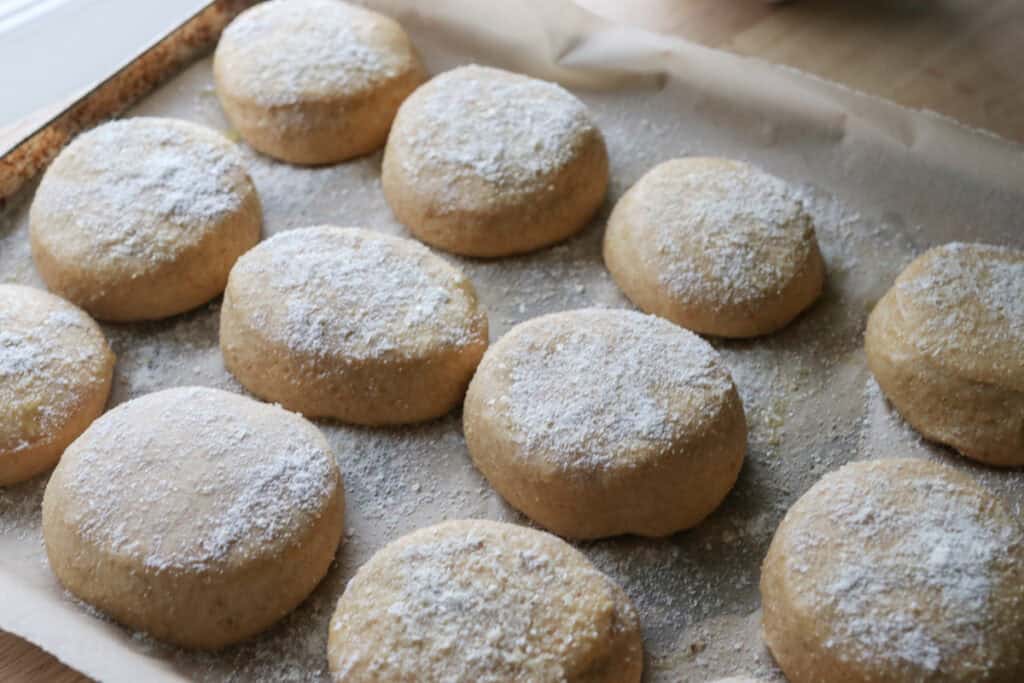
- Once risen, turn out on an oiled or lightly floured surface very gently. You don’t want to punch the dough down or be rough with it. Gently roll it out until it’s got about ¾ an inch thickness. Use a 3-inch biscuit cutter and cut out circles. Continue rolling and cutting the dough until it has all been used.
- Dip both sides of the english muffins into a bowl of cornmeal to coat them, then place on a baking sheet lined with parchment paper. Allow to rise for about 20-30 minutes, until puffy.
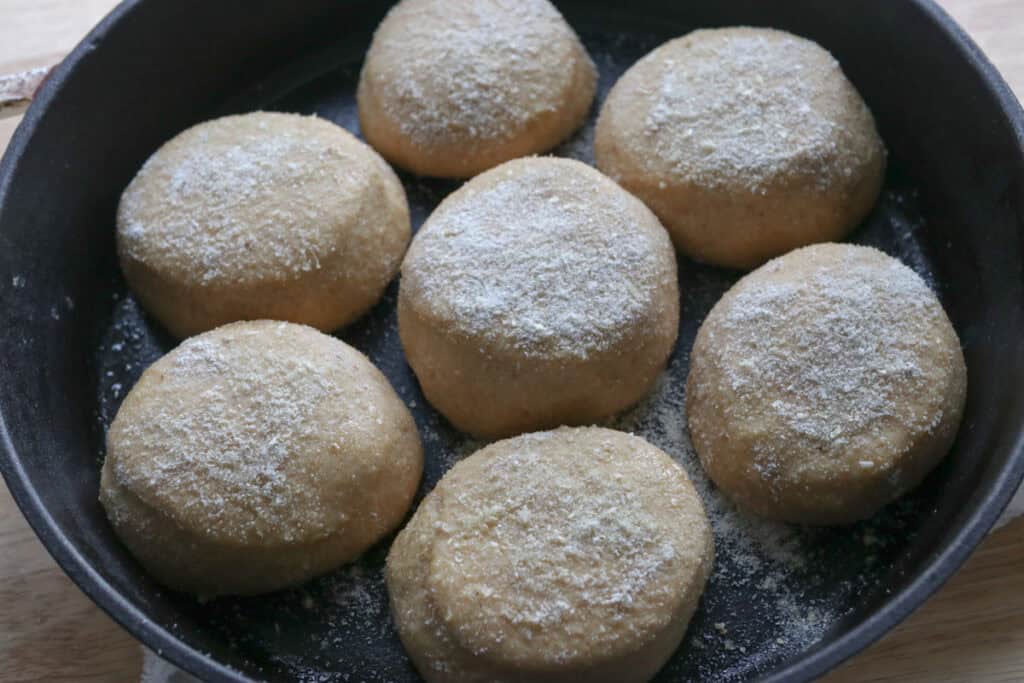
- Preheat your cast iron skillets over low-medium heat while the muffins are rising and coat the pans lightly with oil.
- Once the pans are heated and the english muffins have risen, put them in the skillet and allow to cook on one side for 6-8 minutes, until golden brown. Gently flip them, being sure not to drop or hit them. Then cover the pan with a lid.
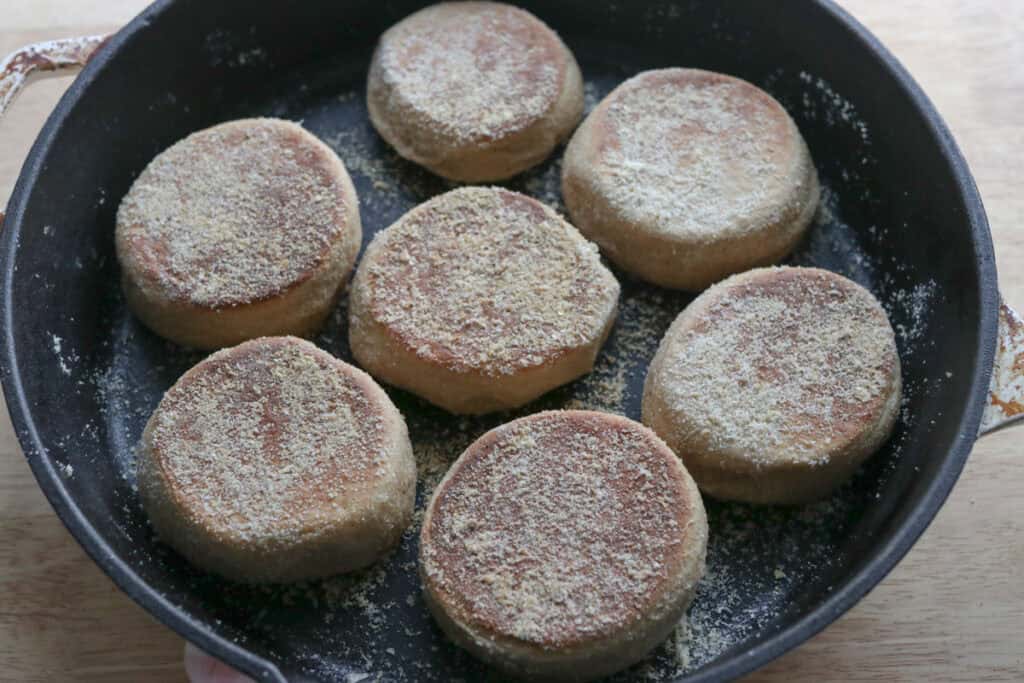
- Allow to cook for 8-16 minutes, depending on how your burner cooks. The bottoms should be browned and the internal temperature should be between 195-205 degrees F.
Recipe Variations
Add Seeds:
Mix in sunflower seeds, sesame seeds, or poppy seeds into the dough to introduce a nutty crunch and extra visual appeal.
Sweet Twist:
Incorporate cinnamon and a bit of brown sugar into the dough for muffins that lean into breakfast dessert territory.
Savory Herb:
Stir in dried rosemary, thyme, or chives to give the muffins a fresh, savory note—perfect for pairing with cheeses and cold cuts.
Gluten-Free Version:
Substitute freshly milled flour with a gluten-free flour blend designed for baking, adjusting liquid as needed for dough consistency.
Whole Grain Boost:
Use a mix of freshly milled whole wheat and rye flour for a deeper, earthier flavor with added fiber.
Troubleshooting Common Problems with this Recipe
Muffins Are Dense
Make sure your yeast is fresh and active, and don’t neglect proofing if using active dry yeast. Also, don’t overwork the dough, which can lead to dense muffins rather than light, airy ones.
Muffins Don’t Brown Evenly
Check your cooking temperature; too hot will burn bottoms before the centers cook. Using ring molds helps maintain even shape and cooking throughout.
Dough Is Too Sticky to Handle
Freshly milled flour varies in moisture content. Flour your surface and tools well, but if it’s very sticky, sprinkle in a little extra flour gradually until manageable.
English Muffins Are Dry or Crumbly
Don’t overbake or overcook the muffins, and make sure to keep your dough moist by not skimping on liquids. Cover cooked muffins with a clean towel as they cool to retain moisture.
Muffins Have No Nooks and Crannies
Be gentle when handling the dough to preserve air bubbles formed during proofing. Avoid rolling out dough too thinly, and don’t press down too hard when shaping.
Freezing & Storing Leftovers
Freezing:
Once fully cooled, wrap your English muffins tightly in plastic wrap and place them in a freezer-safe bag. Freeze for up to 2 months. When ready to enjoy, thaw at room temperature or toast straight from frozen.
Storing:
Store muffins in an airtight container or resealable bag at room temperature for 3-4 days to maintain their softness. For longer storage, keep them in the refrigerator and warm slightly before serving.
Extra FAQs
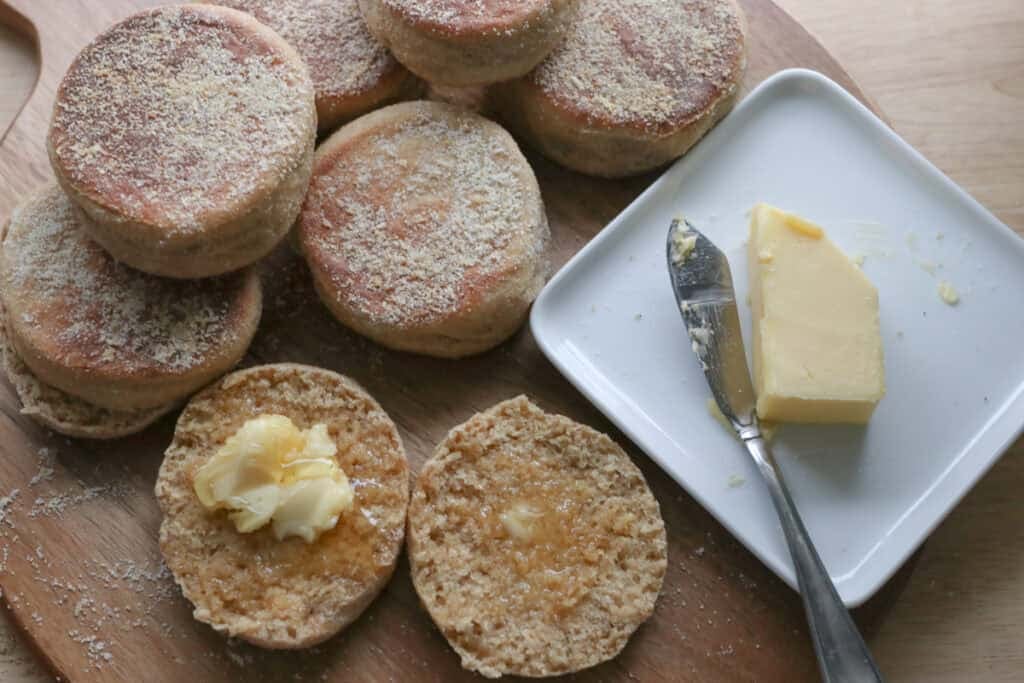
What’s the best way to slice these muffins?
Use a fork to gently split them in half rather than a knife; this creates those beautiful nooks and crannies that hold butter so beautifully.
Can I make the dough ahead of time?
Yes, after the first rise, shape and cut out the dough, then freeze the english muffins before the second rise. Remove from the freezer and allow to come to room temperature before baking.
Are English muffins supposed to be sweet?
They’re typically mildly sweet, enough to balance the dough but not overpowering. This makes them fantastic with both sweet and savory toppings.
Can I use all-purpose flour instead of freshly milled?
You can, but the flavor and texture won’t be quite the same. Freshly milled flour adds a richer, nuttier taste that really elevates the final product.
Delicious English Muffins with Freshly Milled Flour
Ingredients
- 4 – 4 ½ cups freshly milled hard white wheat flour finely milled (520-585 grams)
- ¾ cup warm water 170 grams
- 1 cup whole milk 244 grams
- 3 tablespoons melted butter
- 2 tablespoons honey
- 2 teaspoons salt
- 2 ¼ teaspoons instant yeast
- cornmeal for dusting
Instructions
- In the bowl of a stand mixer, combine the water milk, butter, honey, and salt.
- Add 3 ½ cups flour and combine. Let it rest for 15 minutes.
- Add the yeast and remaining flour, if needed. Add a half cup at a time, watching to see when it starts to pull away from the sides of the bowl. Do not add anymore flour once it starts doing this.
- Knead until the dough is smooth and you reach windowpane. The dough will be wet and moist, but not super sticky.
- Place in a bowl and cover to rise until doubled, 1-1.5 hours.
- Once risen, turn out on an oiled surface very gently. You don’t want to punch the dough down or be rough with it. Gently roll it out until it’s about ¾ an inch thick. Use a 3-inch biscuit cutter and cut out circles. Continue rolling and cutting the dough until it has all been used.
- Dip both sides of the english muffins into a bowl of cornmeal to coat them, then place on a baking sheet lined with parchment paper. Allow to rise for about 20-30 minutes, until puffy.
- Preheat your cast iron skillets over low-medium heat while the muffins are rising and coat the pans lightly with oil.
- Once the pans are heated and the english muffins have risen, put them in the skillet and allow to cook on one side for 6-8 minutes, until browned. Gently flip them, being sure not to drop or hit them. Then cover the pan with a lid. Allow to cook for 8-16 minutes, depending on how your burner cooks. The bottoms should be browned and the internal temperature should be between 195-205 degrees F.


Can these be frozen?
definitely!