Homemade Cake Pops Made with Freshly Milled Flour
This post may contain affiliate links. Please read our Disclosure Policy.
Cake pops should never taste like regret on a stick, yet most do. The culprit is usually stale box cake mix bound together with canned frosting, rolled into balls that crumble when you bite them, coated in chocolate that cracks off in sad little shards. You deserve better. Fresh milled flour changes the entire foundation of this treat, creating a cake base that’s actually moist, flavorful, and sturdy enough to hold up without turning into dense little hockey pucks. When you mill your own flour right before baking, you’re working with grain at its peak, with oils and nutrients that haven’t had time to oxidize. The result is cake that tastes richer and more complex, with a tender crumb that binds beautifully without needing a pound of frosting to hold it together. This isn’t just a novelty, it’s a genuine upgrade in both flavor and texture. The process is more straightforward than you think, and the payoff is cake pops that actually taste like cake.
What Makes This Recipe Great
Most cake pop recipes treat the cake itself like an afterthought, a bland vehicle for chocolate coating and sprinkles. This one flips that tired script entirely. The freshly milled flour brings a nutty, almost buttery depth that makes every component taste more alive, from the cake crumb to the way it mingles with the coating.
Here’s why this approach works better than standard methods:
- The flour is fresher than anything on a grocery shelf. Milling your own wheat berries means the flour hits your bowl with all its natural oils intact, creating a cake that’s inherently more flavorful and moist without any tricks or add-ins.
- The texture is sturdier but never dense. Freshly milled flour has a slightly different protein structure that helps the cake hold together when crumbled and mixed with frosting, so your pops won’t fall apart mid-dip or crumble when someone bites in.
- You control the grain. Want whole wheat for deeper flavor? Go for it. Prefer a lighter pop with white wheat or spelt? You’re in charge. This flexibility lets you customize the base to match your flavor vision.
- The coating actually sticks. Because the delicious vanilla cake mixture has better binding properties, the chocolate or candy coating adheres smoothly without sliding off or cracking as it sets.
This isn’t about making cake pops harder than they need to be. It’s about taking something that’s usually mediocre and making it genuinely worth the effort. When the foundation tastes this good, you don’t need to overcompensate with excessive sweetness or flashy decorations. The pops can stand on their own.
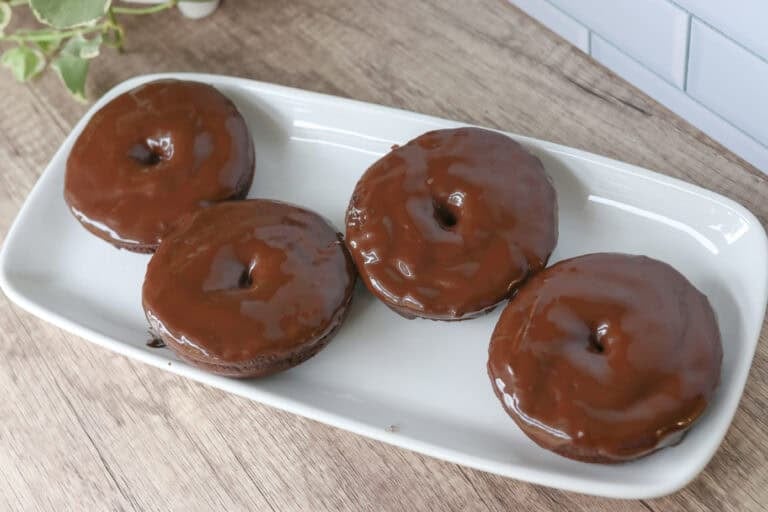
For more freshly milled recipes, be sure to try these Mango Cheesecake Bars or these Frosted Banana Bars!
Overview of Ingredients
Understanding what each ingredient contributes helps you adjust on the fly and troubleshoot when something feels off. Cake pops are all about ratios and binding, so swapping ingredients without knowing their role can throw everything sideways.
For the Cake:
- Freshly milled flour: This is your structure and flavor base. Soft white wheat berries produce a more cake-like, tender texture. Hard white wheat flour can be used, but it will be a little more like whole wheat, and the texture will not be as soft and light. Mill it as close to baking time as possible for maximum freshness. Whole wheat flour can also be used, but you may need to use less flour.
- Granulated sugar: Sweetness, obviously, but also moisture retention. Sugar is hygroscopic, meaning it grabs onto water molecules and keeps your cake from drying out too fast.
- Butter, softened: Fat equals flavor and tenderness. Butter also helps the crumb hold together when you mix it with frosting later. Don’t swap for oil here, the structure won’t be the same.
- Eggs: Binding and leavening. Eggs give structure and lift, and the fat in the yolks adds richness.
- Whole milk: Hydration and tenderness. Whole milk has enough fat to keep things moist without making the batter too wet.
- Baking powder: Your leavening agent. This creates the air pockets that give you a light crumb instead of a dense brick.
- Salt: Amplifies every other flavor in the cake. Without it, everything tastes flat.
- Vanilla extract: Depth and warmth. It rounds out the wheat flavor without overwhelming it.
For Assembly:
- Buttercream recipe: The binder that holds your crumbled cake together. Start with less than you think you need. You can always add more, but too much makes the mixture gummy and hard to shape. You could also sub your favorite frosting recipe if desired.
- Candy melts or chocolate (any flavor): Your coating. Candy melts are easier for beginners because they set quickly and don’t require tempering, but real chocolate tastes infinitely better. If using chocolate, add a teaspoon of coconut oil to thin it slightly for easier dipping.
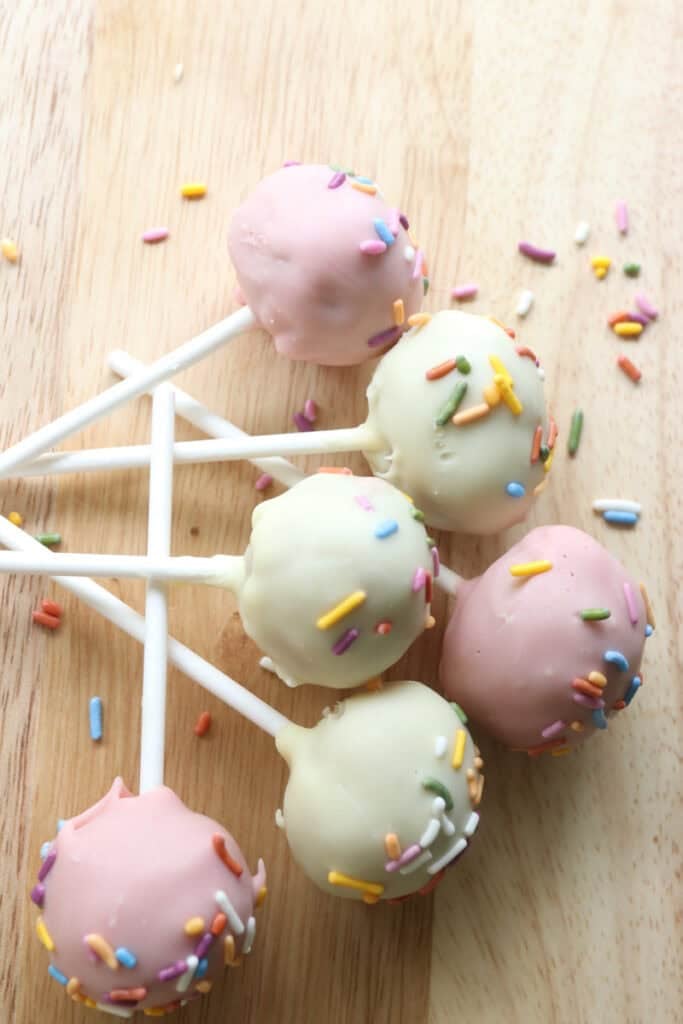
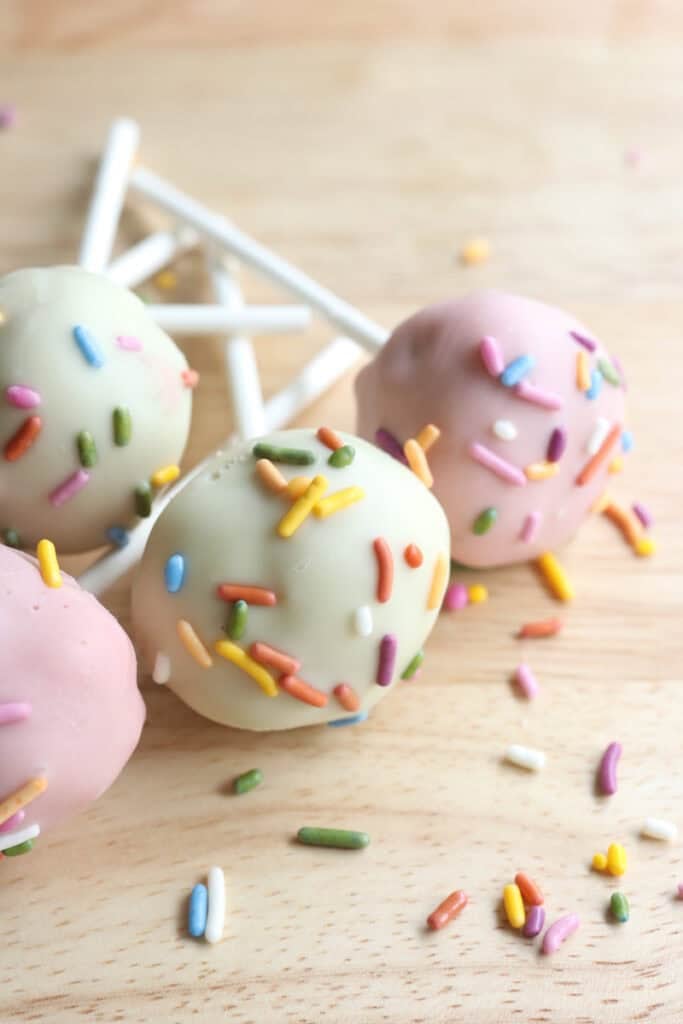
- Sprinkles, crushed nuts, or drizzle (optional): Pure decoration. Add these while the coating is still wet so they stick.
Tips for Success
Cake pops have a reputation for being fiddly, but most failures come down to three things: ratios, temperature, and impatience. Get those right, and the rest is just rolling balls and dipping them in chocolate. Here’s how to stack the odds in your favor from the start.
- Let the cake cool completely before crumbling. Warm cake turns gummy when you mix it with frosting, and you’ll end up with a sticky mess that won’t hold a shape. Patience here saves you 30 minutes of frustration later.
- Crumble the cake finely. Big chunks create weak spots where the pop can break. Use your hands or a food processor to get it down to coarse breadcrumb texture. No one wants to bite into a cake pop and hit a dry chunk.
- Add frosting gradually. For best results, tart with a few tablespoons, mix thoroughly, then add more only if the mixture won’t hold together when squeezed. The goal is playdough consistency, not cookie dough. Too much frosting makes the pops heavy, overly sweet, and prone to sliding off the stick.
- Chill the shaped balls before dipping. Pop them in the fridge for at least 30 minutes, or the freezer for 15. Cold cake pops hold their shape when they hit warm chocolate. Room temperature pops will start to soften and can fall off the stick mid-dip.
- Dip the stick in chocolate first, then insert it into the ball. This creates a seal that keeps the pop from sliding off. Push the stick about halfway through the ball, no further or it might poke out the top.
- Tap, don’t swirl, to remove excess coating. After dipping, gently tap the stick against the edge of the container to let excess chocolate drip off. Swirling creates ridges and uneven coating.
- Let them set upright. Laying cake pops flat while the coating sets creates a flat side and looks sloppy. Stick them in foam or a stand so the coating hardens evenly all the way around.
If you’re making these for an special occasion, prep the cake a day ahead and store it wrapped tightly at room temperature. The next day, crumble and assemble. Finished cake pops can sit at room temperature for a couple of days if your kitchen isn’t too warm, or refrigerate them if you need them to last longer. Just bring them back to room temperature before serving so the coating doesn’t feel waxy.
Helpful Tools & Supplies
Whether you’re just dipping your toes into the world of fresh milled flour or you’re a seasoned home baker, I’ve taken the guesswork out of what you truly need. All of these tools and resources are available in my shop, designed to help your journey be smooth and nourishing:
Grain Mills
- NutriMill Classic Grain Mill – My go-to for fine, consistent milling; perfect for sandwich breads and everyday baking.
- NutriMill Harvest Grain Mill – Stone-ground elegance: this model delivers whole-grain flavor with a beautiful appearance.
Mixers
- Ankarsrum Mixer – A powerhouse kitchen companion with multiple speeds and attachments—ideal for kneading bread dough effortlessly.
Baking & Bread Tools
- Bread Bow Knife – Artisan-made with a high-carbon steel blade and cherry wood handle—this knife slices loaves with ease.
- Sourdough Essentials Kit With Starter – Complete starter kit that includes dehydrated sourdough starter, banneton baskets, a dough whisk, scoring lame, and more.
Cookbooks & eBook Bundles
- Everyday Whole Grains Vol. 1 & 2 (printed & digital) – Packed with 70+ recipes built around fresh milled flour, from breads to snacks and desserts.
- The Fresh Breads Bundle – A comprehensive set including eBooks like The Perfect Loaf, the Cookie Jar, bulk baking guides, and a sourdough mini‑course—all centered on fresh milled flour.
- Freshly Milled Made Simple Guide – A video-based guide that walks you through milling and baking basics, making the process feel easy and approachable.
Specialty Items
- Dehydrated Sourdough Starter – Just add water and flour to rehydrate this starter—perfect for bakers without an active sourdough culture.
- I Knead Fresh Flour Mug – A charming, handmade 12 oz ceramic mug—great for coffee breaks during dough rising!
Why These Are Worth It
Every tool in this collection has been personally vetted to support you in baking with fresh milled flour. From the grain mills that make your flour, to mixers that knead dough, to resources that teach you every step—it’s all here to make sure your homemade bread journey is joyful, nourishing, and successful.
➡️ Explore all of these items and more in the Generation Acres Farm Shop — your one-stop spot for fresh milled flour baking essentials.
Equipment
You don’t need a specialty cake pop pan or any single-use gadgets collecting dust in your cabinets. This recipe works with basic tools you likely already own, plus your grain mill. Each piece of equipment plays a specific role in getting the texture and coating just right, so understanding what each one does helps you troubleshoot if things go sideways.
7 or 8 inch baking pan: This size gives you the right cake thickness for proper moisture and baking time.
Large mixing bowl: You’ll be crumbling cake and mixing it with frosting, which requires room to work without making a mess all over your counter.
Cookie scoop or kitchen scale: Consistency matters with cake pops. A 1-tablespoon scoop or weighing each portion at about 20 grams ensures they’re all the same size, which means they’ll coat evenly and look professional.
Lollipop sticks: Standard 6-inch paper sticks work best. Plastic ones can slip out, and shorter sticks make the pops harder to dip and display.
Tall, narrow container for melting chocolate: A 2-cup glass measuring cup or a deep mug makes dipping infinitely easier than a wide shallow bowl. You need depth to submerge the pop without using a gallon of melting chocolate.
Styrofoam block or cake pop stand: You need somewhere to stick the finished pops while the coating sets. A block of florist foam works great, or you can poke holes in a cardboard box if you’re improvising.
How to Make Cake Pops Made with Freshly Milled Flour
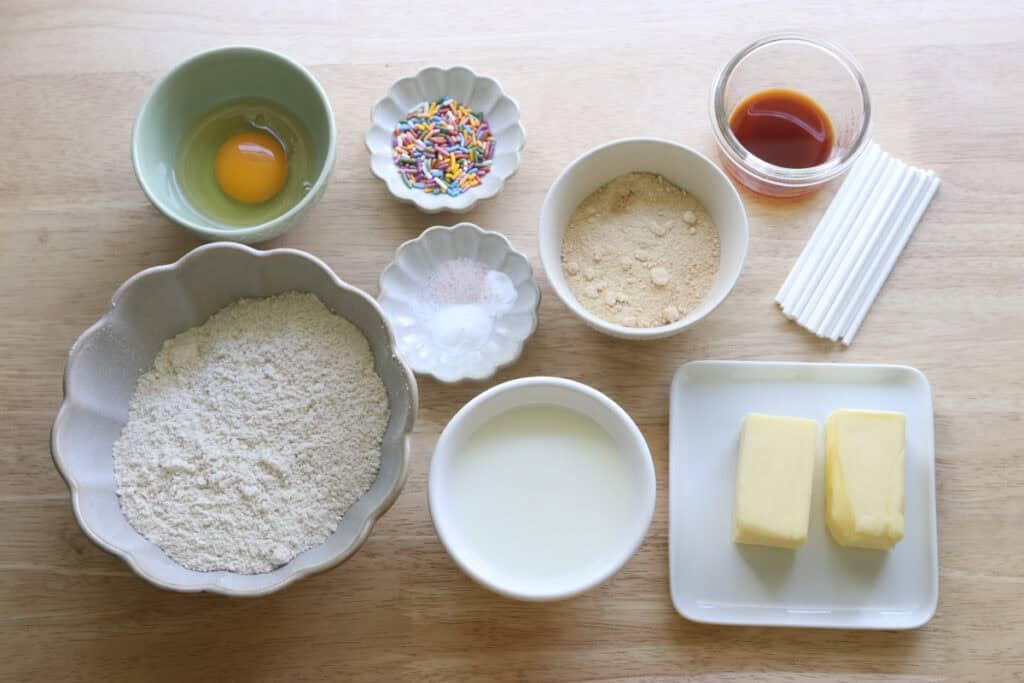
Ingredients
Cake Batter:
- 1 cup freshly milled soft white wheat flour, finely milled (115 grams)
- ¼ teaspoon baking powder
- ⅛ teaspoon baking soda
- ¼ teaspoon salt
- ¼ cup softened butter (58 grams)
- ⅓ cup sugar (50 grams)
- 1 egg
- 1 teaspoon vanilla
- ½ cup milk (114 grams)
Vanilla Buttercream:
- ¼ cup softened butter (58 grams)
- 1 teaspoon vanilla
- 1 cup powdered sugar (100 grams)
- 2-3 tablespoons heavy cream
Coating:
- 14 ounces white chocolate chips
- 2 teaspoons coconut oil
- Red, plant-based food coloring
Directions:
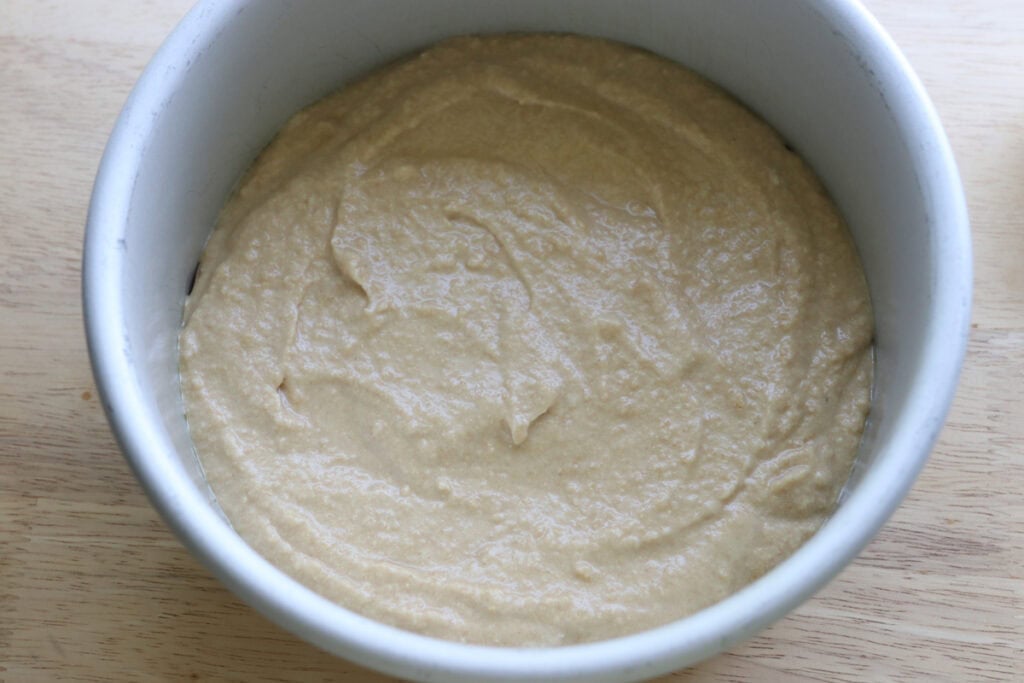
- Preheat the oven to 350 degrees F. and grease a 7 or 8 inch cake pan with oil.
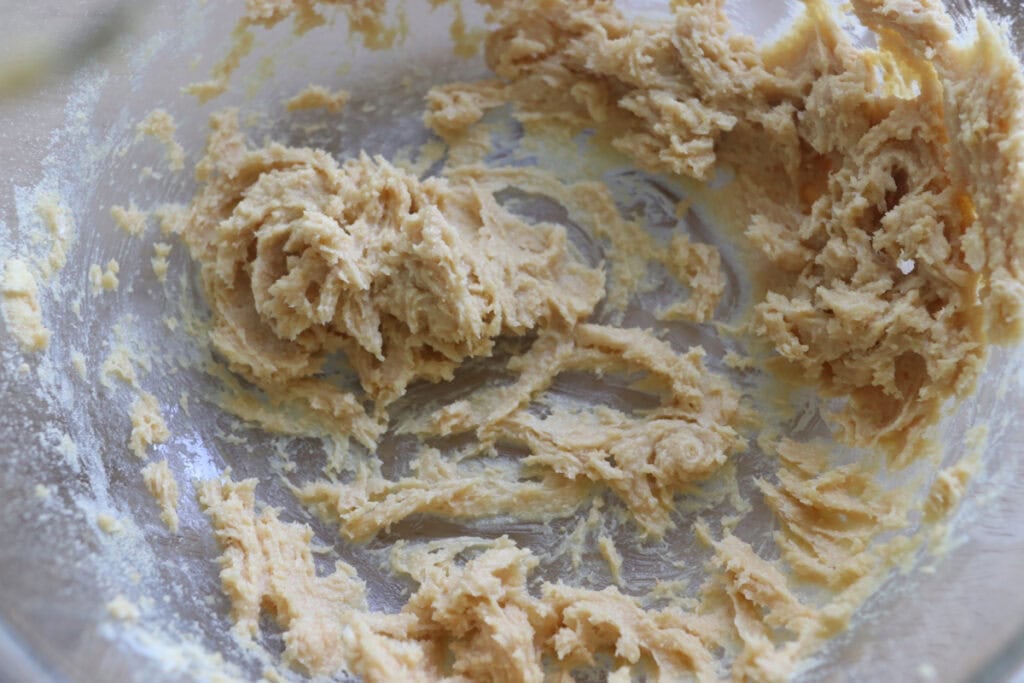
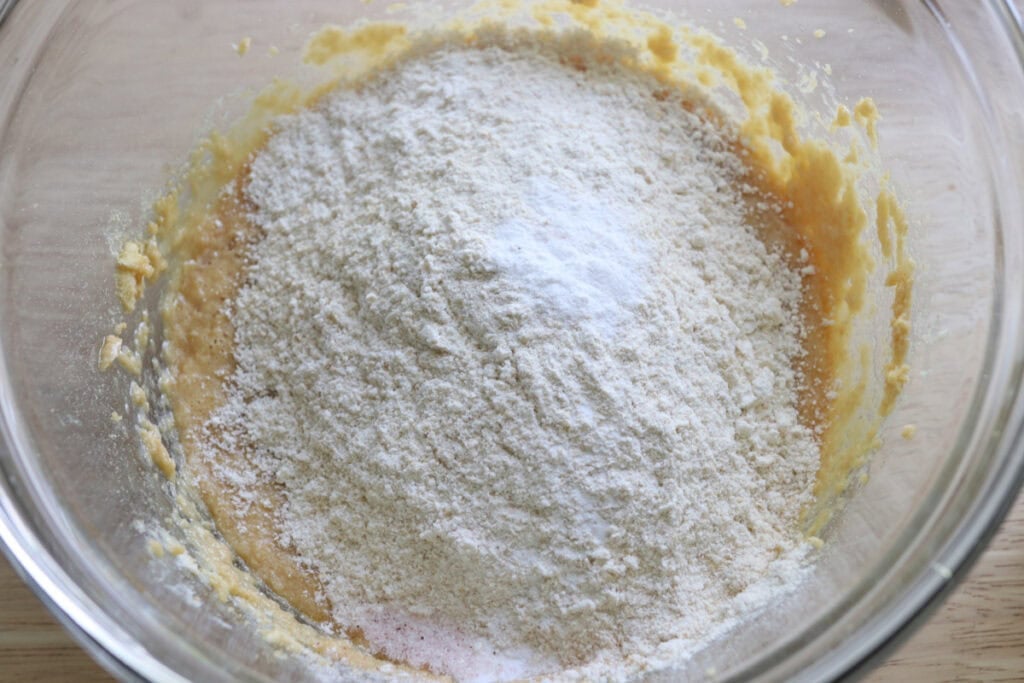
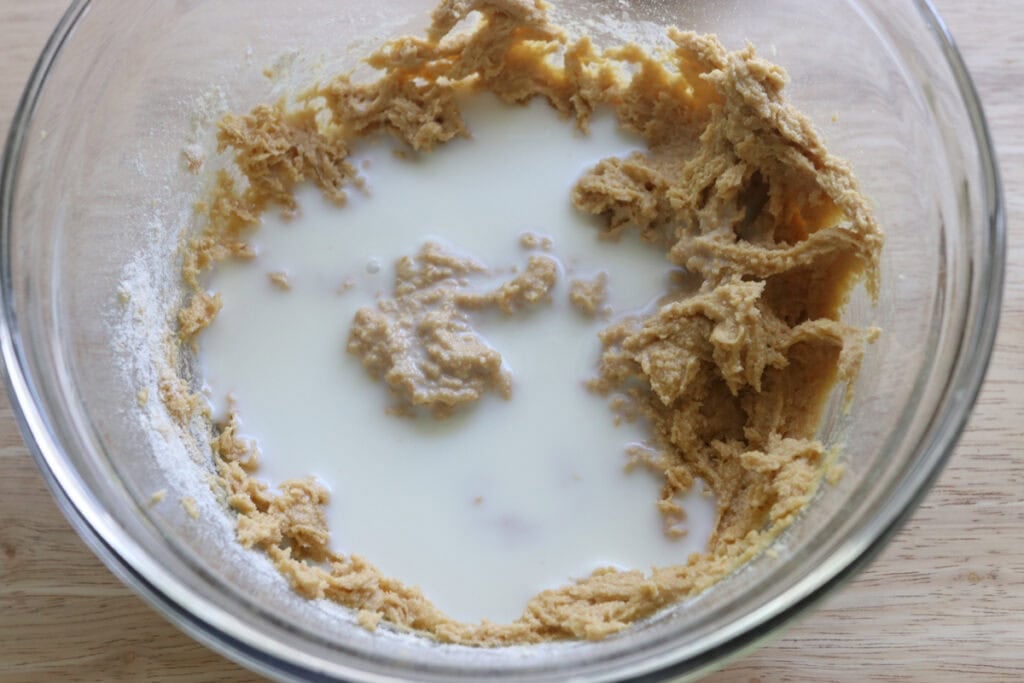
- In a medium bowl, beat the butter and sugar. Add the egg and and vanilla and combine. Mix in the flour, baking powder, baking soda, and salt. Fold in the milk.
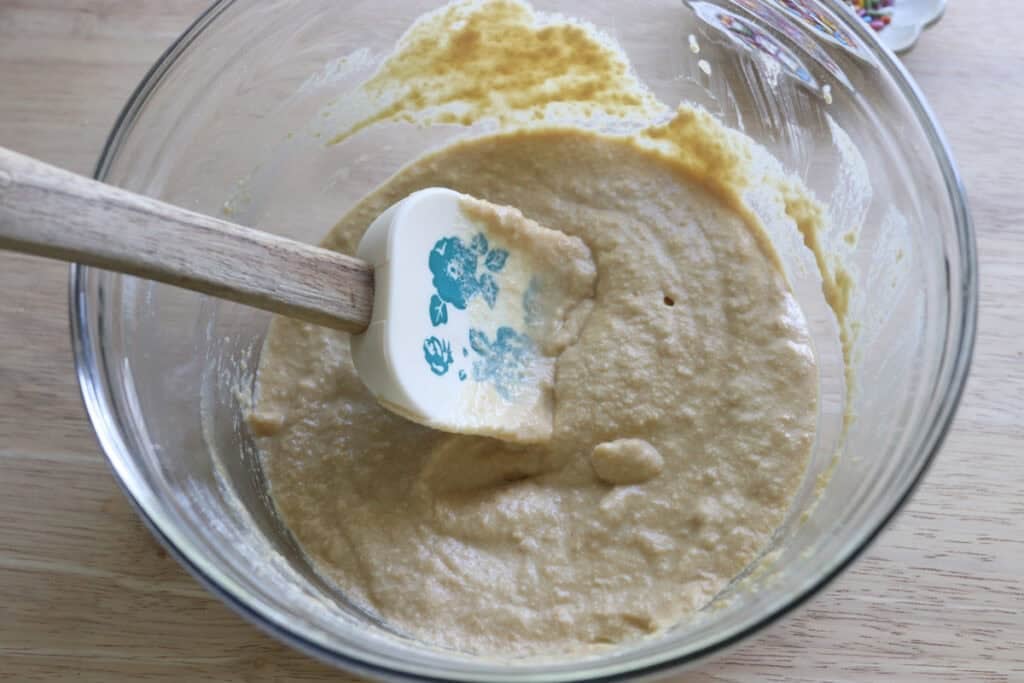
- Pour batter into the pan and bake for 15-18 minutes, until a toothpick inserted in the middle comes out clean.
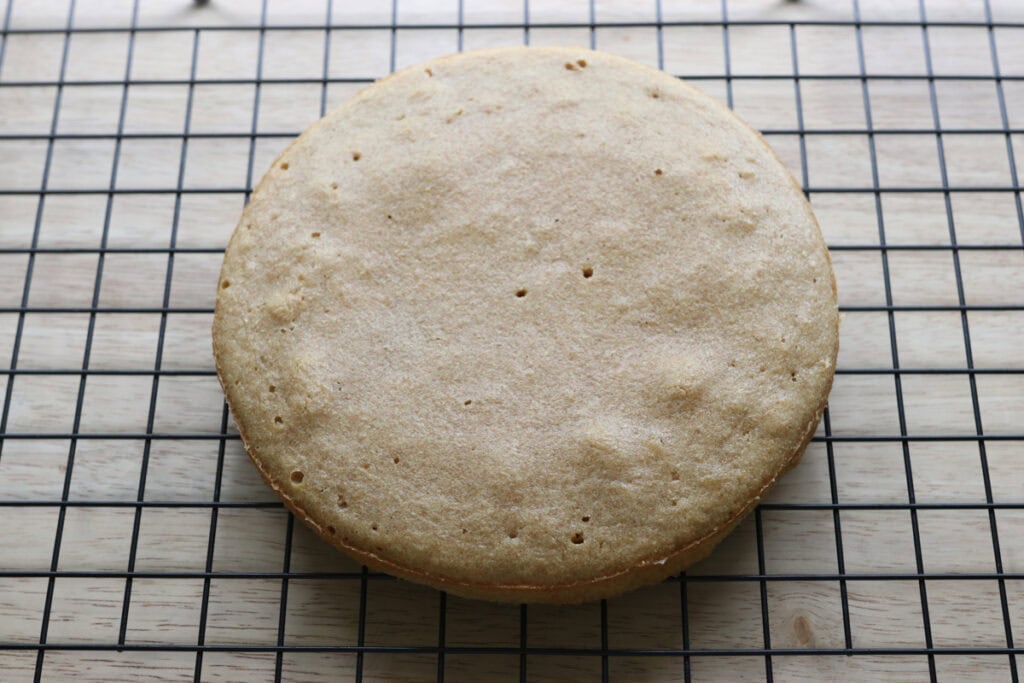
- Allow the cake to cool completely.
- In a large bowl, prepare the frosting by beating the butter until smooth. Add the vanilla and powdered sugar and beat. Add the heavy cream and beat until smooth and fluffy.
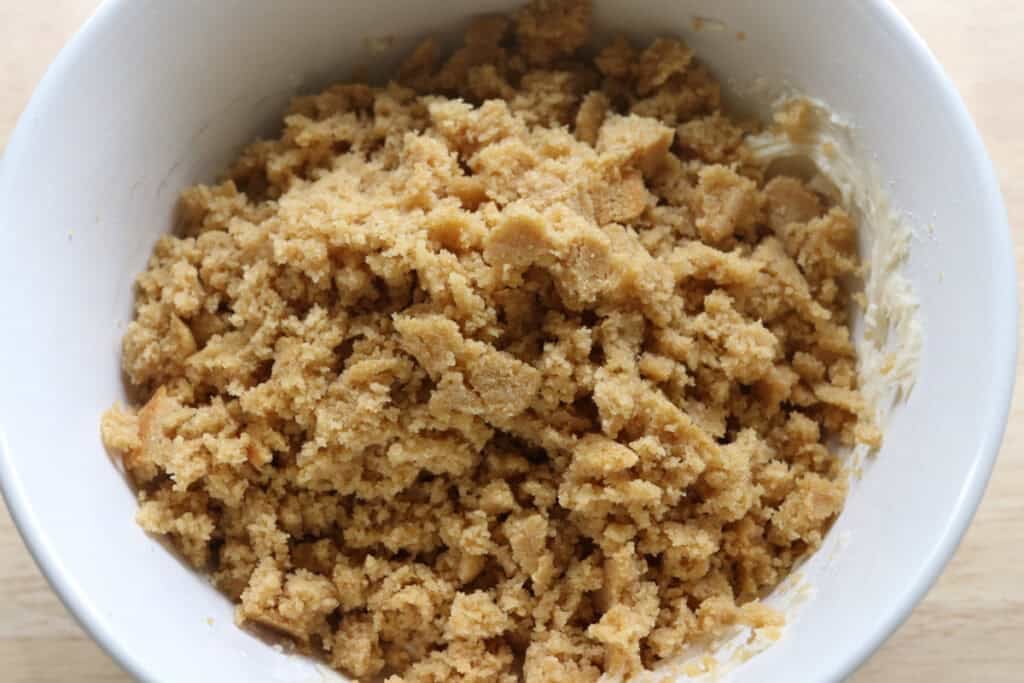
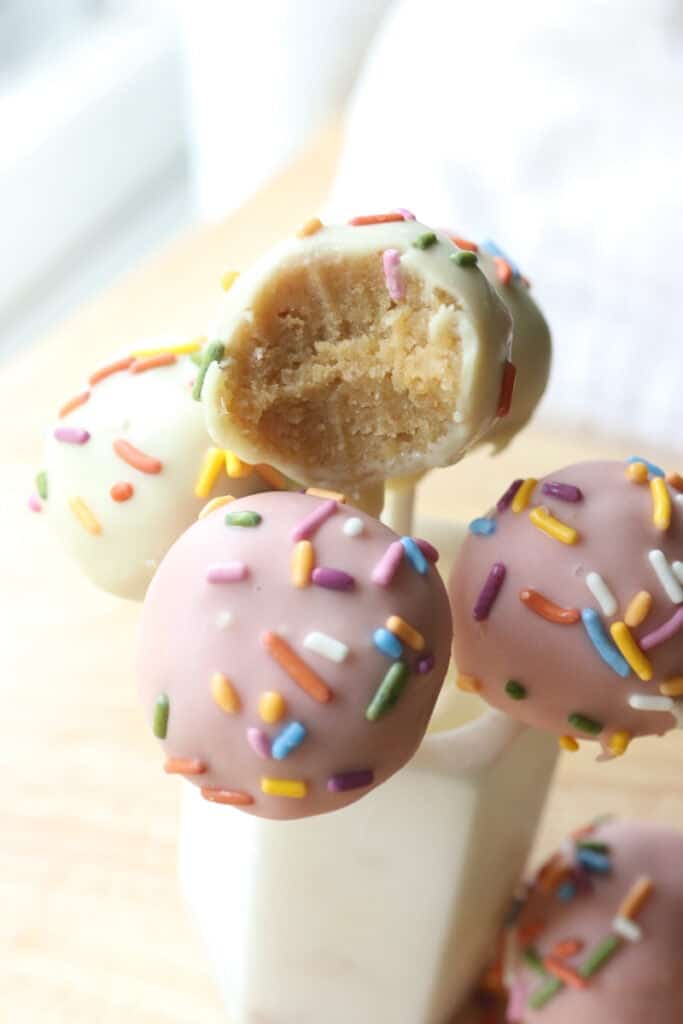
- To the same bowl, take the cooled cake and crumble into small pieces over the bowl.
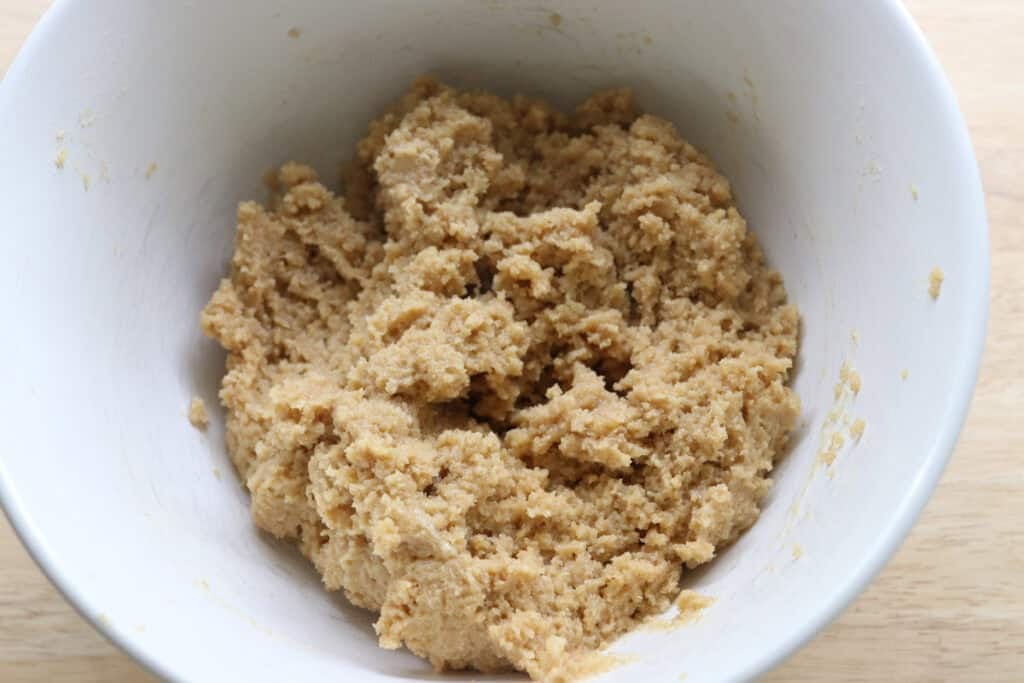
- Mix the cake into the icing until you have a dough like consistency.
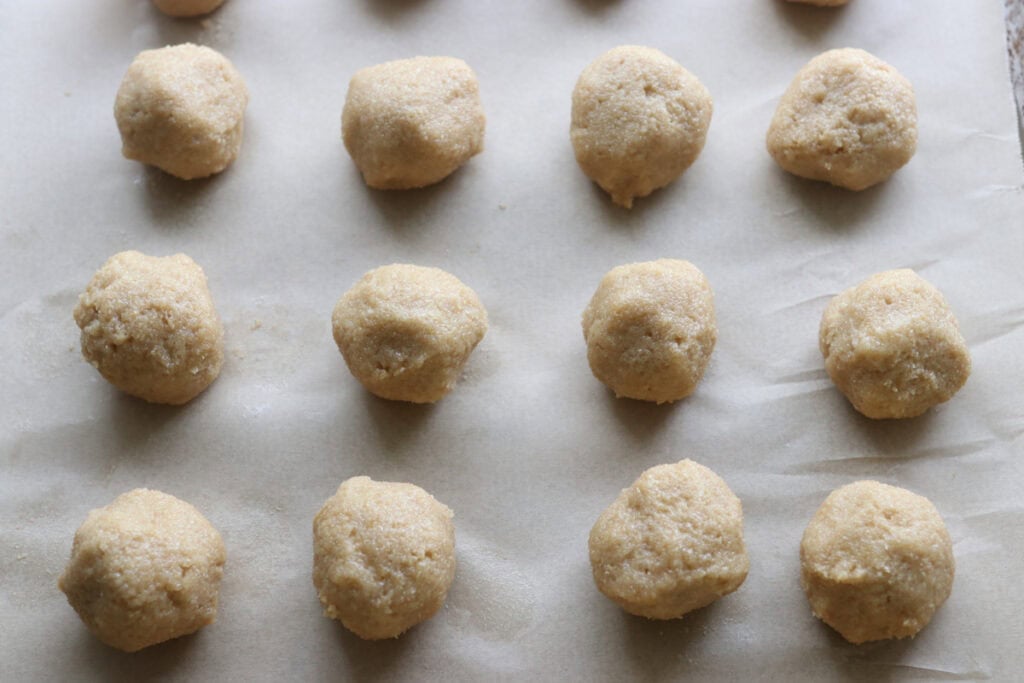
- Scoop the batter using a 1 tablespoon scoop and roll into balls with your hands. Place them on a parchment-lined baking sheet.
- Refrigerate for a couple of hours until firm. You can re-roll them into a smoother round shape once hardened if need be.
- Divide the chocolate chips into two separate bowls and add 2 teaspoon of oil to each bowl. Microwave in 15 to 30 second increments until melted, stirring in between.
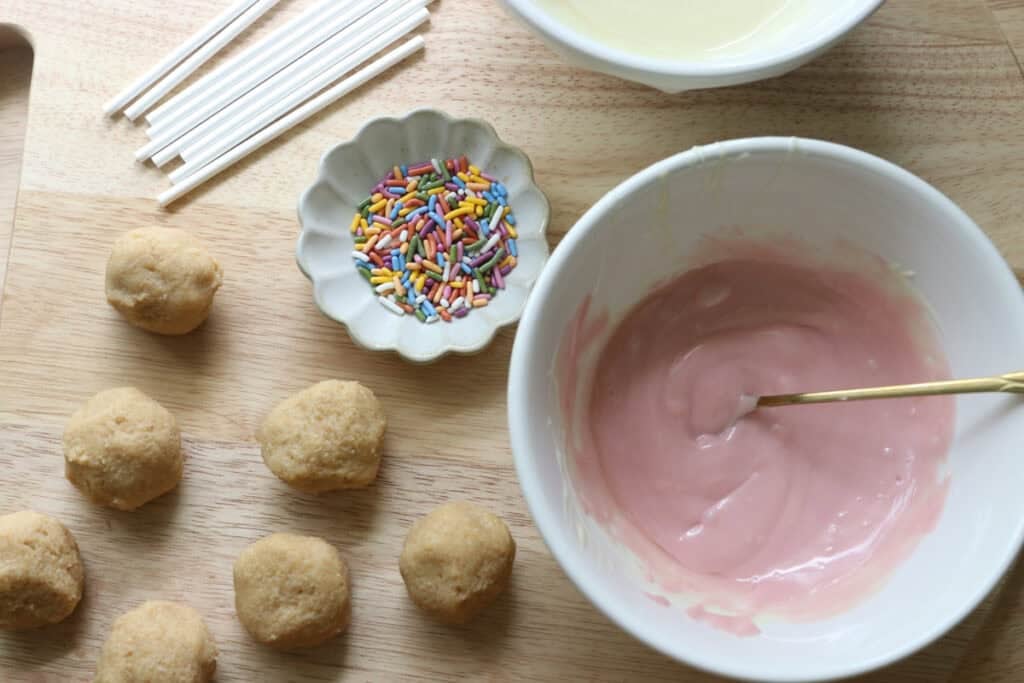
- Add a several drops of red coloring to one bowl to make it pink. Make sure the chocolate has cooled down some.
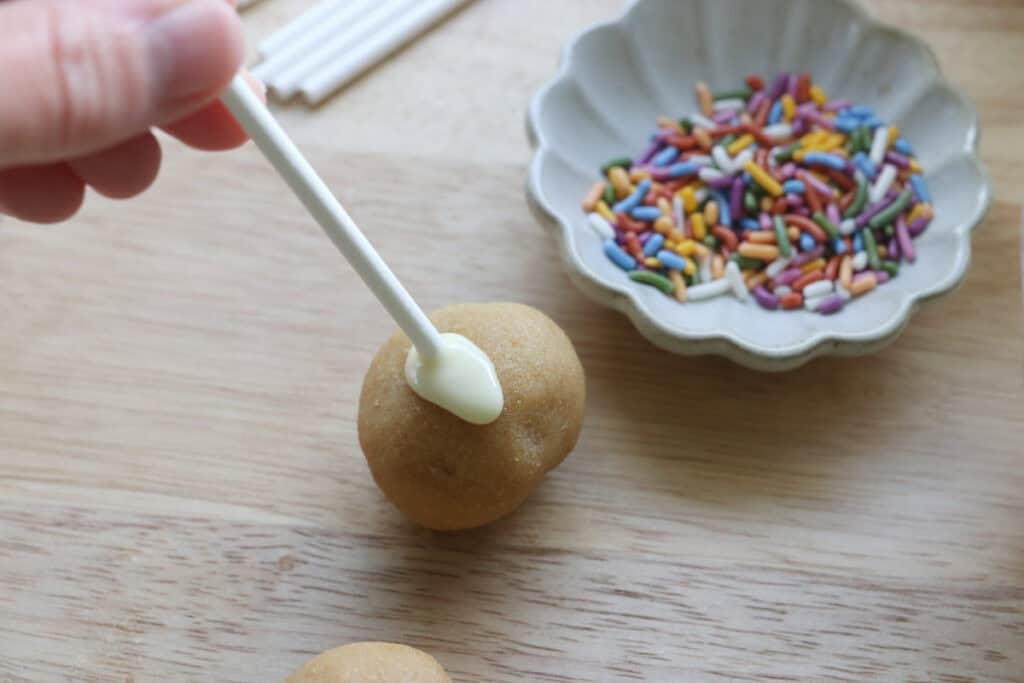
- Dip the cake pop sticks into some of the chocolate, then push the cake pops about ¾ of the way into the stick.

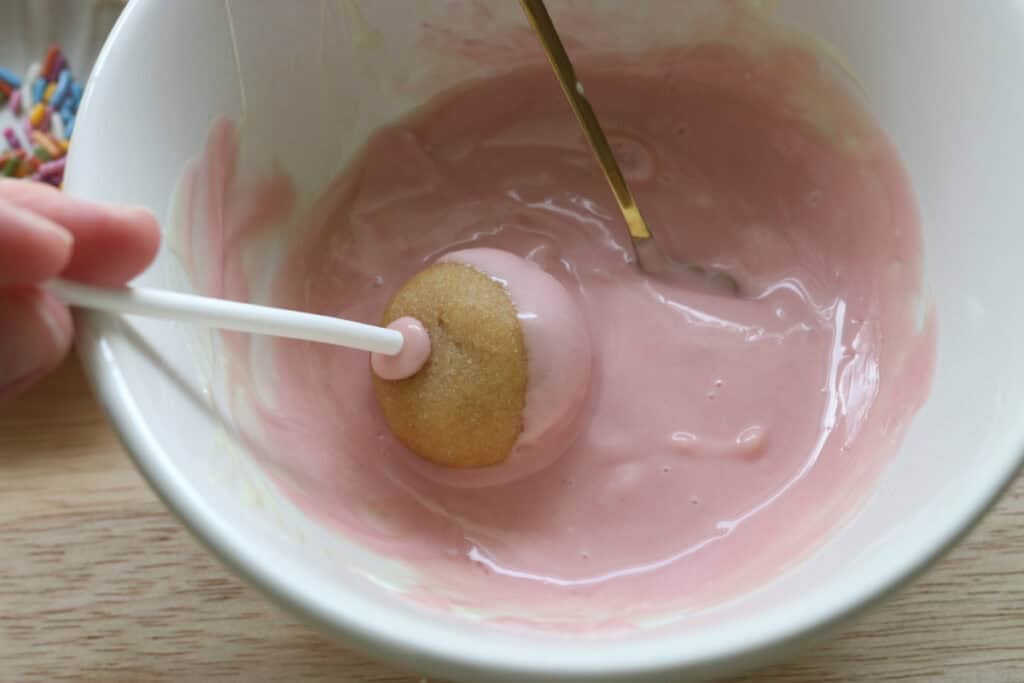
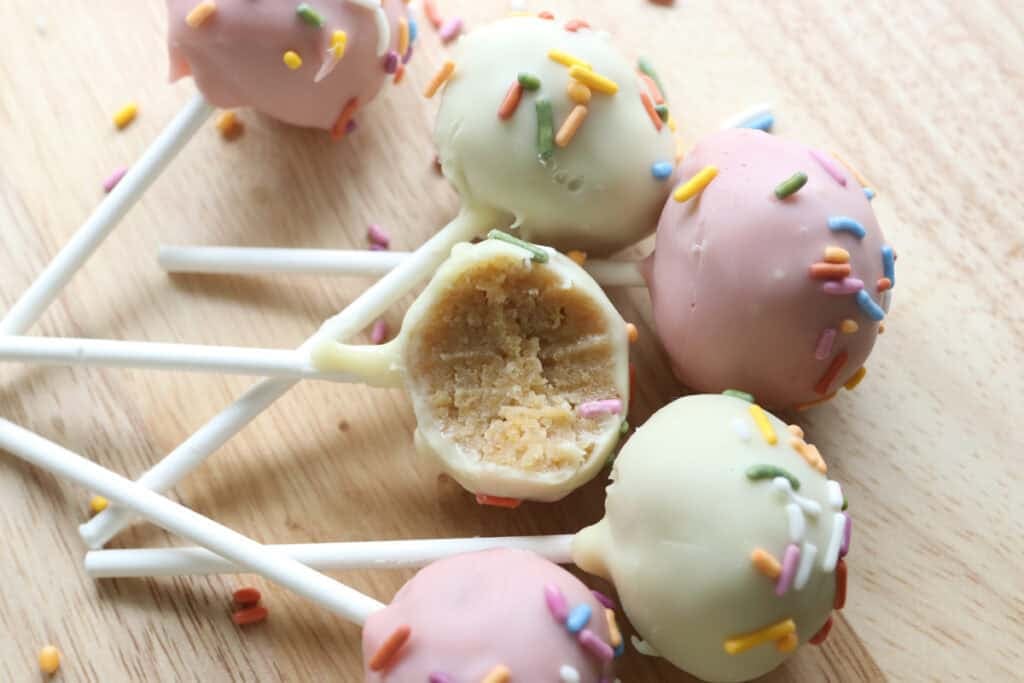
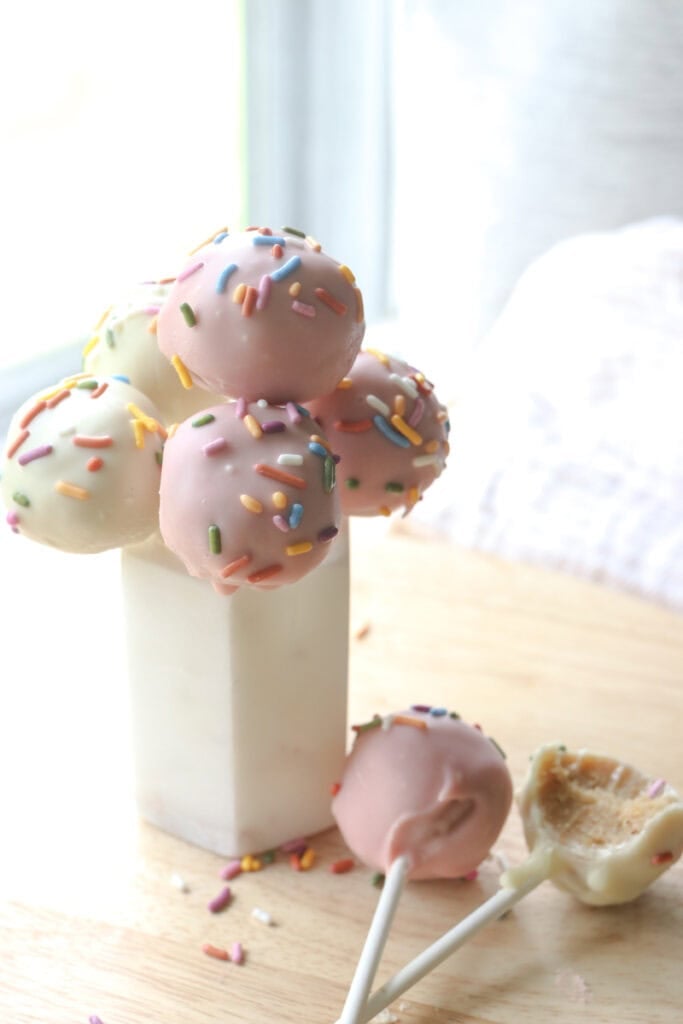
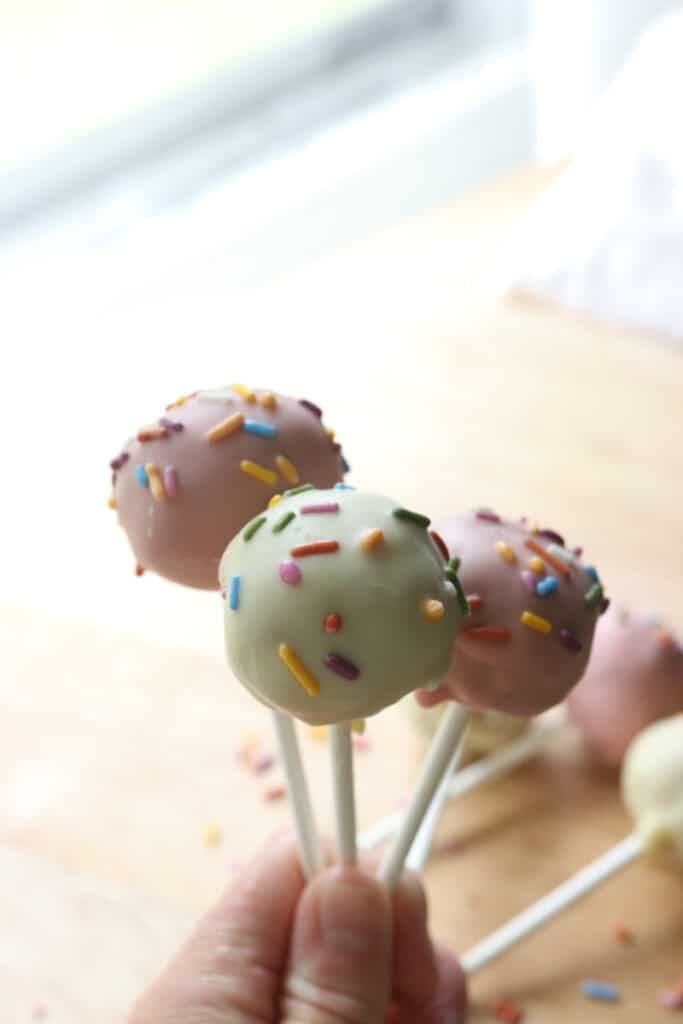
- Dip the cake pops into the chocolate to fully coat them. Tap on the side of the bowl to let the excess chocolate drip off. Top with sprinkles. Stick them into a piece of styrofoam and place in the fridge to harden.
Troubleshooting Common Problems with This Recipe
The cake pops keep falling off the stick:
You didn’t chill them long enough, or you skipped dipping the stick in chocolate before inserting it. The chocolate seal is what holds everything in place. If pops are already falling apart, re-chill them for another 15 minutes and try again with freshly dipped sticks.
The coating cracks after it sets:
This usually means the cake balls were too cold when you dipped them. Freezing is great for firming them up, but if they’re ice-cold when they hit warm chocolate, the temperature shock causes cracks as the coating contracts. Let frozen pops sit at room temperature for 5 minutes before dipping.
The mixture is too dry and won’t stick together:
You need more frosting. Add it a tablespoon at a time and mix thoroughly. If you already shaped the balls and they’re crumbly, break them back down, add more frosting, and reshape. It’s annoying but not unfixable.
The mixture is too wet and sticky:
You added too much frosting. The only real fix here is to bake another small batch of cake, crumble it, and mix it in to balance the ratio. Or refrigerate the mixture for 30 minutes to firm it up, which helps but doesn’t completely solve the problem.
The coating is too thick and clumpy:
It cooled down too much or you didn’t thin it enough. Reheat it gently (microwave in 10-second bursts or use a double boiler) and stir in a small amount of coconut oil or shortening to loosen it up. For candy melts, a teaspoon per cup usually does it. For chocolate, start with half a teaspoon.
The pops look lumpy or misshapen:
You didn’t pack the mixture tightly enough when rolling. Squeeze firmly as you shape each ball to eliminate air gaps. If they’re already dipped and lumpy, you can’t fix them, but you can cover imperfections with extra sprinkles or drizzle.
The good news is that even imperfect cake pops usually taste great. If presentation matters (like for a party or gift), practice a few before you commit to decorating the whole batch. The first few are always a learning curve.
Recipe Variations
Once you nail the basic method, cake pops become a template for just about any flavor combination you’re craving. The freshly milled flour works beautifully with different mix-ins, coatings, and frosting flavors without losing that superior texture.
- Chocolate cake base: Swap ¼ cup of the flour for cocoa powder. You’ll get deep, fudgy pops that pair perfectly with white chocolate or peanut butter coating.
- Lemon or citrus version: Add 2 tablespoons of lemon zest to the cake batter and use lemon cream cheese frosting for binding. Coat in white chocolate and these taste like sunshine.
- Spiced fall pops: Mix in 1 teaspoon cinnamon, ½ teaspoon nutmeg, and ¼ teaspoon cloves. Pair with cream cheese frosting and a cinnamon-sugar coating instead of chocolate for something that tastes like autumn in ball form.
- Nut or seed add-ins: Fold in ¼ cup finely chopped toasted pecans, almonds, or sunflower seeds after crumbling the cake. This adds texture and plays up the nutty flavor from the fresh flour.
- Different coatings: Try dark chocolate, milk chocolate, or white chocolate. You can also roll the pops in crushed cookies, toasted coconut, or finely chopped freeze-dried fruit instead of dipping them entirely.
- Grain swaps: Spelt berries create a slightly sweeter, more delicate crumb. Einkorn works too but has a denser texture. Avoid hard red wheat unless you want a pronounced whole grain flavor that can taste a little bitter in sweeter applications.
If you’re making these for a crowd with mixed preferences, split the cake and make half with chocolate buttercream, half vanilla buttercream, or do different coatings on the same base. The flexibility here is part of what makes this a great recipe. You’re not locked into one flavor profile just because you baked a single cake.
Storage & Leftovers
Cake pops hold up surprisingly well if you store them correctly, which makes them great for prepping ahead for parties, gifts, or just having a stash of something sweet on hand. The coating acts as a seal that keeps the cake moist, so they don’t dry out as fast as regular cake.
Refrigerator: Store cake pops in an airtight container. They will stay fresh for up to a week in the fridge. Let them come to room temperature for about 20 minutes before serving, or the coating will feel waxy and the texture won’t be as enjoyable. The cold dulls the flavor slightly, so warming them up makes a difference.
Freezer: These freeze beautifully for up to two months. Wrap each pop individually in plastic wrap, then store them all together in a freezer-safe container or bag. Thaw them in the fridge overnight, then bring to room temperature before serving. Don’t try to speed-thaw them in the microwave or the coating will melt and the texture will go weird.
If you’re gifting or transporting cake pops, wrap each one in a small cellophane bag tied with ribbon. This keeps them protected and makes them look intentional.
The beauty of making cake pops with freshly milled flour is that they genuinely taste better a day after you make them. The flavors meld and deepen slightly, and the texture becomes even more cohesive. So don’t stress if you can’t serve them immediately. They’ll be just as good, if not better, the next day.
Freshly milled flour gives you a foundation that’s worth building on, and the effort of making these from scratch pays off in texture, flavor, and the fact that people will actually want seconds. Make a batch, see how much better they can be, and you’ll understand why cutting corners with box mix never quite gets you there.
Extra FAQs
Can I use store-bought flour if I don’t have a grain mill?
Yes, but use whole wheat flour for the closest texture. Regular all-purpose flour will work but produces a denser, less flavorful pop. The fresh-milled advantage is real, but this recipe isn’t completely off-limits if you don’t have a mill yet.
How do I know when I’ve added enough frosting?
Squeeze a small amount of the mixture in your hand. If it holds together without crumbling and feels like firm playdough, you’re good. If it crumbles apart, add more frosting a tablespoon at a time. If it feels sticky or wet, you’ve added too much.
Can I make these without sticks?
Absolutely. Shape them into balls and dip them with a fork, letting excess coating drip off before setting them on parchment paper. They become cake truffles instead of pops, which works just as well for eating and gifting.
Why do my cake pops have air bubbles in the coating?
You either didn’t tap off enough excess chocolate, or there was moisture on the cake ball before dipping. Make sure the pops are completely dry and tap the stick firmly against the side of your container after dipping to release trapped air.
Can I use a different frosting?
Yes. Buttercream, cream cheese, or even ganache works. Avoid whipped frostings because they don’t bind as well. The frosting flavor will come through subtly, so pick one that complements your cake and coating.
How far in advance can I make these?
You can bake the cake up to two days ahead and store it wrapped tightly. Once assembled and dipped, cake pops stay fresh for a week in the fridge. Frozen, they last up to two months.
Can I decorate them with royal icing or fondant?
You can, but it’s overkill for most purposes. The coating is already a layer of decoration. If you want to add details, use melted chocolate in a piping bag or small squeeze bottle for drizzles and dots. It’s cleaner and tastes better than fondant.

Ingredients
Cake Batter:
- 1 cup freshly milled soft white wheat flour finely milled (115 grams)
- ¼ teaspoon baking powder
- ⅛ teaspoon baking soda
- ¼ teaspoon salt
- ¼ cup softened butter 58 grams
- ⅓ cup sugar 50 grams
- 1 egg
- 1 teaspoon vanilla
- ½ cup milk 114 grams
Frosting:
- ¼ cup softened butter 58 grams
- 1 teaspoon vanilla
- 1 cup powdered sugar 100 grams
- 2-3 tablespoons heavy cream
Coating:
- 14 ounces white chocolate chips
- 2 teaspoons coconut oil
- Red plant-based food coloring
Instructions
- Preheat the oven to 350 degrees F. and grease a 7 or 8 inch cake pan with oil.
- In a medium bowl, beat the butter and sugar. Add the egg and and vanilla and combine. Mix in the flour, baking powder, baking soda, and salt. Fold in the milk.
- Pour batter into the pan and bake for 15-18 minutes, until a toothpick inserted in the middle comes out clean.
- Allow the cake to cool completely.
- In a large bowl, prepare the frosting by beating the butter until smooth. Add the vanilla and powdered sugar and beat. Add the heavy cream and beat until smooth and fluffy.
- To the same bowl, take the cooled cake and crumble into small pieces over the bowl.
- Mix the cake into the icing until you have a dough like consistency.
- Scoop the batter using a 1 tablespoon scoop and roll into balls with your hands. Place them on a parchment-lined baking sheet.
- Refrigerate for a couple of hours until firm. You can re-roll them into smoother bowls once hardened if need be.
- Divide the chocolate chips into two separate bowls and add 2 teaspoon of oil to each bowl. Microwave in 15 to 30 second increments until melted, stirring in between.
- Add a several drops of red coloring to one bowl to make it pink. Make sure the chocolate has cooled down some.
- Dip the cake pop sticks into some of the chocolate, then push the cake pops about ¾ of the way into the stick.
- Dip the cake pops into the chocolate to fully coat them. Tap on the side of the bowl to let the excess chocolate drip off. Top with sprinkles. Stick them into a piece of styrofoam and place in the fridge to harden.