Freshly Milled Red Velvet Cupcakes with Frosting
This post may contain affiliate links. Please read our Disclosure Policy.
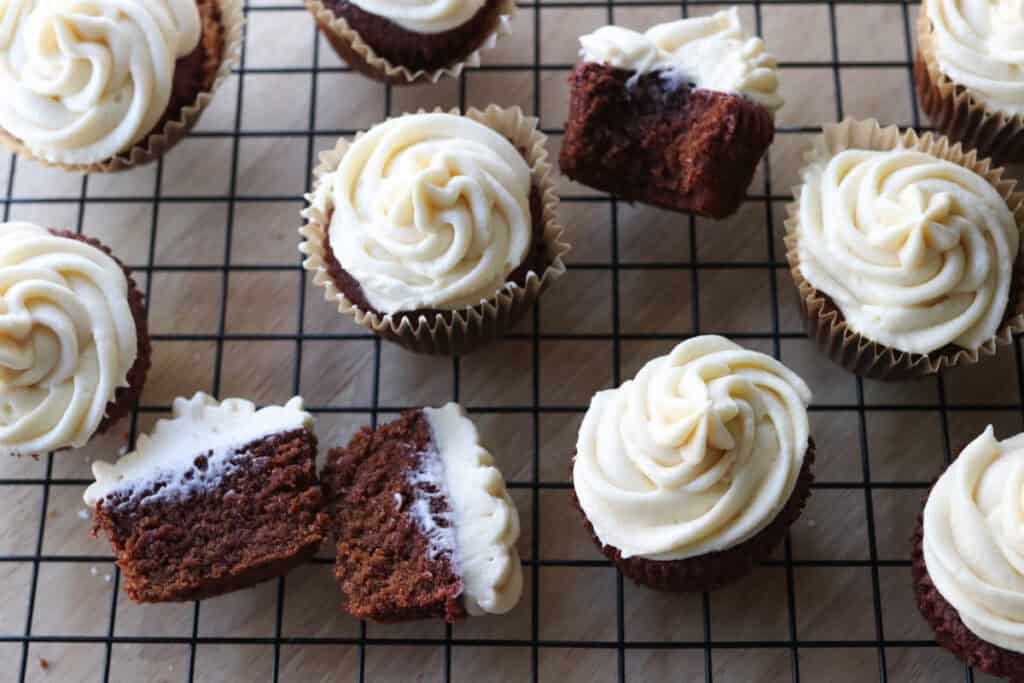
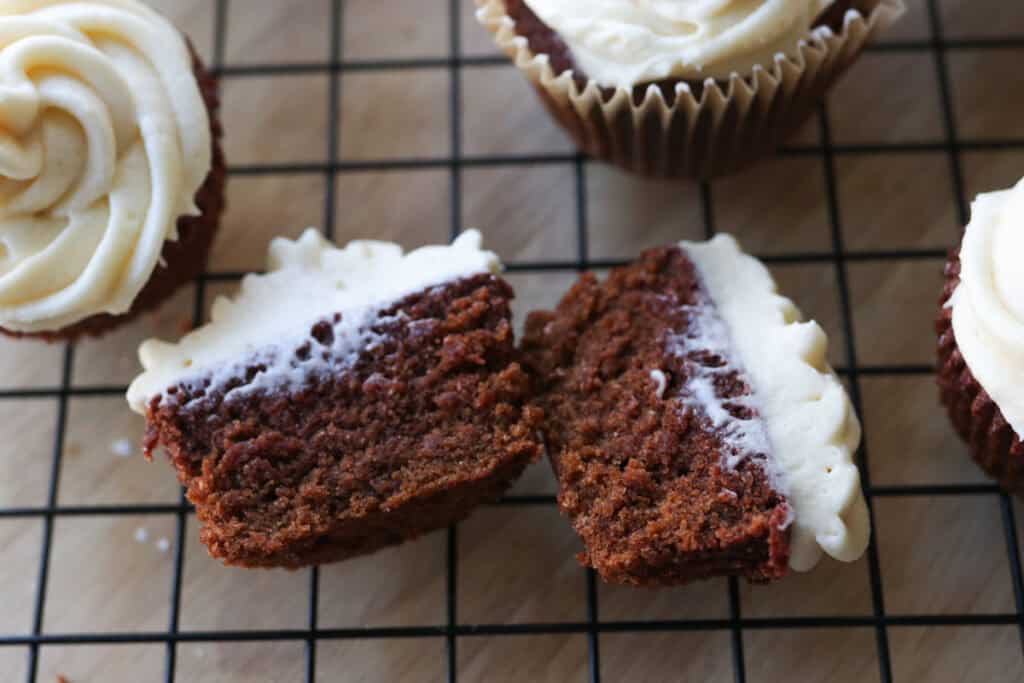
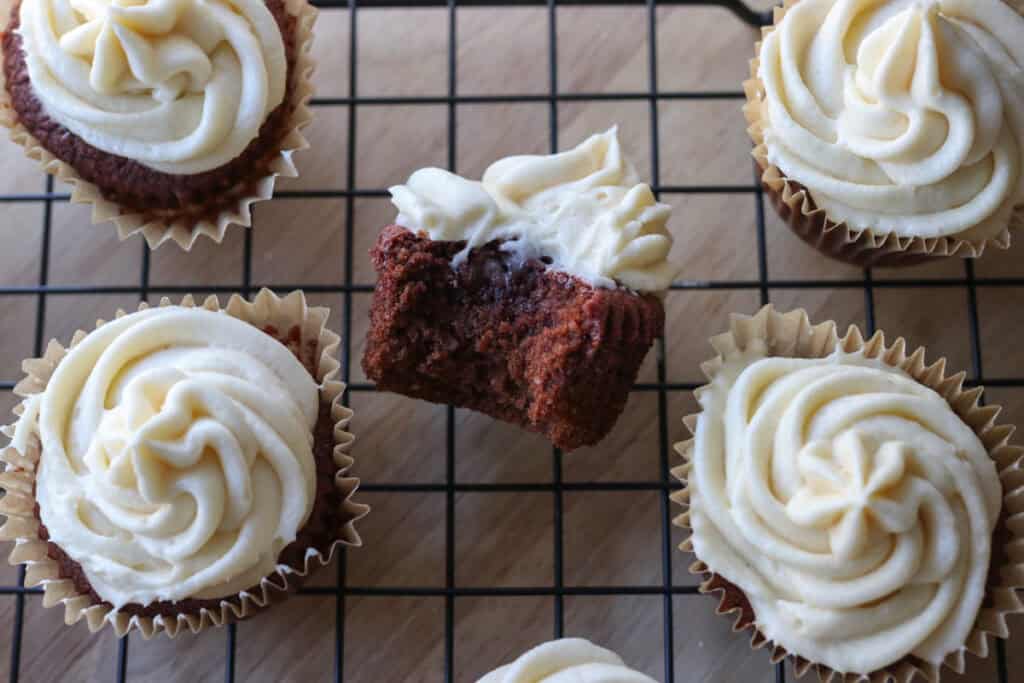
If you’re in the mood for a cupcake with a little extra charm, these freshly milled red velvet cupcakes with cream cheese frosting just might steal the show. There’s something special about using freshly milled flour—it brings a subtle nutty depth that you don’t get with store-bought flour. Pair that with the silky, tangy cream cheese frosting, and you’ve got yourself a delicious treat that feels both classic and a little adventurous. Plus, these cupcakes have a lovely, velvety texture that practically begs to be shared. Whether you’re baking for a special occasion or just a cozy afternoon, these cupcakes invite you to slow down, enjoy the process, and savor every bite.
What Makes This Recipe Great
Freshly milled flour magic.
Grinding your own flour may sound like a fancy step, but it adds a wonderfully fresh and earthy flavor that you’ll notice in every bite. It’s a little kitchen adventure that pays off with a texture that’s both tender and delightfully crumbly.
Homemade cream cheese frosting, elevated.
The frosting here isn’t just sweet; it’s got that perfect balance of tangy richness that complements the red velvet’s subtle cocoa notes beautifully. It’s smooth and luscious, creating an irresistible contrast with the cupcake’s soft crumb.
A recipe that feels homemade but special.
These cupcakes bridge that gap between everyday baking and a polished dessert worthy of celebrations. They are simple enough to make on a relaxed afternoon but elegant enough to impress guests or treat yourself after a long day.
Overview of Ingredients
Freshly Milled Flour
Using freshly milled flour is the secret ingredient here, giving these homemade red velvet cupcakes a fresh, nutty flavor you just can’t get from pre-packaged flour. If you don’t have a grain mill handy, you can substitute with high-quality cake flour or all-purpose flour, but the experience won’t be quite the same.
Cocoa Powder
This brings the subtle chocolate flavor that’s part of red velvet’s charm. Use natural unsweetened cocoa powder for authentic color and taste, though Dutch-processed can work if that’s what you have—just know the flavor will be a little different.
Buttermilk
Buttermilk’s acidity adds moisture and tender crumb to the cupcakes, plus it reacts beautifully with the baking soda for lift. If you’re out of buttermilk, make homemade buttermilk by mixing regular milk with half a teaspoon of lemon juice or vinegar and letting it sit for five minutes.
Cream Cheese
Cream cheese is the star of the frosting with its tangy, creamy richness. Go for full-fat cream cheese for the best texture and flavor. If needed, you can swap in mascarpone for a milder taste or a plant-based cream cheese for a dairy-free option.
Natural Food Coloring
Free from artificial food coloring or artificial dyes, these cupcakes get their classic, deep red color from a plant based food coloring.
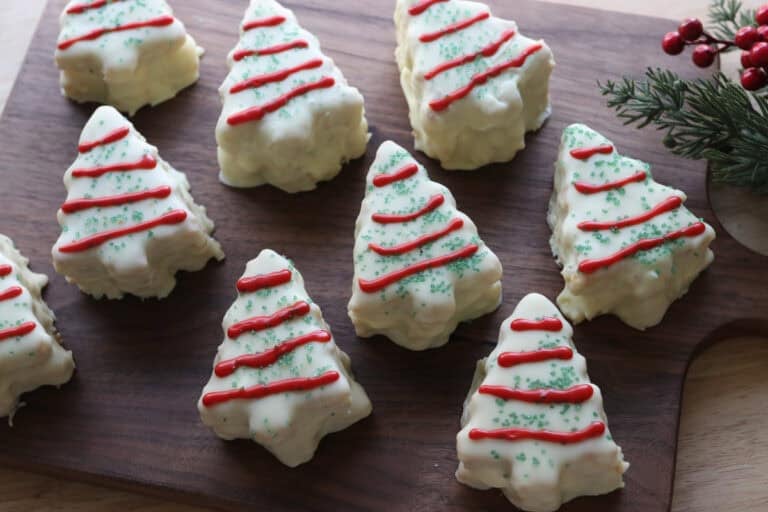
For more fresh milled desserts, be sure to try these delicious buckeye brownie cookies or these slice and bake chocolate chunk cookies!

Tips for Success
#1 Sift the flour and cocoa powder together
Sifting ensures there are no lumps and helps evenly distribute the cocoa throughout the batter. This little step keeps your cupcakes light and airy rather than dense or unevenly colored.
#2 Don’t overmix the batter
Once you add the wet ingredients to the dry, mix just until combined. Overmixing develops the flour’s gluten too much, leading to a tougher cupcake instead of a moist cupcake.
#3 Room temperature ingredients
Have your butter, eggs, and cream cheese at room temperature before starting. This helps everything blend smoothly and makes for a creamier frosting and more even cupcake texture.
#4 Use a piping bag for frosting
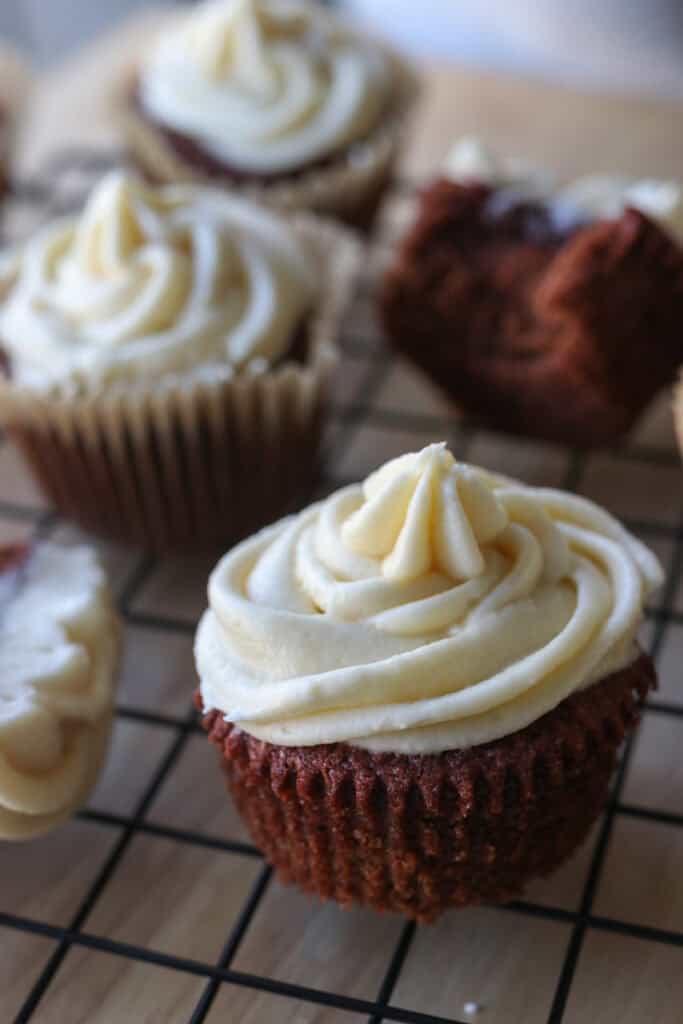
For that polished look, use a piping bag fitted with a star tip to frost your cupcakes. It turns a simple swirl into an inviting presentation and is easier than you might think.
#5 Chill the frosting slightly before piping
If your frosting feels too soft or runny, pop it in the fridge for about 15 minutes. It firms up just enough to hold its shape beautifully when piped.
Helpful Tools & Supplies
Whether you’re just dipping your toes into the world of fresh milled flour or you’re a seasoned home baker, I’ve taken the guesswork out of what you truly need. All of these tools and resources are available in my shop, designed to help your journey be smooth and nourishing:
Grain Mills
- NutriMill Classic Grain Mill – My go-to for fine, consistent milling; perfect for sandwich breads and everyday baking.
- NutriMill Harvest Grain Mill – Stone-ground elegance: this model delivers whole-grain flavor with a beautiful appearance.
Mixers
- Ankarsrum Mixer – A powerhouse kitchen companion with multiple speeds and attachments—ideal for kneading bread dough effortlessly.
Baking & Bread Tools
- Bread Bow Knife – Artisan-made with a high-carbon steel blade and cherry wood handle—this knife slices loaves with ease.
- Sourdough Essentials Kit With Starter – Complete starter kit that includes dehydrated sourdough starter, banneton baskets, a dough whisk, scoring lame, and more.
Cookbooks & eBook Bundles
- Everyday Whole Grains Vol. 1 & 2 (printed & digital) – Packed with 70+ recipes built around fresh milled flour, from breads to snacks and desserts.
- The Fresh Breads Bundle – A comprehensive set including eBooks like The Perfect Loaf, the Cookie Jar, bulk baking guides, and a sourdough mini‑course—all centered on fresh milled flour.
- Freshly Milled Made Simple Guide – A video-based guide that walks you through milling and baking basics, making the process feel easy and approachable.
Specialty Items
- Dehydrated Sourdough Starter – Just add water and flour to rehydrate this starter—perfect for bakers without an active sourdough culture.
- I Knead Fresh Flour Mug – A charming, handmade 12 oz ceramic mug—great for coffee breaks during dough rising!
Why These Are Worth It
Every tool in this collection has been personally vetted to support you in baking with fresh milled flour. From the grain mills that make your flour, to mixers that knead dough, to resources that teach you every step—it’s all here to make sure your homemade bread journey is joyful, nourishing, and successful.
➡️ Explore all of these items and more in the Generation Acres Farm Shop — your one-stop spot for fresh milled flour baking essentials.
Equipment:
Cupcake Pans
Cupcake Liners
Large Mixing Bowl
Stand Mixer or Hand Mixer
Measuring Cups and Spoons
Rubber Spatula
Piping Bag with Star Tip (optional)
How to Make Freshly Milled Red Velvet Cupcakes
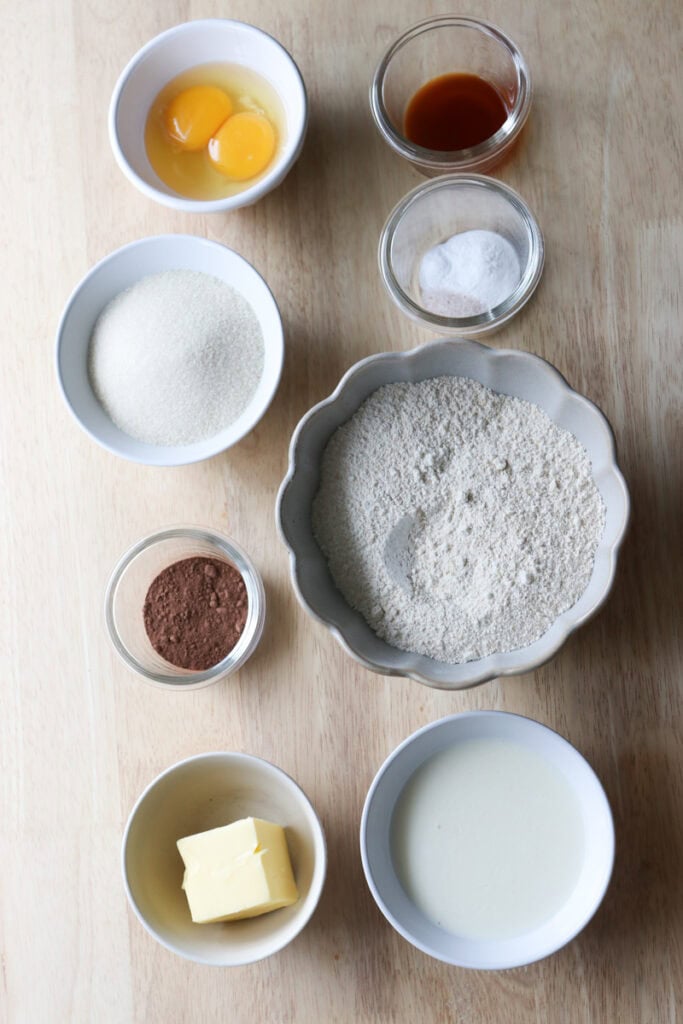
Ingredients
Cupcake Batter:
- 5 tablespoons softened butter
- ⅔ cup sugar (140 grams)
- 1 egg yolk
- 1 egg
- 1 teaspoon vanilla extract
- ½ cup buttermilk (122 grams)
- 1 ¾ cups freshly milled soft white wheat flour, finely milled (173 grams)
- 2 tablespoons cocoa powder
- 1 teaspoon baking powder
- ⅛ teaspoon baking soda
- ¼ teaspoon salt
- 10-20 drops plant-based, natural red food coloring
Icing:
- ½ cup softened butter (115 grams)
- 4 ounces softened cream cheese (113 grams)
- ½ teaspoon vanilla extract
- 1 ¾ cups powdered sugar (175 grams)
Directions:
- Preheat the oven to 350 degrees F. and line a cupcake pan with liners.
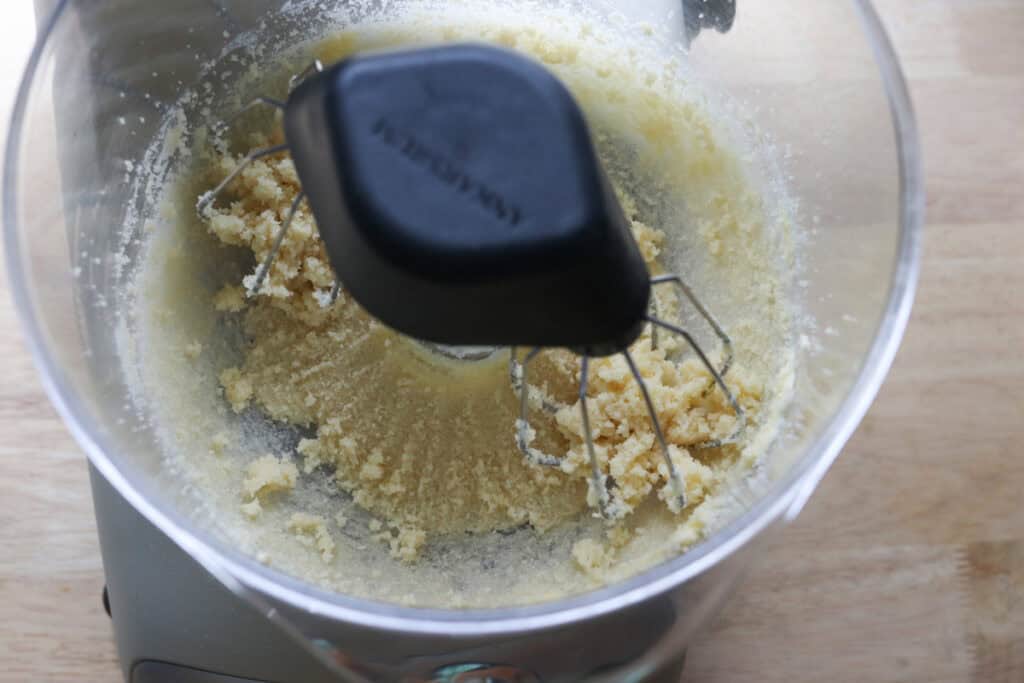
- In a mixing bowl, cream the butter and sugar with the paddle attachment.
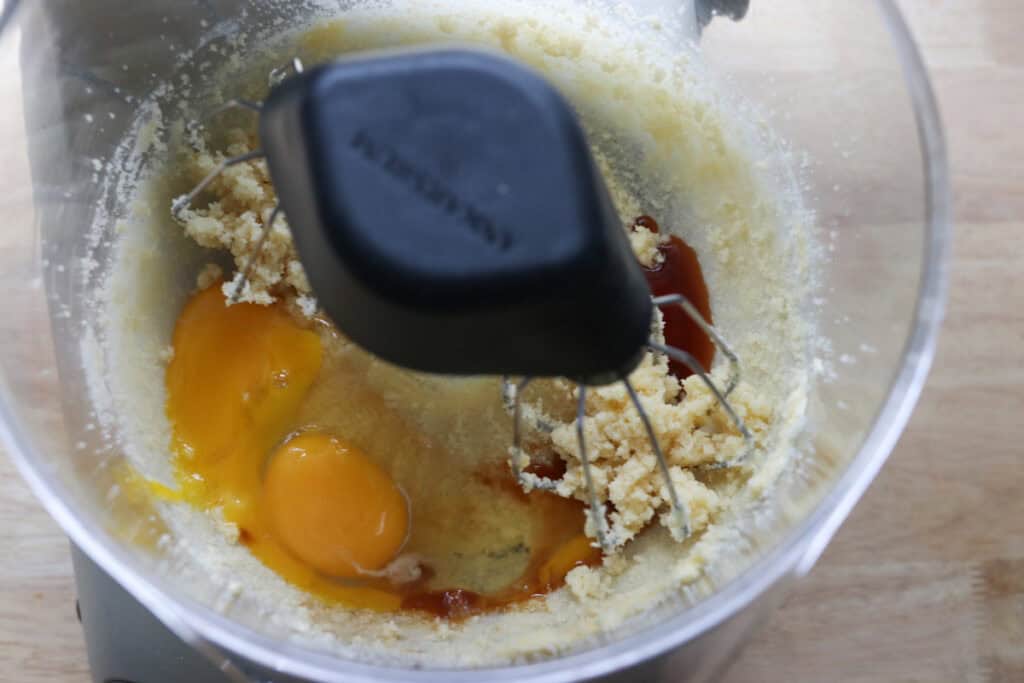
- Add the eggs and vanilla and beat for several minutes, until fluffy and lighter in color.
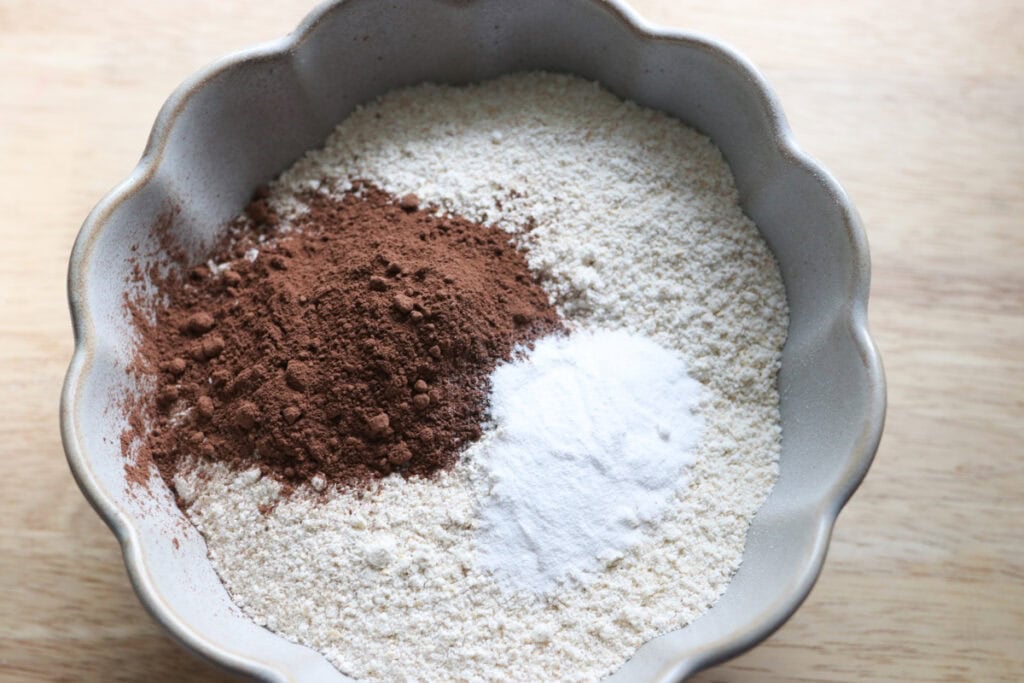
- In a separate bowl, combine the dry ingredients.
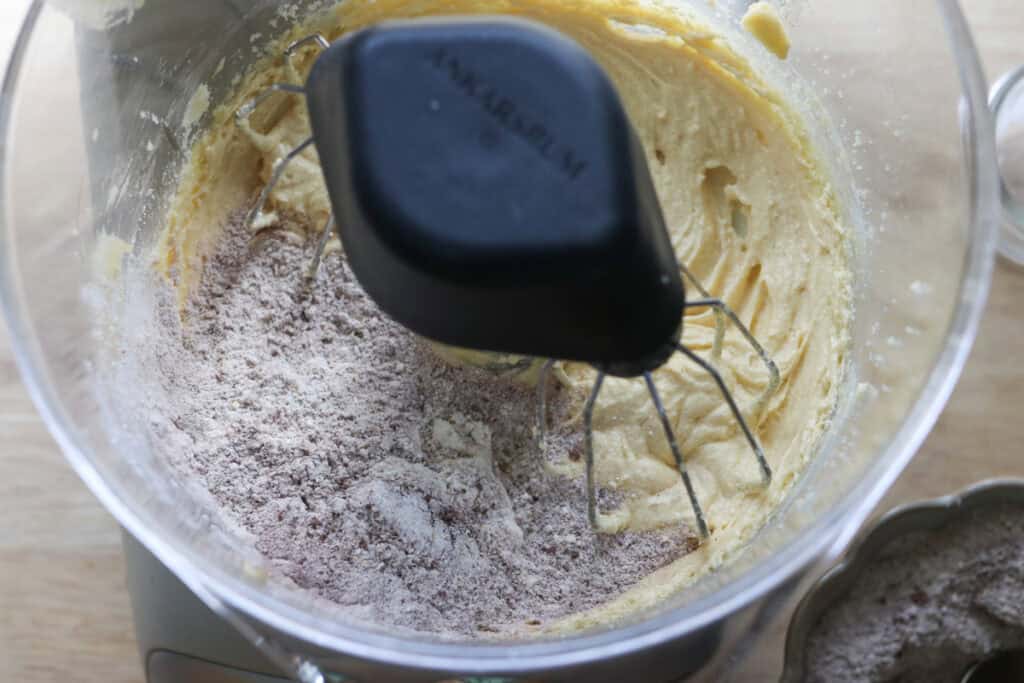
- Add half of the flour mixture to the mixing bowl and combine.

- Add half of the buttermilk to the batter and combine.
- Add the remaining dry ingredients and mix, then add the remaining buttermilk and mix until just combined.
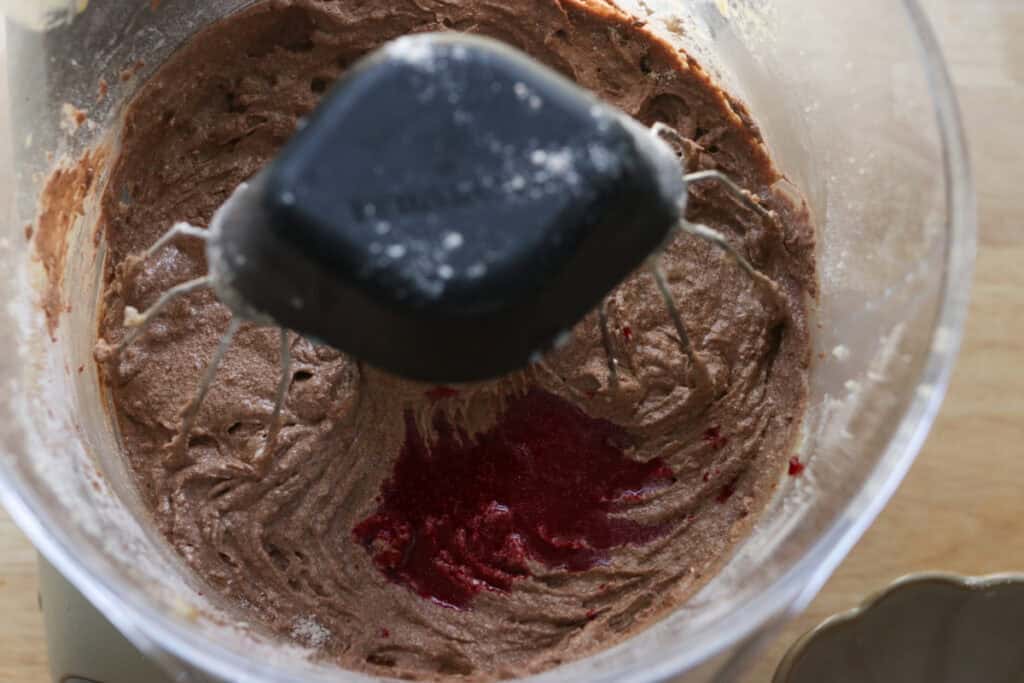
- Gently mix in the food coloring until you reach your preferred color.
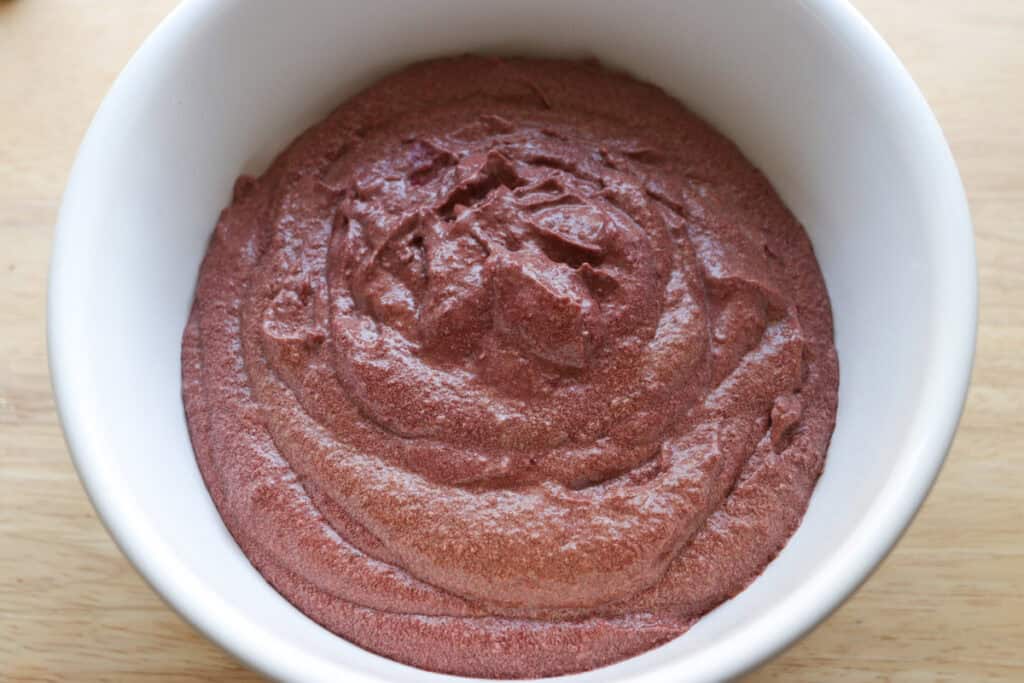
- Spoon batter into the cupcake pan.
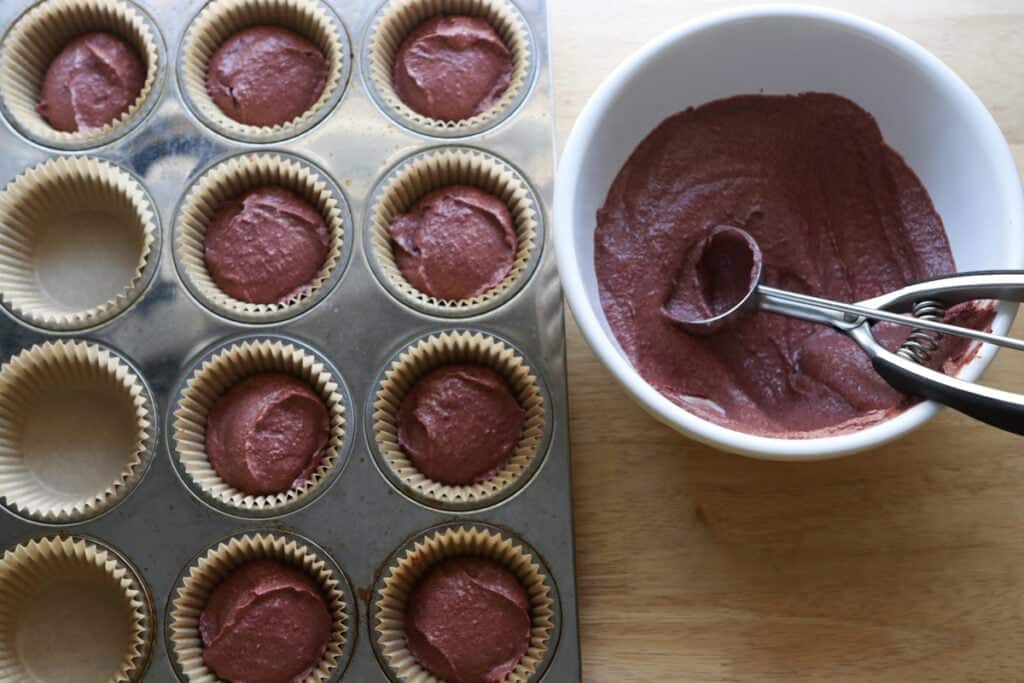
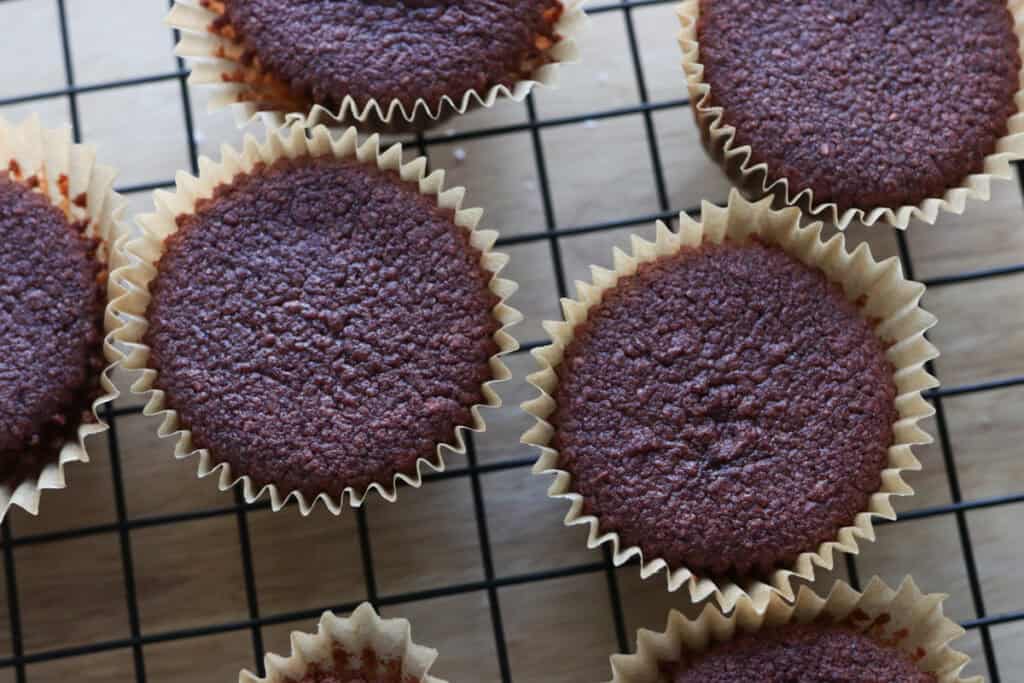
- Bake for 18-20 minutes, until a toothpick inserted in the middle comes out clean.


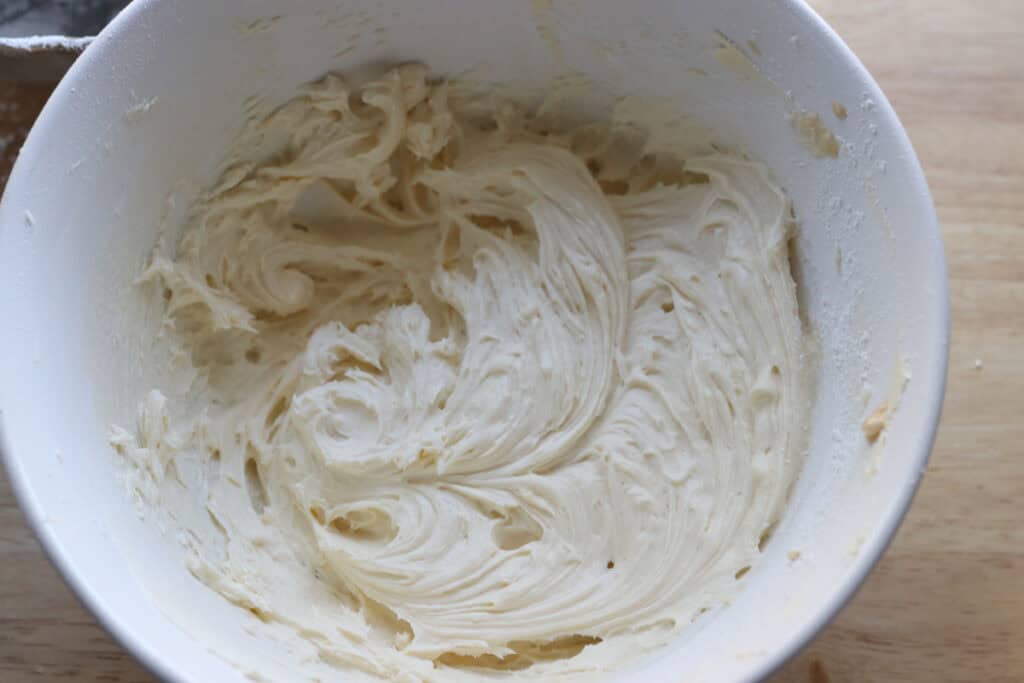
- For the icing, beat the butter and cream cheese until smooth. Add the vanilla and powdered sugar and beat until fluffy.
- Let the cupcakes cool on a wire rack then ice as desired.
Recipe Variations
Nutty Twist:
Add finely chopped toasted pecans or walnuts to the batter or sprinkle them on top of the frosting for a lovely crunch.
Spice it Up:
Try adding a teaspoon of cinnamon or a dash of cayenne pepper to the batter for a warming twist on the classic red velvet flavor.
Vegan Version:
Use plant-based cream cheese and substitute flax eggs (1 tablespoon ground flaxseed mixed with 3 tablespoons water) for the eggs. Use a good quality non-dairy milk in place of buttermilk.
Mini Cupcakes:
Make bite-sized versions using mini cupcake liners for party-friendly, easy-to-eat treats.
Decorate with Fresh Berries:
Top each cupcake with a raspberry or sprinkle of blueberries for an inviting pop of color and a fresh contrast to the creamy frosting.
Troubleshooting Common Problems with this Recipe
Cupcakes Are Dense or Heavy
Make sure to avoid over-mixing the batter. Double-check that your baking soda and baking powder are fresh to ensure proper rise.
Frosting is Too Runny
If your cream cheese frosting is too soft, try chilling it in the refrigerator for a bit before using. Also, gradually add powdered sugar to help thicken it up without making it overly sweet.
Cupcakes Are Dry
Use the correct ratio of wet to dry ingredients and don’t overbake. Check cupcakes a couple of minutes before the recipe’s baking time is up to avoid drying out that tender crumb.
Color Is Faint
Red velvet can sometimes be a bit shy on the red color. Add a few extra drops of food coloring if you want a more vibrant appearance.
Frosting Cracks or Doesn’t Spread Smoothly
Ensure the cream cheese and butter are softened to room temperature before mixing. If the frosting feels stiff, add a teaspoon of milk to loosen it slightly.
Freezing & Storing Leftovers
Freezing:
Once cooled, store cupcakes in an airtight container and freeze for up to 2 months. To enjoy, thaw overnight in the refrigerator and bring to room temperature before frosting. I wouldn’t recommend freezing the frosting.
Storing:
Keep unfrosted cupcakes in an airtight container at room temperature for up to 2 days. Frosted cupcakes are best stored in the refrigerator for 3-4 days due to the cream cheese frosting. Let them come to room temperature before serving.
Extra FAQs
Can I use pre-milled flour instead of freshly milled?
Absolutely, though the flavor won’t be as vibrant or nuanced. Just make sure your flour is fresh and hasn’t been sitting open for a long time.
What’s the best way to store leftover frosting?
Keep it in an airtight container in the fridge for up to a week. Give it a quick stir or re-whip before using.
Can I make these cupcakes gluten-free?
You can try substituting the flour with a gluten-free baking mix, but the texture will differ from the traditional recipe. Experiment with binding agents like xanthan gum for best results.
How do I prevent cupcakes from cracking or doming too much?
Bake at the right temperature and avoid opening the oven door too often. Also, don’t overfill the cupcake liners to allow room for even rising.
Can I prepare the batter ahead of time?
You can make the batter and refrigerate it for up to 24 hours before baking. Just give it a gentle stir before scooping to refresh the mixture.

Freshly Milled Red Velvet Cupcakes with Frosting
Ingredients
Cupcake Batter:
- 5 tablespoons softened butter
- ⅔ cup sugar 140 grams
- 1 egg yolk
- 1 egg
- 1 teaspoon vanilla extract
- ½ cup buttermilk 122 grams
- 1 ¾ cups freshly milled soft white wheat flour finely milled (173 grams)
- 2 tablespoons cocoa powder
- 1 teaspoon baking powder
- ⅛ teaspoon baking soda
- ¼ teaspoon salt
- 10-20 drops plant-based natural red food coloring
Icing:
- ½ cup softened butter 115 grams
- 4 ounces softened cream cheese 113 grams
- ½ teaspoon vanilla extract
- 1 ¾ cups powdered sugar 175 grams
Instructions
- Preheat the oven to 350 degrees F. and line a cupcake pan with liners.
- In a mixing bowl, cream the butter and sugar with the paddle attachment.
- Add the eggs and vanilla and beat for several minutes, until fluffy and lighter in color.
- In a separate bowl, combine the dry ingredients.
- Add half of the flour mixture to the mixing bowl and combine.
- Add half of the buttermilk to the batter and combine.
- Add the remaining dry ingredients and mix, then add the remaining buttermilk and mix until just combined.
- Gently mix in the food coloring until you reach your preferred color.
- Spoon batter into the cupcake pan.
- Bake for 18-20 minutes, until a toothpick inserted in the middle comes out clean.
- For the icing, beat the butter and cream cheese until smooth. Add the vanilla and powdered sugar and beat until fluffy.
- Let the cupcakes cool on a wire rack then ice as desired.