
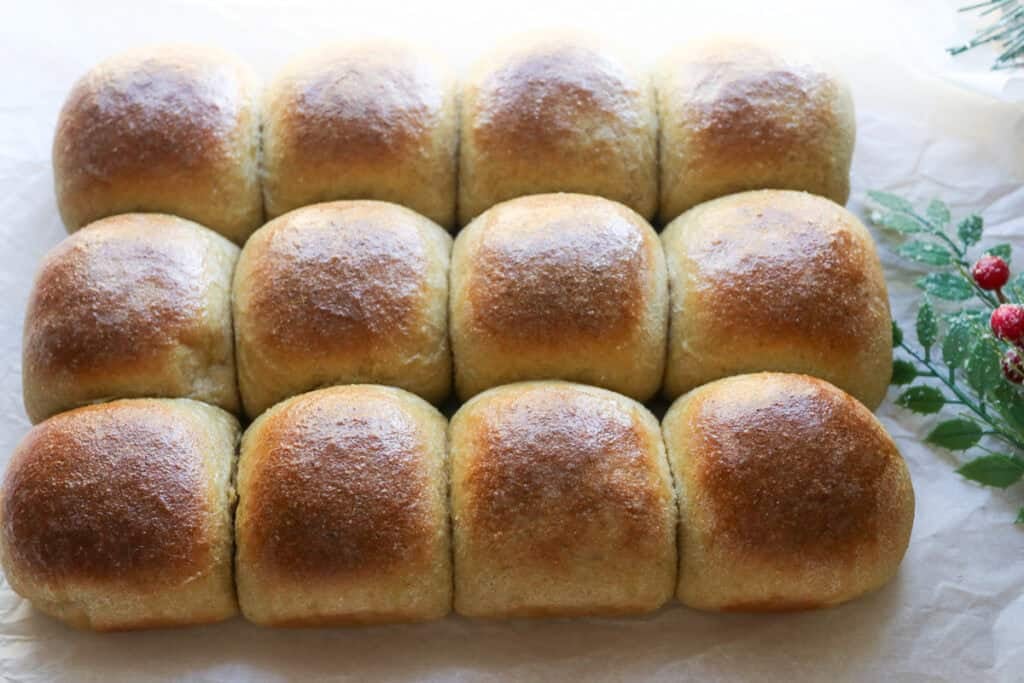
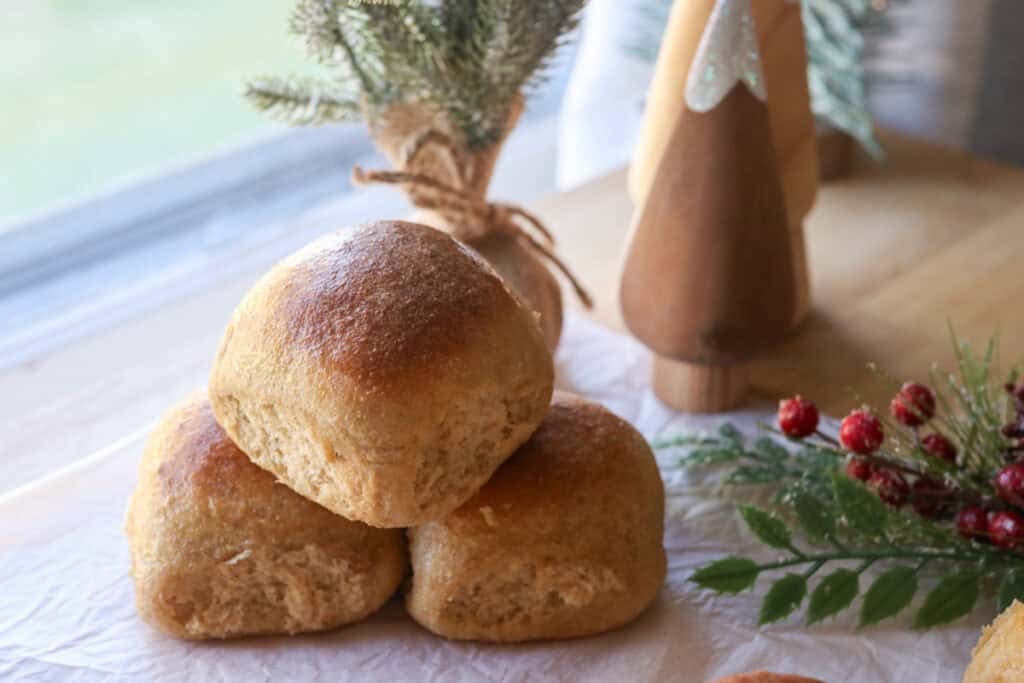
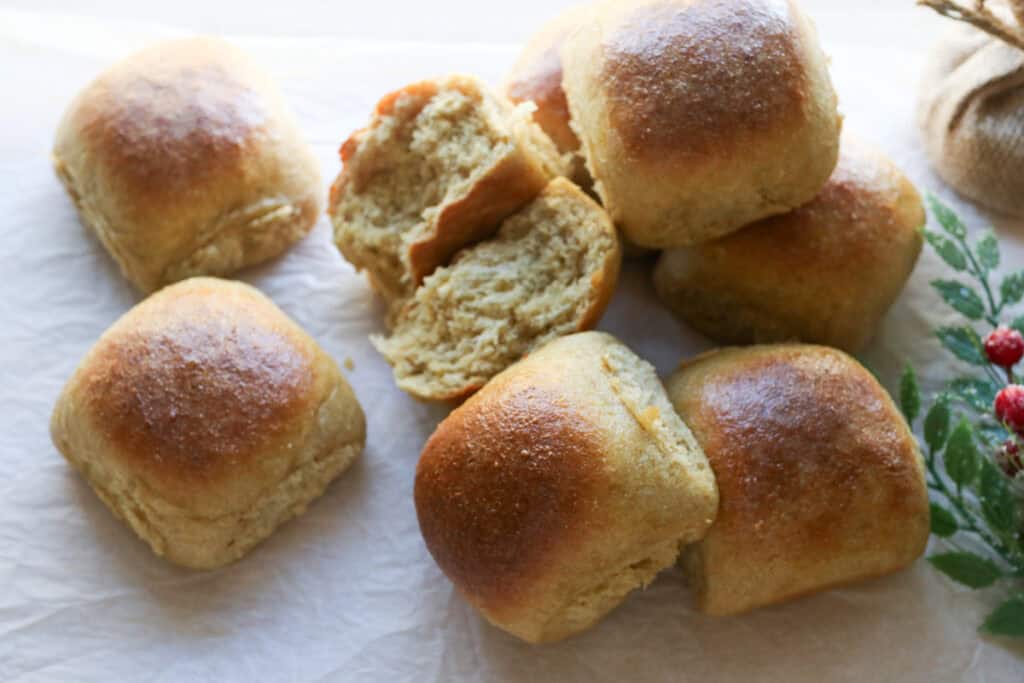
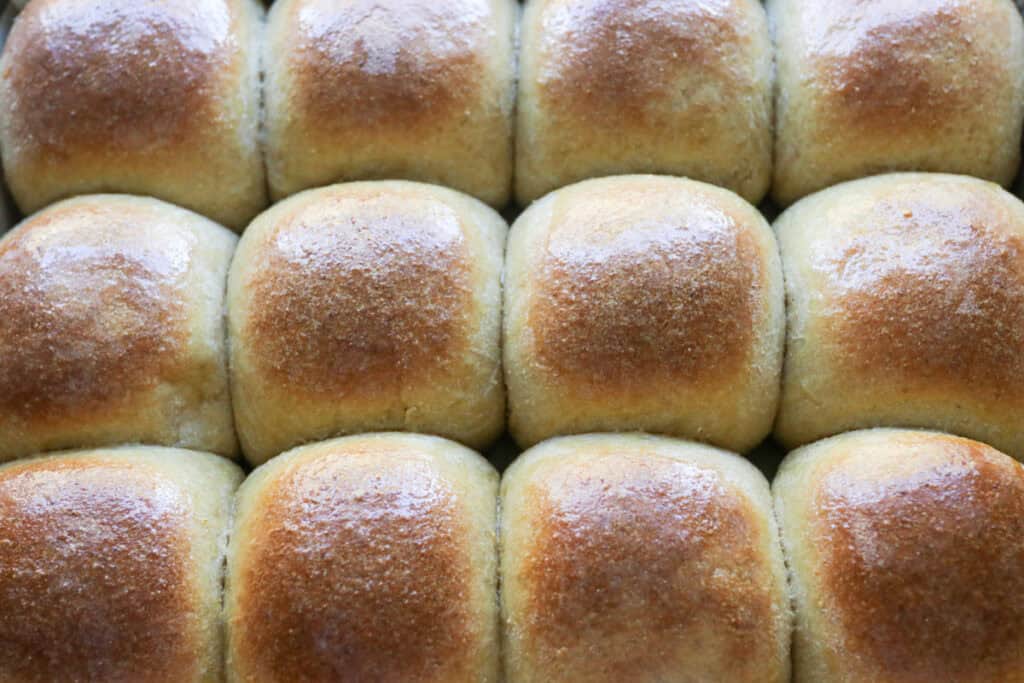
Fluffy Christmas Dinner Rolls with Fresh Milled Flour
This post may contain affiliate links. Please read our Disclosure Policy.
There’s just something magical about pulling a tray of soft, golden dinner rolls from the oven on Christmas Day — especially when they’re made with fresh flour instead of store-bought flour. These fresh milled dinner rolls rise beautifully, bake up fluffy and light, and fill your kitchen with that unmistakable homemade aroma. Whether you’re making them for a special holiday meal or a cozy Sunday dinner, shaping each roll feels like a labor of love that always ends in great success. For the best results, follow this recipe closely and get ready to serve up the most irresistible, buttery rolls your family has ever tasted.
What Makes This Recipe Great
Fresh Milled Flour Magic.
Using freshly milled flour means these rolls have a depth of flavor and a fluffy texture that’s hard to beat. It captures the essence of homemade bread in every bite, offering a nuttier, more complex taste than your average flour.
Perfect Fluffy Dinner Rolls.
The dough is just the right balance of airy and soft, rising to become light rolls that hold their shape beautifully. They’re soft but sturdy enough to pair with any meal, making them an excellent companion for your Christmas dinner spread.
Beginner Friendly with a Twist.
Even if fresh milled flour sounds intimidating, this recipe keeps the process straightforward and doable. Plus, the satisfaction of making something a little different adds an extra layer of holiday joy in the kitchen.
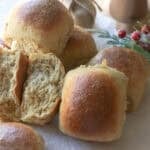
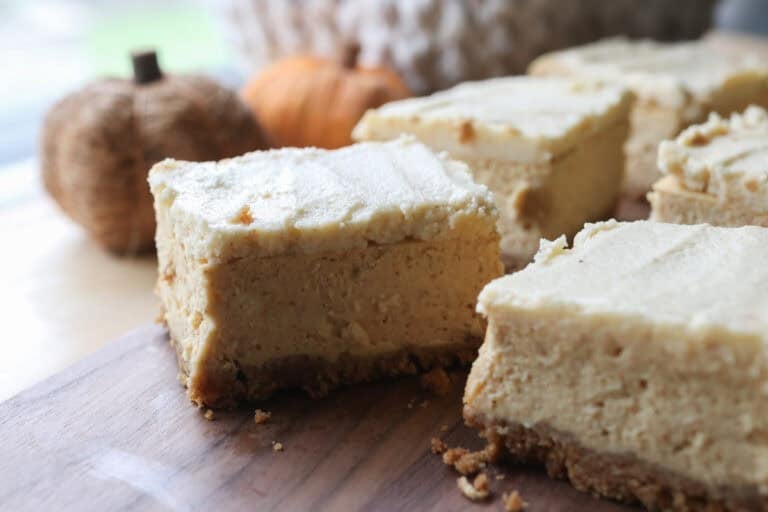
For more holiday recipes, try these Gingerbread Cheesecake Cups or this Cinnamon Sugar Star Bread!
Overview of Ingredients
Fresh Milled Flour
Fresh milled flour is the star ingredient giving these fluffy rolls their signature flavor and texture. If you don’t have a home mill, feel free to substitute with a high-quality all-purpose or bread flour, although the rolls may be slightly less flavorful.
Yeast
Active dry yeast helps the dough rise to that perfect fluffy texture. If you’re out of it, instant yeast can be swapped in with no major issues, just reduce the proofing time slightly since it acts faster.
Milk
Whole milk lends creaminess and tenderness to the dough, but you can swap it with lower-fat milk or even non-dairy milk like almond or oat for a vegan twist. Warm water can also be a substitute.
Butter
Butter enriches the dough adding a subtle richness and soft crumb. Margarine or a mild vegetable oil can stand in as substitutions if dairy isn’t your thing.
Sugar
A bit of sugar feeds the yeast and adds just a hint of sweetness to balance the flavors. Honey or maple syrup can be swapped in for a more unique flavor profile.
Salt
Salt is essential to bring out the flavors and control yeast growth. Sea salt or kosher salt will work just as well.
Tips for Success
#1 Measure Flour Carefully
Flour measurement can make or break your rolls. Use a kitchen scale if you can, or fluff your flour, scoop lightly, and level off with a knife to avoid dense dough that’s too heavy.
#2 Warm the Milk, Not Hot
When warming your milk, aim for a cozy temperature around 100-110°F. Too hot can kill the yeast, too cold can slow down the rising, so trust your thermometer or test the temperature on your wrist.
#3 Give the Dough Time
Patience pays off—let your dough rise until it has doubled, usually about an hour in a warm spot. Rushing this step may result in less airy rolls.
#4 Don’t Overwork the Dough
Knead just until the dough is smooth and elastic. Over-kneading can lead to a tougher texture, and that’s not what we want for our tender rolls.
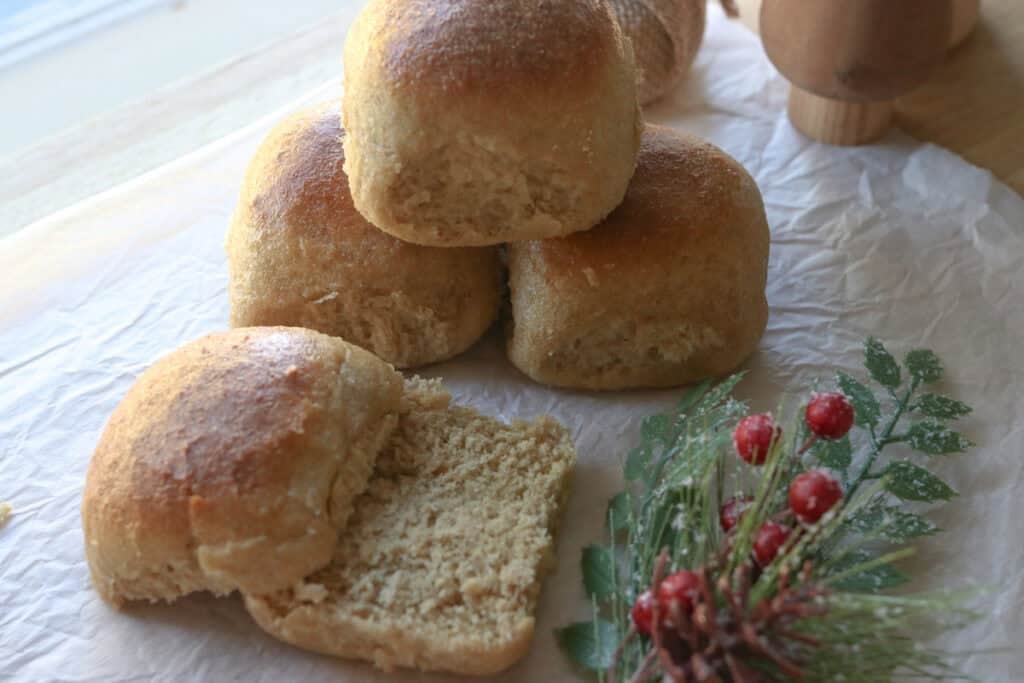
#5 Brush with Butter Right After Baking
Brushing the tops of the rolls with melted butter as soon as they come out of the oven gives them a lovely shine and extra soft crust, elevating the overall experience.
Helpful Tools & Supplies
Whether you’re just dipping your toes into the world of fresh milled flour or you’re a seasoned home baker, I’ve taken the guesswork out of what you truly need. All of these tools and resources are available in my shop, designed to help your journey be smooth and nourishing:
Grain Mills
- NutriMill Classic Grain Mill – My go-to for fine, consistent milling; perfect for sandwich breads and everyday baking.
- NutriMill Harvest Grain Mill – Stone-ground elegance: this model delivers whole-grain flavor with a beautiful appearance.
Mixers
- Ankarsrum Mixer – A powerhouse kitchen companion with multiple speeds and attachments—ideal for kneading bread dough effortlessly.
Baking & Bread Tools
- Bread Bow Knife – Artisan-made with a high-carbon steel blade and cherry wood handle—this knife slices loaves with ease.
- Sourdough Essentials Kit With Starter – Complete starter kit that includes dehydrated sourdough starter, banneton baskets, a dough whisk, scoring lame, and more.
Cookbooks & eBook Bundles
- Everyday Whole Grains Vol. 1 & 2 (printed & digital) – Packed with 70+ recipes built around fresh milled flour, from breads to snacks and desserts.
- The Fresh Breads Bundle – A comprehensive set including eBooks like The Perfect Loaf, the Cookie Jar, bulk baking guides, and a sourdough mini‑course—all centered on fresh milled flour.
- Freshly Milled Made Simple Guide – A video-based guide that walks you through milling and baking basics, making the process feel easy and approachable.
Specialty Items
- Dehydrated Sourdough Starter – Just add water and flour to rehydrate this starter—perfect for bakers without an active sourdough culture.
- I Knead Fresh Flour Mug – A charming, handmade 12 oz ceramic mug—great for coffee breaks during dough rising!
Why These Are Worth It
Every tool in this collection has been personally vetted to support you in baking with fresh milled flour. From the grain mills that make your flour, to mixers that knead dough, to resources that teach you every step—it’s all here to make sure your homemade bread journey is joyful, nourishing, and successful.
➡️ Explore all of these items and more in the Generation Acres Farm Shop — your one-stop spot for fresh milled flour baking essentials.
Equipment:
Mixing Bowls
Measuring Cups and Spoons
Kitchen Scale (optional but recommended)
Dough Hook or Wooden Spoon
Baking Sheet or Round Pan
Bench Scraper
Wire Rack
How to Make Fluffy Christmas Dinner Rolls with Fresh Milled Flour
Ingredients:
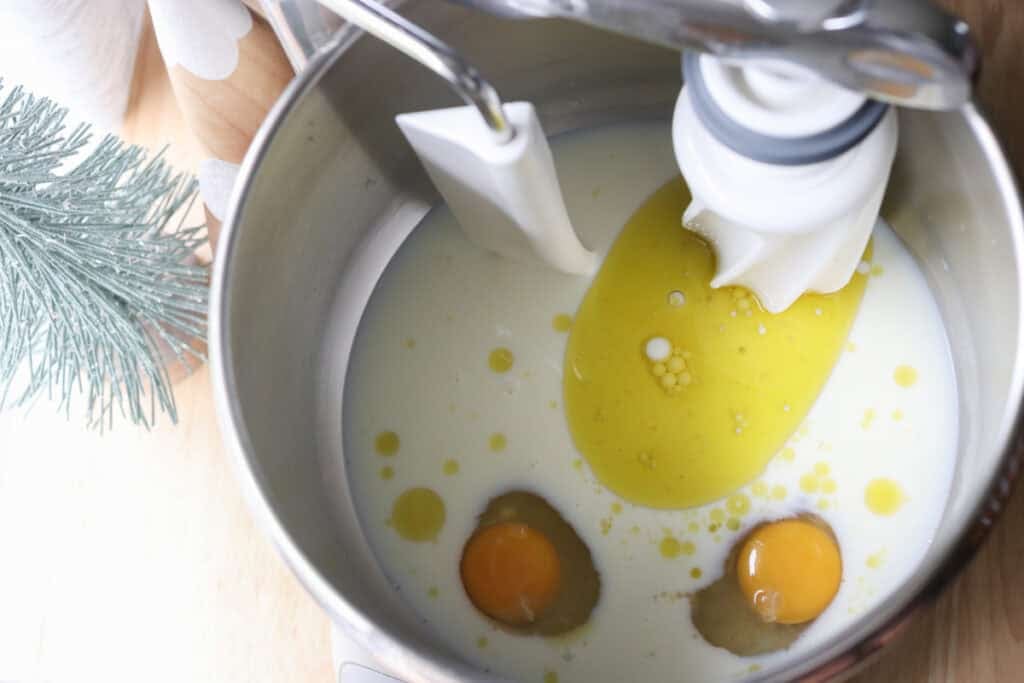
- 1 ⅓ cups warm milk (332 grams)
- 2 eggs
- 4 tablespoons honey
- 2 tablespoons oil
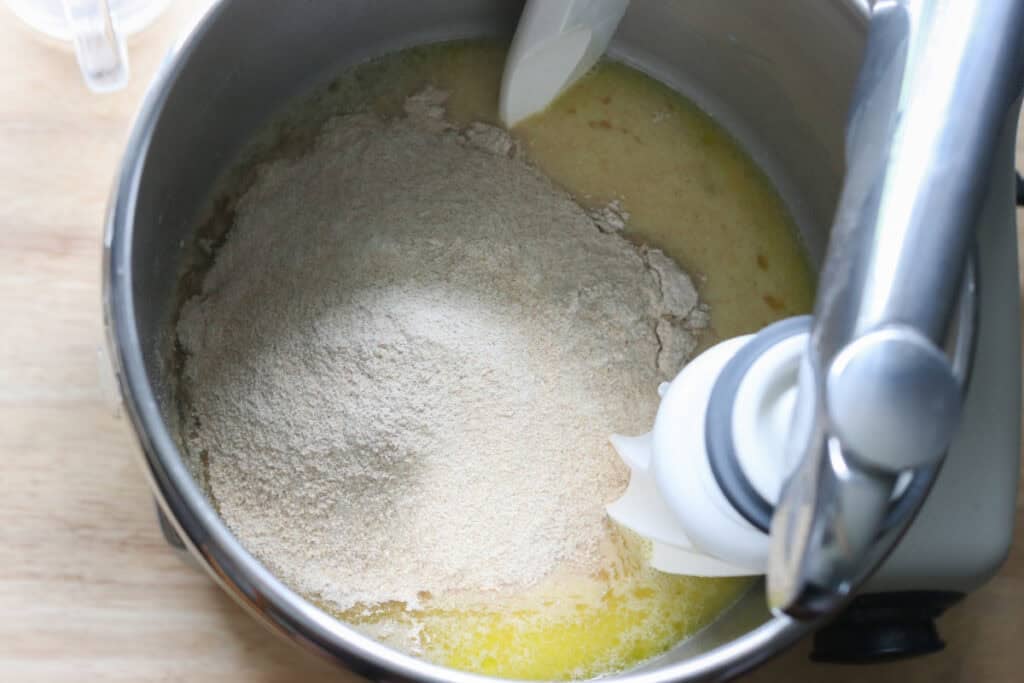
- 4 ¼ – 4 ½ cups freshly milled hard white wheat flour, finely milled (553-618 grams)
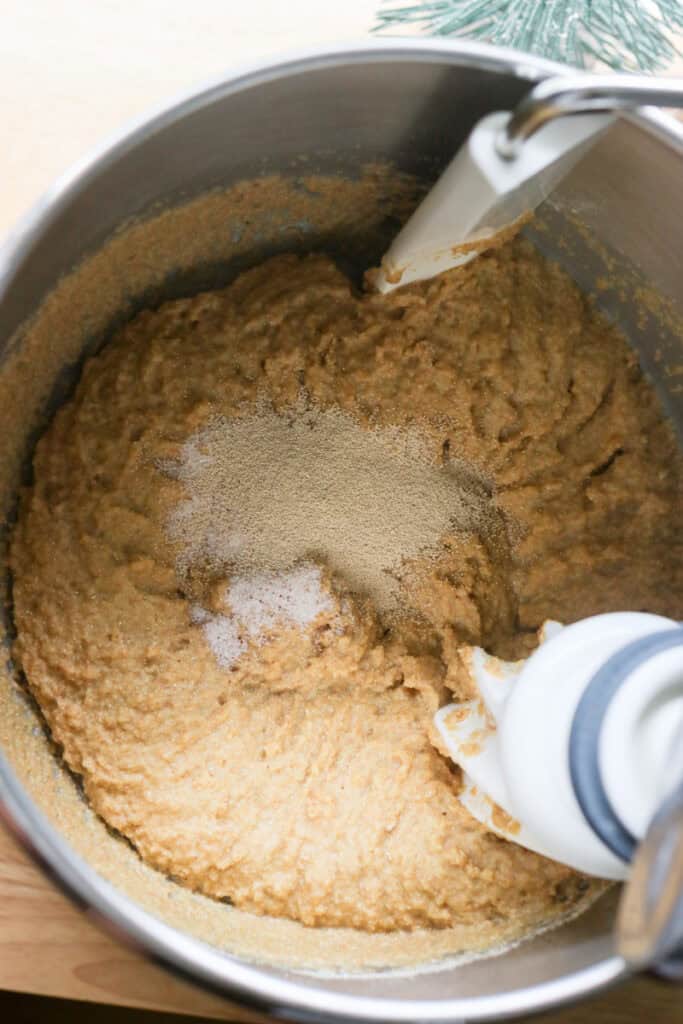
- 2 ½ teaspoon salt
- 2 ½ teaspoons instant yeast
Directions:
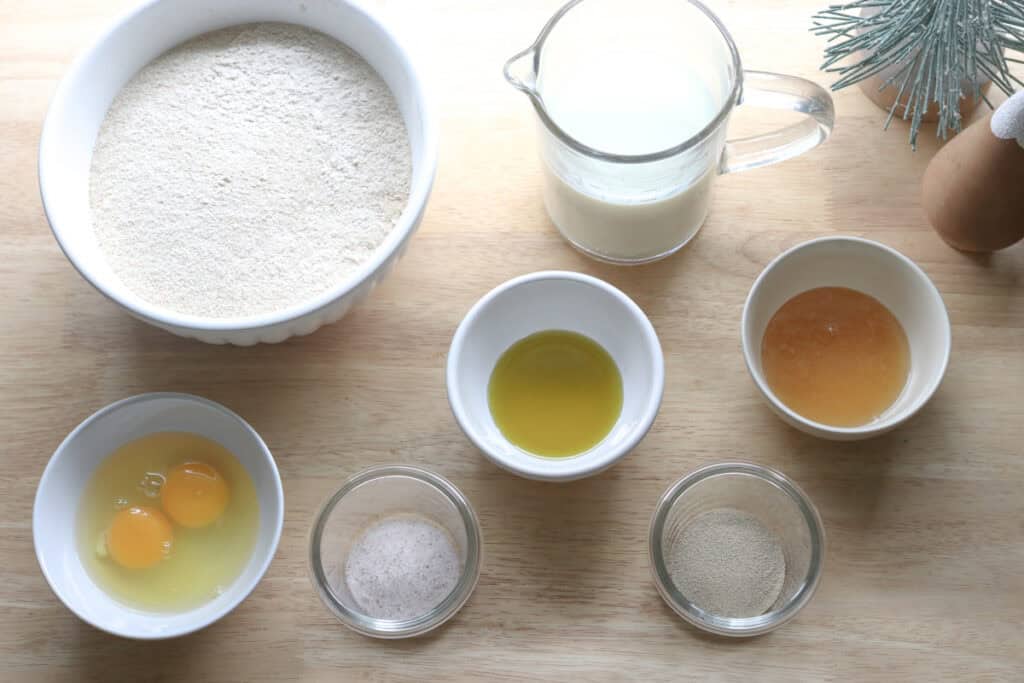
- In the bowl of a stand mixer combine the milk, eggs, honey, and oil.
- Add 3 ½ cups of flour, combine, and rest for 15 minutes.
- After the rest, add the yeast, salt, and the remaining flour ½ a cup at a time, until it starts pulling away from the sides of the bowl. The dough should come together, but still be a somewhat sticky dough. Be careful not to add too much flour.
- Knead for 8-12 minutes with the dough hook attachment, until windowpane is reached.
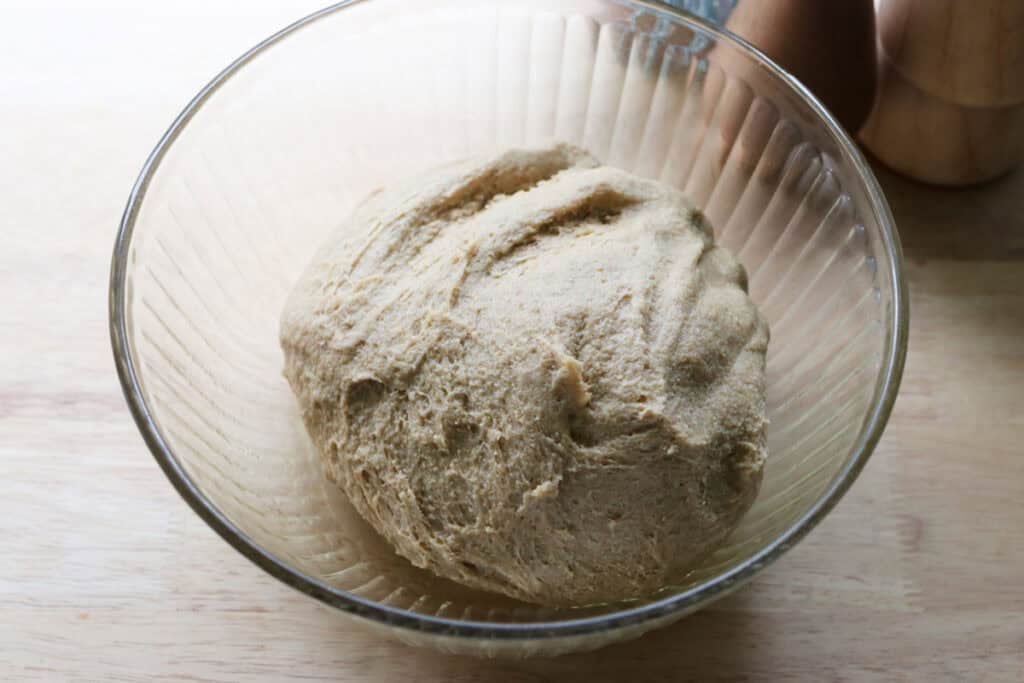

- Cover and place dough in a warm place to rise until doubled in size, about 1 hour.
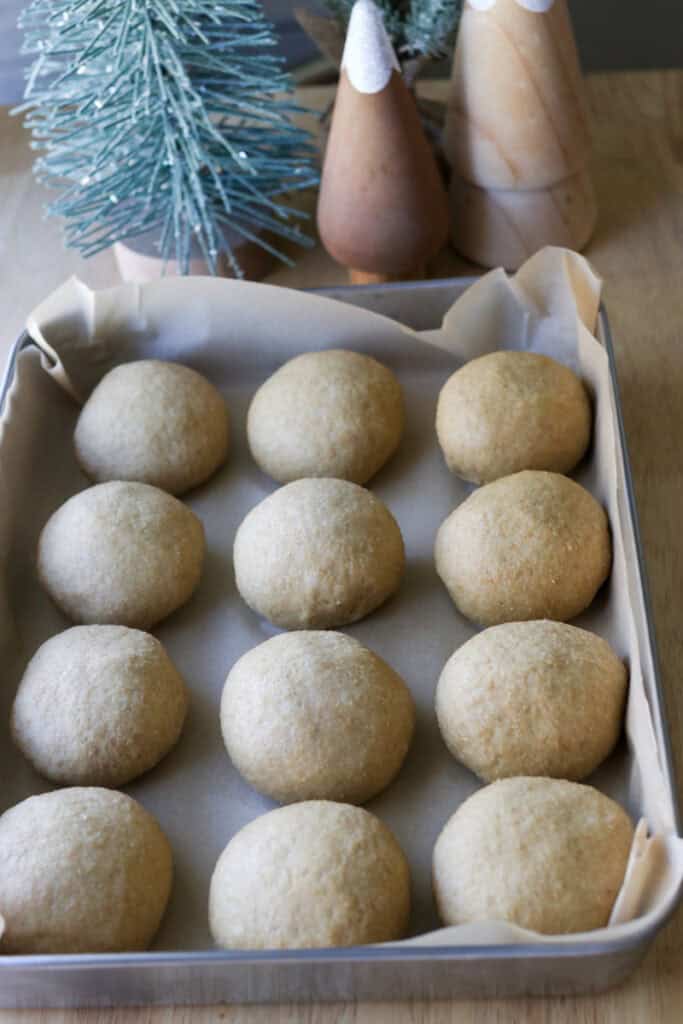
- Once risen, turn out onto a lightly floured or oiled work surface and divide dough into 12 equal pieces. Shape into balls.
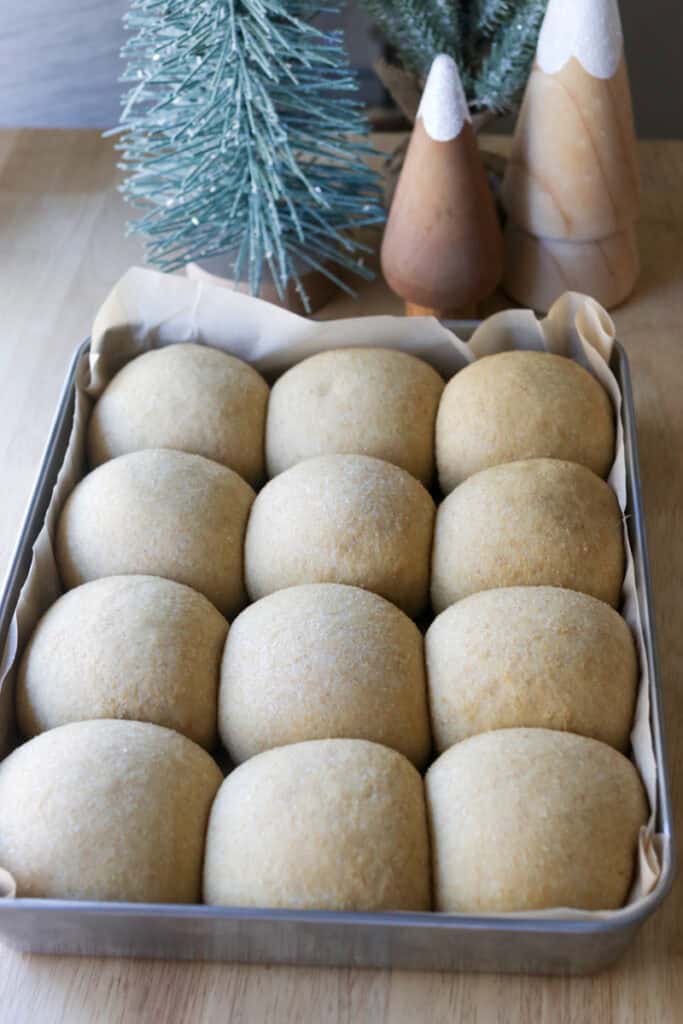
- Place the shaped rolls in a greased or parchment lined 9×13 inch baking dish. Cover and allow for a second rise until doubled, about 1 hour.
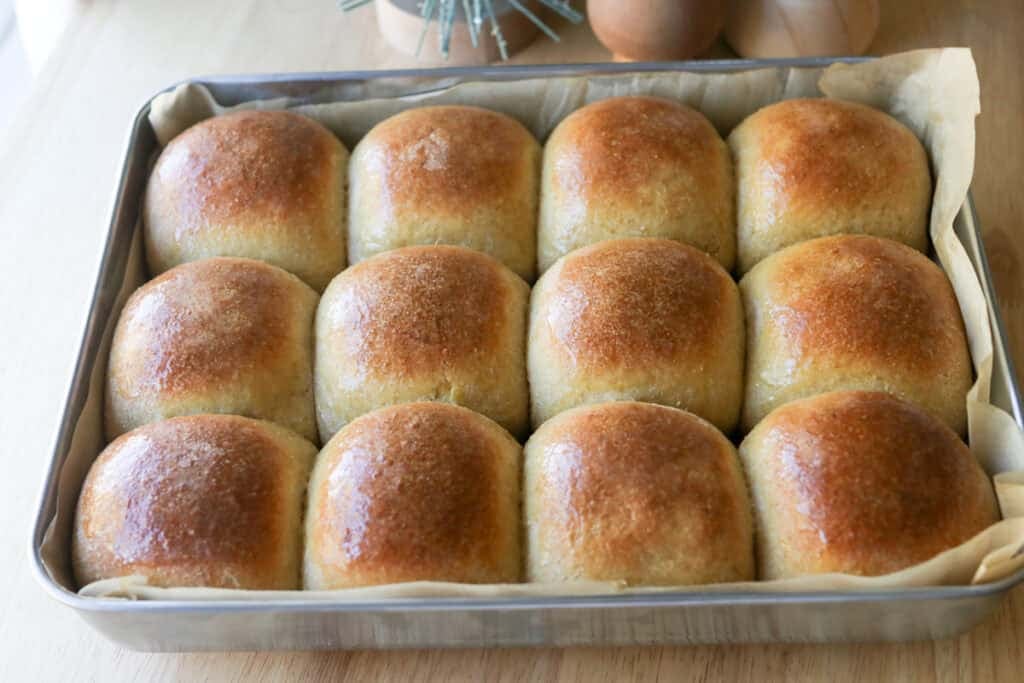
- Preheat the oven to 375 degrees F.
- Bake for 18-24 minutes, until they start to turn golden brown.
Recipe Variations
Herb-Infused Rolls
Add fresh or dried herbs like rosemary, thyme, or sage to the dough for a festive twist that pairs well with holiday meals.
Sweet Rolls
Sprinkle cinnamon and a touch of nutmeg into the dough for a sweet variation, perfect on their own or with a pat of honey butter.
Gluten-Free Option
Use a gluten-free baking blend in place of the flour and adjust liquids as needed. Keep in mind the texture will differ but can still be delicious.
Cheese-Stuffed Rolls
For a surprise twist, place a small cube of cheese in the center of each dough ball before baking for melty goodness inside.
Troubleshooting Common Problems with this Recipe
Dense or Heavy Rolls
This often happens if the flour was packed down or too much was used. Measure flour carefully and allow the dough to rise fully for the best texture. This can also happen due to not enough or too much kneading. Be sure to do the windowpane test to ensure proper kneading.
Dough Doesn’t Rise
Yeast temperature or activity may be to blame. Ensure milk is warm but not hot, and your yeast is fresh and proofed properly.
Rolls Are Too Dry
Try not baking too long. Brushing immediately with butter after baking also helps keep them moist.
Crust Too Hard or Thick
If crust feels too tough, reduce baking time slightly and cover rolls with foil once they reach a golden color to soften the crust.
Uneven Baking
Make sure rolls are spaced evenly on the baking sheet to allow proper air circulation and consistent cooking.
Freezing & Storing Leftovers
Freezing:
Allow rolls to cool completely before freezing in an airtight container or freezer bag. They keep well for up to two months. When ready, thaw rolls at room temperature or warm them in the oven wrapped in foil.
Storing:
Store leftover rolls in a bread box or airtight container at room temperature for up to two days. For longer storage, refrigerate for up to a week but expect the texture to dry slightly.
How To Reheat
Oven Method
Best for:
Preserving that fresh-baked texture and fluffy crumb. Preheat your oven to 350°F (175°C). Wrap the rolls loosely in foil to keep them moist and warm for about 10-15 minutes, or until heated through.
Microwave Method
Best for:
A quick warm-up when you’re in a pinch. Place rolls on a microwave-safe plate and cover with a damp paper towel. Heat in 20-second bursts until warm, being careful not to overdo it as microwave heat can dry bread out fast.
Toaster Oven Method
Best for:
Getting a lightly crisped exterior while reviving softness inside. Set your toaster oven to 325°F (160°C) and warm rolls uncovered for 5-7 minutes, checking to avoid over-browning.
Stovetop Skillet Method
Best for:
Crisping the exterior with gentle heat. Warm a non-stick skillet over low heat, cover the skillet with a lid, and heat rolls for 3-5 minutes. This method can bring back some of the original crustiness without drying the inside.
Extra FAQs
Can I use all-purpose flour instead of fresh milled flour?
Absolutely, though you’ll miss out on the flavor complexity fresh milled flour offers. It’s a fine substitute for those without milling equipment.
How do I know the rolls are finished baking?
The rolls should reach an internal temperature of 185-190 degrees F.
How long can these rolls sit out on the counter?
For best freshness, enjoy within two days. After that, rolls can start to stale, but reheating can bring them back to life.
Can I double or halve the recipe?
Yes, this recipe scales well. Just watch your rising times as larger or smaller batches may need extra attention.
Fluffy Christmas Dinner Rolls with Fresh Milled Flour
Ingredients
- 1 ⅓ cups warm milk 332 grams
- 2 eggs
- 4 tablespoons honey
- 2 tablespoons oil
- 4 ¼ – 4 ½ cups freshly milled hard white wheat flour finely milled (553-618 grams)
- 2 ½ teaspoon salt
- 2 ½ teaspoons instant yeast
Instructions
- In the bowl of a stand mixer combine the milk, eggs, honey, and oil.
- Add 3 ½ cups of flour, combine, and rest for 15 minutes.
- After the rest, add the yeast, salt, and the remaining flour ½ a cup at a time, until it starts pulling away from the sides of the bowl. The dough should come together, but still be somewhat sticky.
- Knead for 8-12 minutes, until windowpane is reached.
- Cover and place in a warm place to rise until doubled in size, about 1 hour.
- Once risen, turn out onto a lightly floured or oiled surface and divide into 12 equal pieces. Shape into balls.
- Place in a greased or parchment lined 9×13 inch baking dish. Cover and allow to rise until doubled, about 1 hour.
- Preheat the oven to 375 degrees F.
- Bake for 18-24 minutes, until they start to turn golden brown.


My family loves these buns! I am wondering if it’s possible to bloom the yeast with the first part in the milk?