
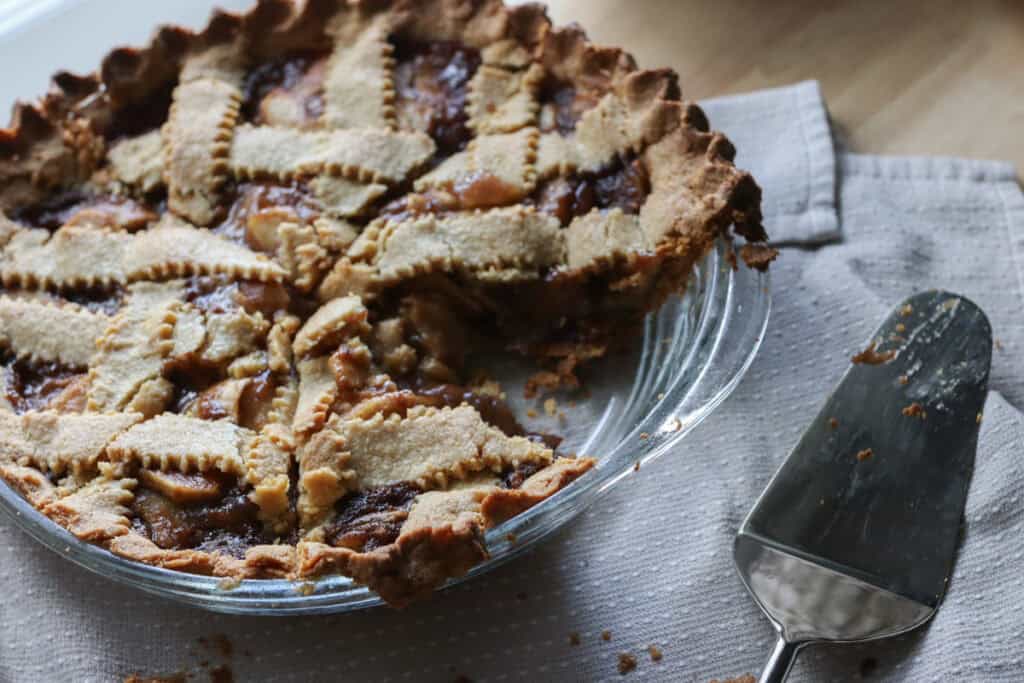
The Best Classic Apple Pie with Freshly Milled Flour
This post may contain affiliate links. Please read our Disclosure Policy.
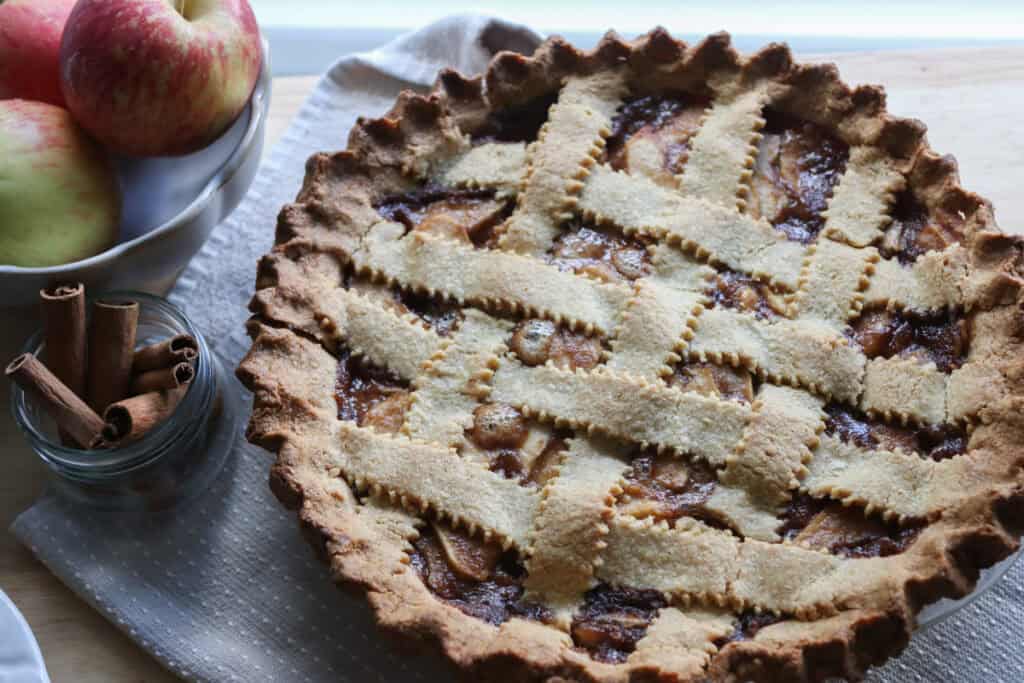
There’s just something irresistibly charming about a classic apple pie, especially when it’s made with freshly milled flour. Imagine the enchanting aroma filling your kitchen, blending the wholesome scent of a freshly ground flaky pie crust with spiced, tender apples baking to golden perfection. It feels like a small celebration of simple, honest ingredients coming together in the best way. Whether it’s a cozy family dinner, Thanksgiving dinner, or a special dessert for friends, the combination of fresh flour and classic apples makes every bite a moment to relish. Happy baking, and enjoy the delightful journey of this timeless dessert.
What Makes This The Best Apple Pie Recipe
Fresh milled flour adds a vibrant, nutty flavor.
Milling your own flour just before baking captures the full essence and oils of the grains, making your homemade pie crust taste far richer and more aromatic than store-bought options.
A perfectly tender and flaky crust.
The use of fresh flour combined with the careful technique of mixing butter into the dough creates a crust that’s both hearty and delicate, offering a delightful contrast to the soft apple filling.
Classic yet wholesome.
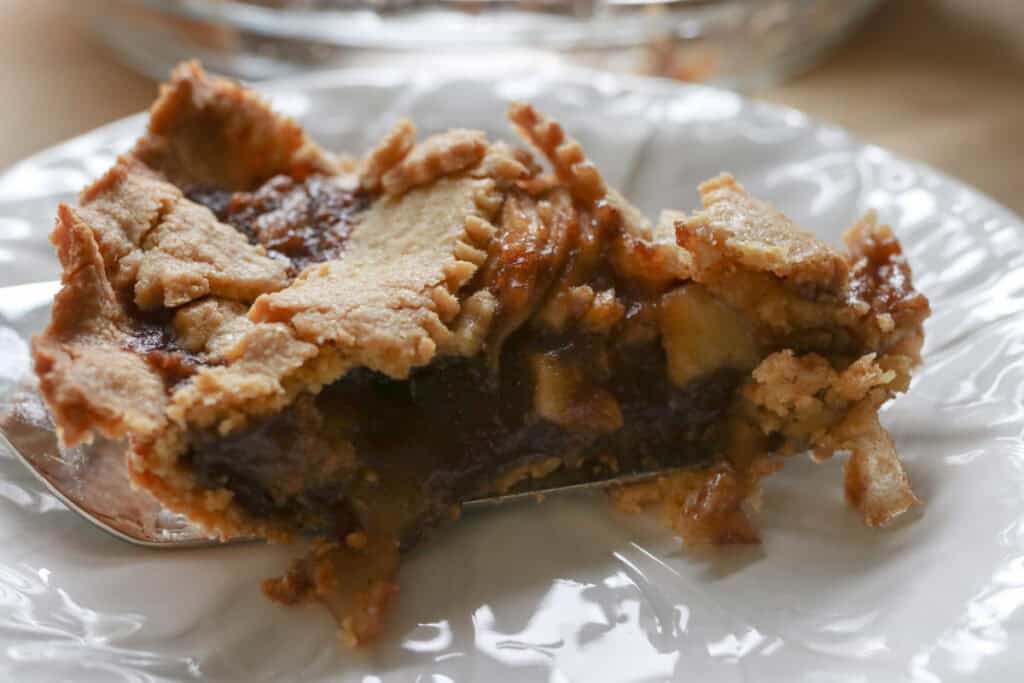
This classic apple pie recipe embraces tradition while elevating it with natural goodness from scratch-made, simple ingredients, creating a dessert that feels as good to eat as it tastes.
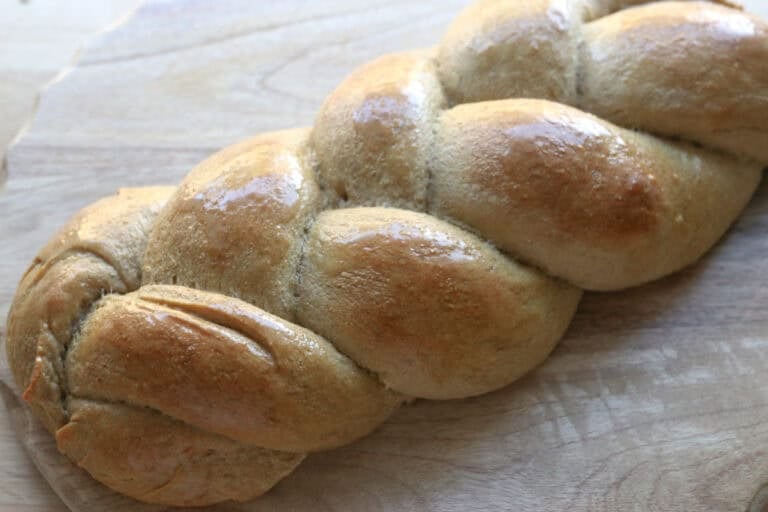
Be sure to try more of our fresh milled fall recipes like these turkey-shaped dinner rolls or these delicious apple cinnamon rolls!
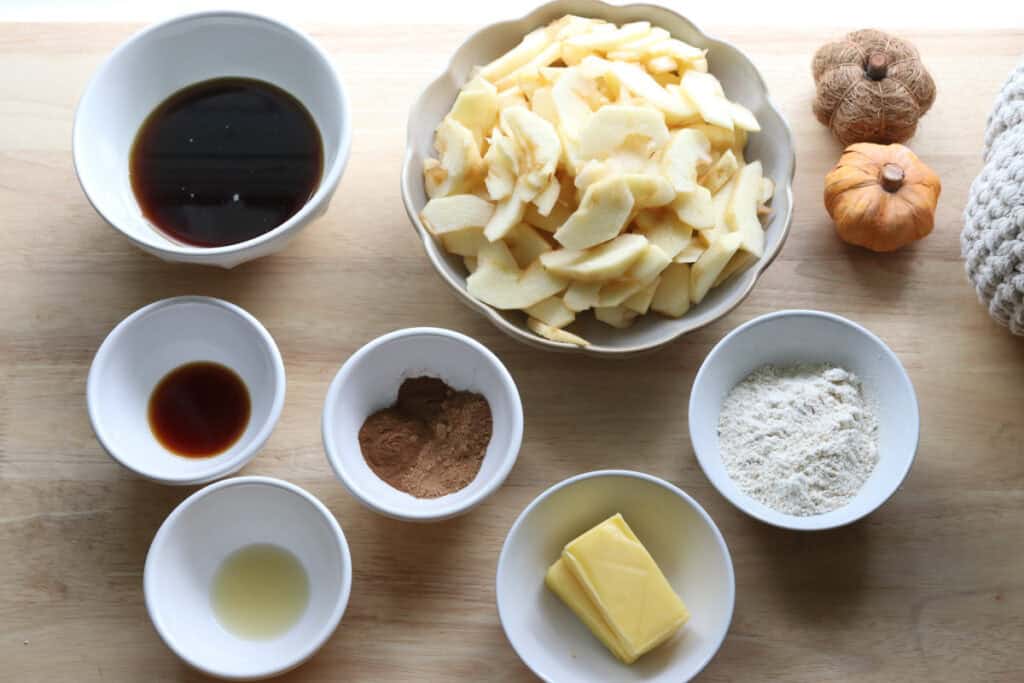
Overview of Ingredients
Freshly Milled Flour
Using freshly milled wheat flour introduces a depth of flavor and freshness you won’t find in regular flour. If milling isn’t an option, you can substitute with high-quality unbleached all-purpose flour, but you might miss out on some of the subtle nutty undertones.
Apples
A mix of tart and sweet apples, like Fuji or Granny Smith apples, works beautifully here to give your pie both tang and sweetness. If you prefer, all Granny Smith or all Honeycrisp apples can also be used to adjust the flavor profile.
Butter
Butter helps achieve that perfect flakiness in the crust. If you want to tweak for dietary needs, you could try coconut oil, though the flavor and texture will be different.
Maple Syrup Maple syrup adds warmth and depth to the filling’s sweetness. Brown sugar can also be used here as a substitute, just know you may need to adjust the amounts. Classic spices like cinnamon and nutmeg make the pie smell like a warm hug. Feel free to adjust the spice amounts to suit your taste.
Lemon Juice
A splash of lemon juice brightens the apple filling and helps maintain the apples’ fresh color while baking. You can use fresh or bottled lemon juice, though fresh offers the best flavor.
Tips for Success
#1 Use chilled ingredients
Keeping your butter and water chilled is crucial for a flaky crust. Warm butter can meld with the flour too much, resulting in a denser crust instead of those wonderful, light layers.
#2 Don’t overwork the dough
Mix the dough just until it comes together. Over-kneading can develop too much gluten, toughening the crust. A few lumps here and there are perfectly fine and even desirable.
#3 Use a pie shield
To protect your crust’s edges from burning while the filling bakes thoroughly, cover the rims with a pie shield or tin foil.
#4 Let the pie cool completely
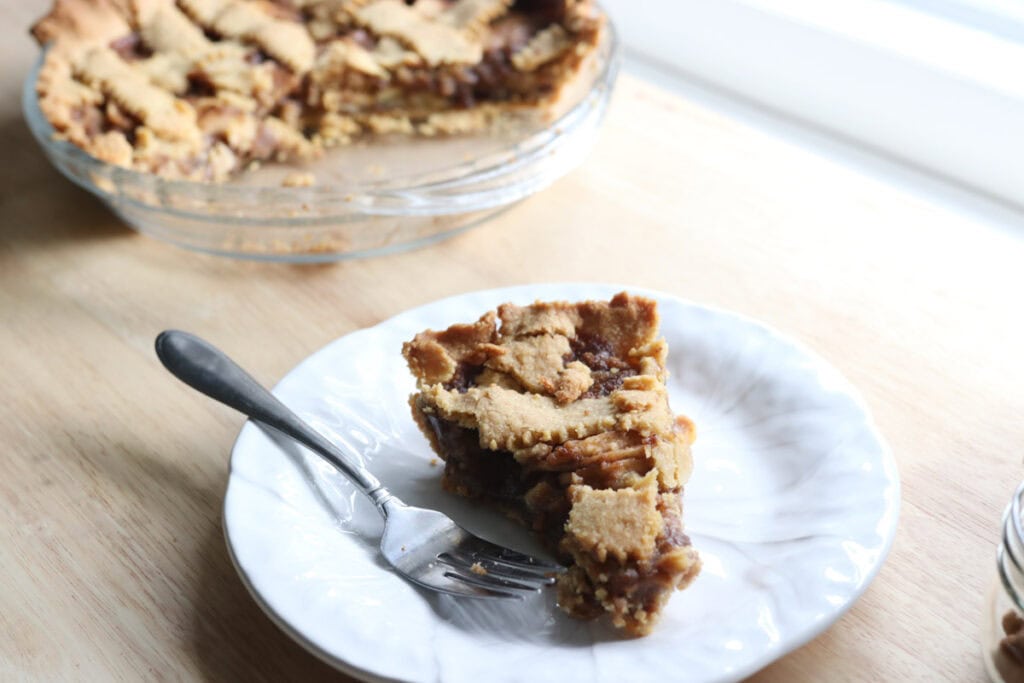
Allow your pie to cool for a few hours after baking so the juices set properly. This makes slicing neater and the flavors even better melded.
Helpful Tools & Supplies
Whether you’re just dipping your toes into the world of fresh milled flour or you’re a seasoned home baker, I’ve taken the guesswork out of what you truly need. All of these tools and resources are available in my shop, designed to help your journey be smooth and nourishing:
Grain Mills
- NutriMill Classic Grain Mill – My go-to for fine, consistent milling; perfect for sandwich breads and everyday baking.
- NutriMill Harvest Grain Mill – Stone-ground elegance: this model delivers whole-grain flavor with a beautiful appearance.
Mixers
- Ankarsrum Mixer – A powerhouse kitchen companion with multiple speeds and attachments—ideal for kneading bread dough effortlessly.
Baking & Bread Tools
- Bread Bow Knife – Artisan-made with a high-carbon steel blade and cherry wood handle—this knife slices loaves with ease.
- Sourdough Essentials Kit With Starter – Complete starter kit that includes dehydrated sourdough starter, banneton baskets, a dough whisk, scoring lame, and more.
Cookbooks & eBook Bundles
- Everyday Whole Grains Vol. 1 & 2 (printed & digital) – Packed with 70+ recipes built around fresh milled flour, from breads to snacks and desserts.
- The Fresh Breads Bundle – A comprehensive set including eBooks like The Perfect Loaf, the Cookie Jar, bulk baking guides, and a sourdough mini‑course—all centered on fresh milled flour.
- Freshly Milled Made Simple Guide – A video-based guide that walks you through milling and baking basics, making the process feel easy and approachable.
Specialty Items
- Dehydrated Sourdough Starter – Just add water and flour to rehydrate this starter—perfect for bakers without an active sourdough culture.
- I Knead Fresh Flour Mug – A charming, handmade 12 oz ceramic mug—great for coffee breaks during dough rising!
Why These Are Worth It
Every tool in this collection has been personally vetted to support you in baking with fresh milled flour. From the grain mills that make your flour, to mixers that knead dough, to resources that teach you every step—it’s all here to make sure your homemade bread journey is joyful, nourishing, and successful.
➡️ Explore all of these items and more in the Generation Acres Farm Shop — your one-stop spot for fresh milled flour baking essentials.
Equipment:
Pie Dish (9-inch)
Mixing Bowls
Rolling Pin
Food Processor or Pastry Cutter
Sharp Knife
Measuring Cups and Spoons
How to Make the Best Classic Apple Pie with Freshly Milled Flour
Ingredients
Pie Crust:
- 3 cups fresh milled soft white wheat flour, finely milled (345 grams)
- ½ teaspoon salt
- 3 tablespoons sugar
- 1 cup COLD butter (225 grams)
- 2 eggs
- 1-2 tablespoons ice cold water
Apple Pie Filling:
- 6 apples, peeled, cored, and sliced thinly
- ⅓ cup freshly milled soft white wheat flour, finely milled (38 grams)
- ⅔ cup maple syrup (208 grams)
- 1 tablespoon cinnamon
- 2 teaspoons nutmeg
- 1 teaspoon vanilla extract
- 4 tablespoons butter (58 grams)
- splash of lemon juice
Directions:
- To make the pie crust, add the flour, salt, and sugar to a food processor and pulse a couple of times to combine.
- Cube the butter and add it to the flour. Blend in the food processor until the butter turns into small pieces.
- Add the eggs and blend.
- If the dough has already come together, there is no need to add water.
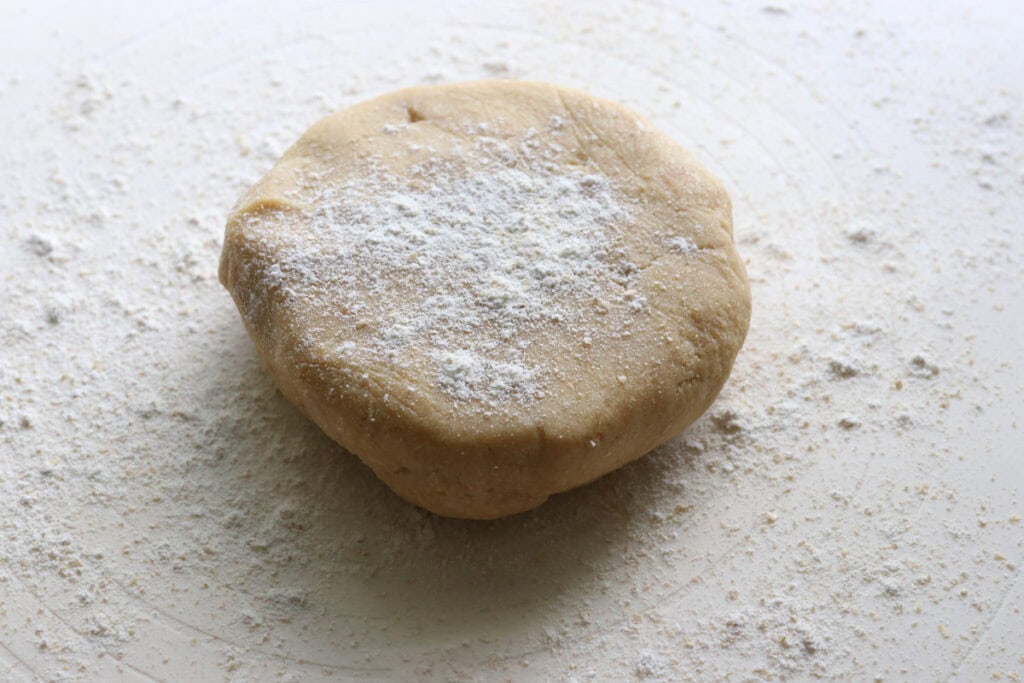
- If it is still a little crumbly, add a tablespoon or two of ice water and blend until the dough forms into a solid ball.
- Turn the dough onto a lightly floured surface and cut in half. Wrap each half in parchment paper and refrigerate for 10-20 minutes.
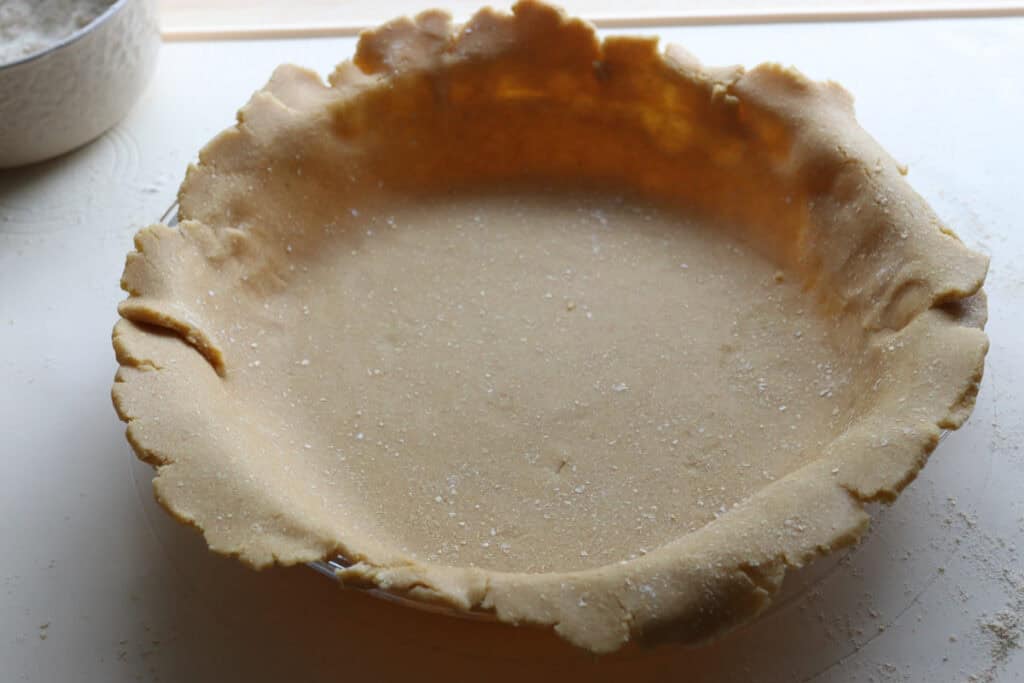
- After the crusts have chilled, roll each one out into a circle.

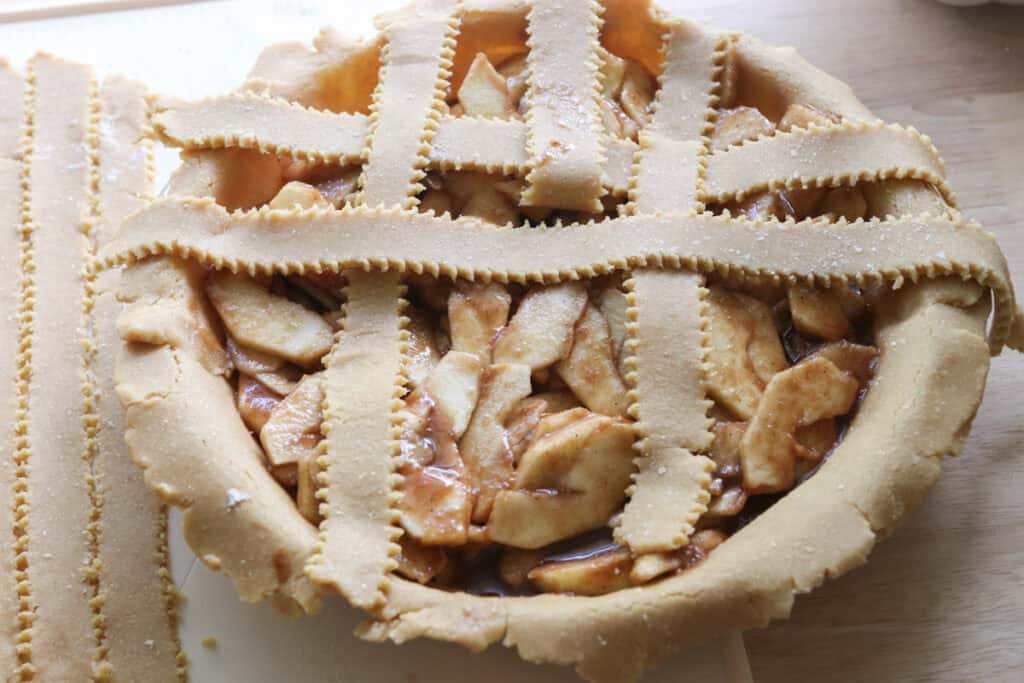
- Place one of them in a greased pie pan. For the other pie dough, either leave it as is, or cut it into 7-8 equal strips, about 1 inch in diameter each.
- In a saucepan over medium heat, melt butter and add flour, maple syrup, cinnamon, nutmeg, vanilla, and lemon juice.
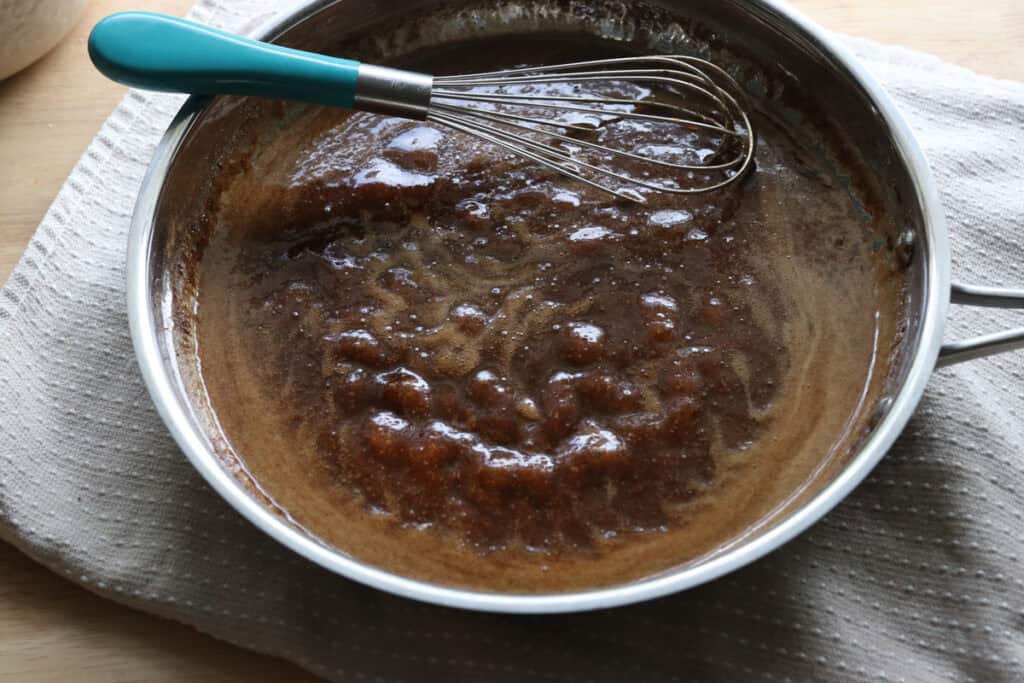
- Simmer stirring constantly until thickened. Remove from heat.
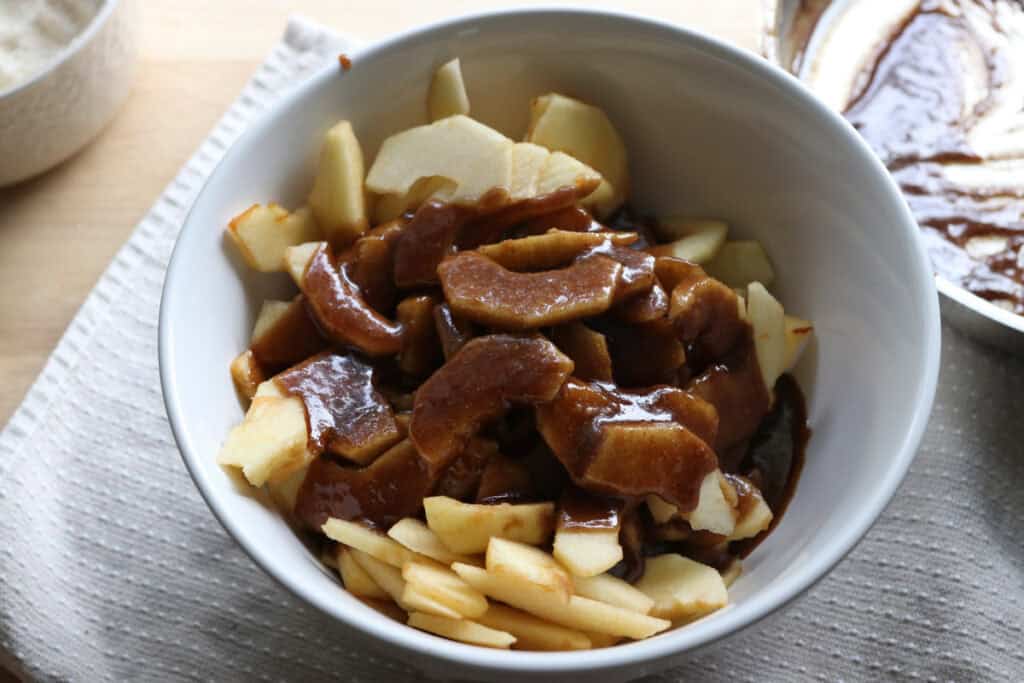
- Place the peeled, cored, and thinly sliced apples in a large bowl and pour the maple syrup mixture over the apples.
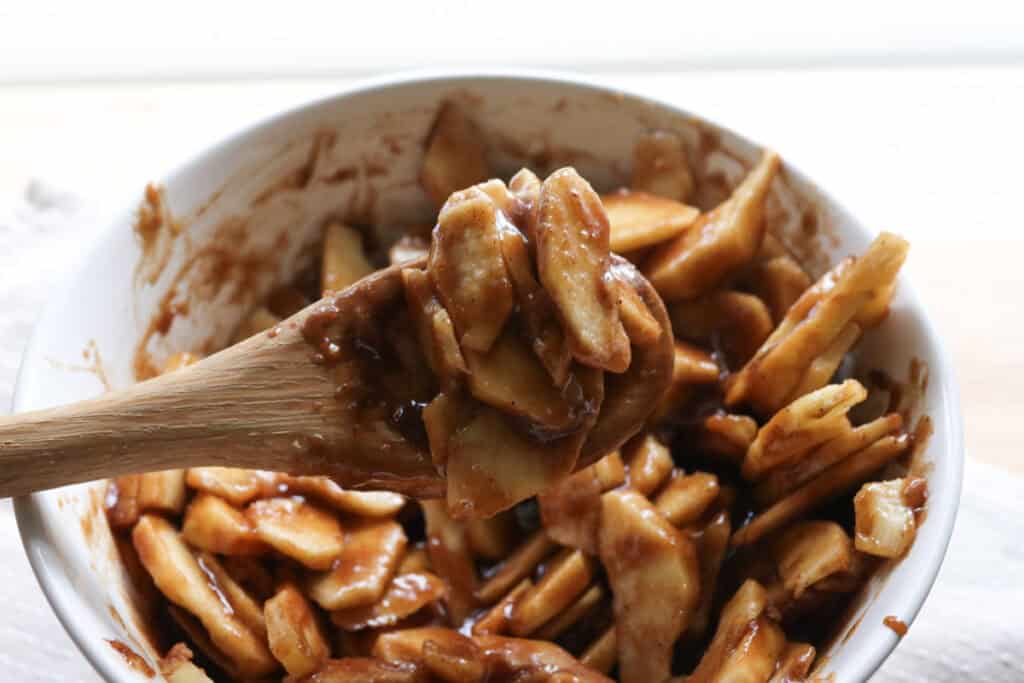
- Toss to coat the apples evenly.
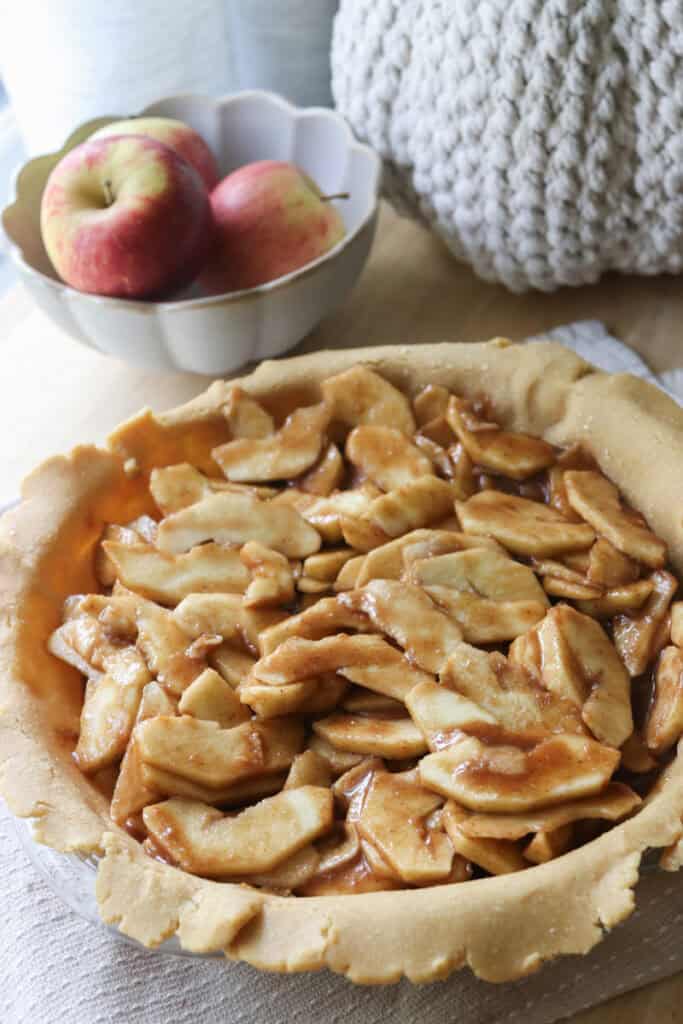
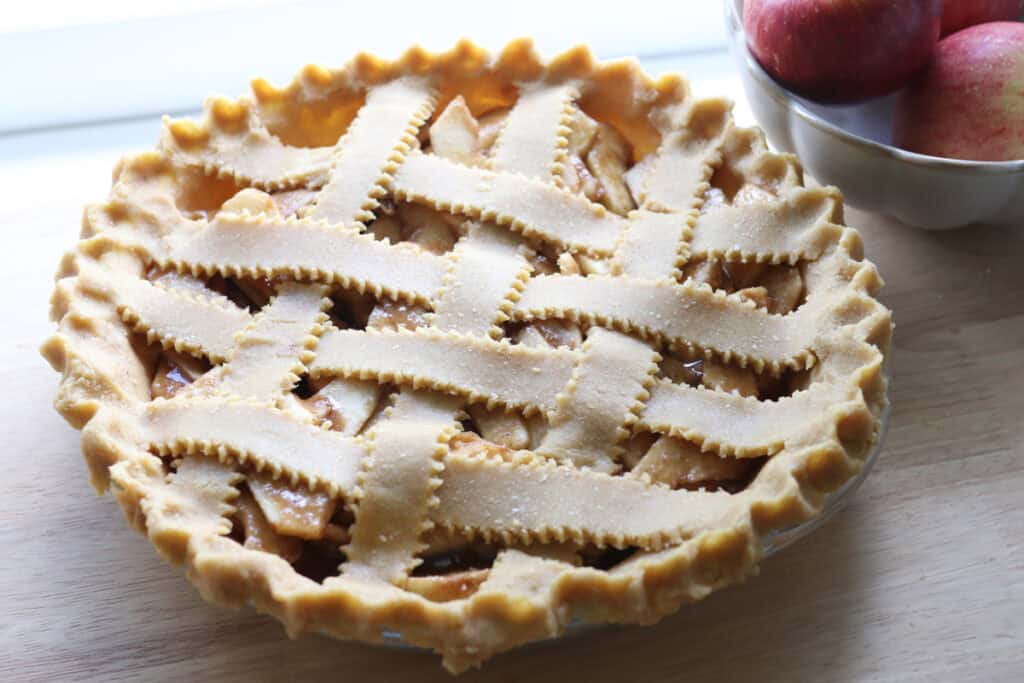
- Preheat oven to 400* f. Pour the apple mixture into the pie dish and top with the other pie crust. Or weave the strips to make a lattice on the top.
- Bake with crust shield (or aluminum foil) on for 30 minutes, reduce to 375 degrees F., remove the crust shield and bake an additional 20 minutes or until golden brown and cooked through.
Recipe Variations
Rustic Open-Faced Pie:
Skip the top crust for a more rustic look and quicker baking time, allowing the apple filling to bubble through visibly.
Add Nuts:
Incorporate chopped walnuts or pecans into the filling or sprinkle them on top of the crust before baking for a delightful crunch.
Caramel Drizzle:
Serve with a drizzle of homemade or store-bought caramel sauce for an extra special touch.
Spiced Variations:
Experiment with adding cardamom or ginger for extra flavor that complement the apples beautifully.
Egg Wash: Lightly brush the top crust with an egg wash and sprinkle with sugar for a perfectly golden and shiny crust.
Troubleshooting Common Problems with this Recipe
Crust Turns Out Tough
This often happens from overworking the dough or using warm butter. Remember to handle the dough gently and keep ingredients chilled.
Soggy Bottom
If your pie crust is soggy, try pre-cooking the filling to reduce moisture or bake the pie on a lower oven rack for better bottom-crust browning.
Filling Too Runny
Make sure to measure the thickener (flour or cornstarch) accurately and allow the pie to cool completely so the filling can set.
Burnt Crust Edges
Use a pie shield or loosely cover the edges with foil halfway through baking to prevent them from burning.
Filling Not Sweet Enough
Taste your filling before baking and adjust the sugar to your preference. Different apple varieties vary in sweetness and may need more or less sugar.
Freezing & Storing Leftovers
Freezing:
For longer storage, wrap your fully baked and cooled apple pie tightly in several layers of plastic wrap and foil before freezing and place in an airtight container. It can be frozen for up to 2 months. To enjoy, thaw in the refrigerator overnight and warm slightly in the oven before serving.
Storing:
Keep leftover pie covered loosely in the refrigerator for 3-4 days. You can cover it with foil or a pie dome to avoid drying out, and bring back its fresh-baked charm by reheating before serving.
How To Reheat
Oven Method
Best for preserving the flaky crust and warm filling evenly. Preheat the oven to 350°F (175°C). Place pie slices on a baking sheet and cover loosely with foil. Heat for 15-20 minutes until warmed through.
Microwave Method
Quicker but can soften the crust. Place a slice on a microwave-safe plate and cover lightly with a paper towel. Microwave on medium power for 30-60 seconds, checking to avoid overheating.
Toaster Oven Method
Great for small slices with less fuss. Heat at 350°F (175°C) for 10 minutes or until warmed through and crust is crisp.

Extra FAQs
Can I use other fruits besides apples?
Absolutely, pears, peaches, or a mix of berries can be delicious substitutions. Adjust the sugar and thickener as needed depending on the fruit’s juiciness.
What’s the best type of butter to use?
European-style butter with higher fat content adds a richer taste.
Can I make the pie crust in advance?
Yes, you can prepare the dough and refrigerate it for up to 2 days before rolling out. Just let it sit at room temperature for a few minutes before rolling.
Is it necessary to peel the apples?
While peeling gives a smoother texture, leaving the skins on adds fiber and a bit of color variation—just make sure to wash them well.

The Best Classic Apple Pie with Freshly Milled Flour
Ingredients
Pie Crust:
- 3 cups fresh milled soft white wheat flour finely milled (345 grams)
- ½ teaspoon salt
- 3 tablespoons sugar
- 1 cup COLD butter 225 grams
- 2 eggs
- 1-2 tablespoons ice cold water
Apple Pie Filling:
- 6 apples peeled, cored, and sliced thinly
- ⅓ cup freshly milled soft white wheat flour finely milled (38 grams)
- ⅔ cup maple syrup 208 grams
- 1 tablespoon cinnamon
- 2 teaspoons nutmeg
- 1 teaspoon vanilla
- 4 tablespoons butter 58 grams
- splash of lemon juice
Instructions
- To make the pie crust, add the flour, salt, and sugar to a food processor and pulse a couple of times to combine.
- Cube the butter and add it to the flour. Blend in the food processor until the butter turns into small pieces.
- Add the eggs and blend.
- If the dough has already come together, there is no need to add water.
- If it is still a little crumbly, add a tablespoon or two of water and blend until the dough forms into a solid ball.
- Turn the dough onto a floured surface and cut in half. Wrap each half in parchment paper and refrigerate for 10-20 minutes.
- After the crusts have chilled, roll each one out into a circle.
- Place one of them in a greased pie pan. For the other pie dough, either leave it as is, or cut it into 7-8 equal strips, about 1 inch in diameter each.
- In a saucepan over medium heat, melt butter and add flour, maple syrup, cinnamon, nutmeg, vanilla, and lemon juice.
- Simmer stirring constantly until thickened. Remove from heat.
- Place the peeled, cored, and thinly sliced apples in a medium sized bowl and pour the maple syrup mixture over the apples.
- Toss to coat the apples evenly.
- Preheat to 400* f. Pour the apple mixture into the pie dish and top with the other pie crust. Or weave the strips to make a lattice on the top.
- Bake with crust shield (or aluminum foil) on for 30 minutes, reduce to 375 degrees F., remove the crust shield and bake an additional 20 minutes or until golden brown and cooked through.


I’m a bit confused….in the paragraphs before the recipe you mention cooking the apples first (slightly) but that’s not reflected in the recipe. Also, what are you supposed to start the oven at? The recipe says to turn it down to 375 after 30 mins, but no starting temp (assuming 425).
Sorry for the confusion. I updated the post. It starts at 400*f. before being reduced. As far as pre-cooking, that’s just an option if you find that your pie crust gets soggy. It’s optional and we haven’t found it to be necessary.
I live in a country where I cannot source soft wheat berries, and have only hard wheat berries. What could I do to successfully use this recipe with freshly milled hard white wheat berries?
You can use hard white wheat berries for this, though the result may be a little different. You could try sifting a very *small* amount of the bran out of the flour to make for a lighter crust. The hard wheats have more bran which makes for a heavier loaf. Also don’t over-knead or mix, as the hard wheats will begin to develop gluten which you do NOT want in a pie crust. I hope that helps!
The recipe ingredient list says 1 cup butter, and then gives the grams for 1/2c butter – is it one cup or half a cup?
It has been corrected and it is 1 cup of butter.
Did anyone notice the 1 cup butter in her recipe shows 115 grams? One cup of butter is actually 226 grams. I’m confused if it should be 1/2 cup or 1 cups butter…?
Anyone make this and have an issue?
It’s fixed, it’s 1 cup of butter.
Can I substitute Einkorn instead? Would it be 1:1 substitution? Thanks!
Yes you can!