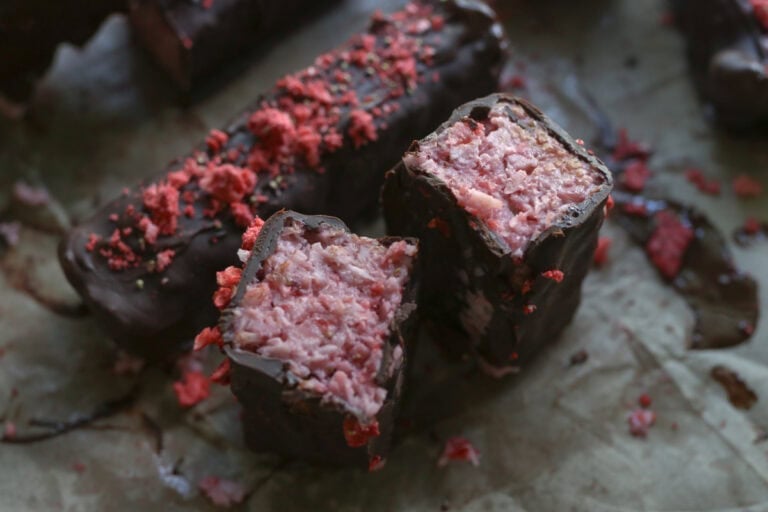
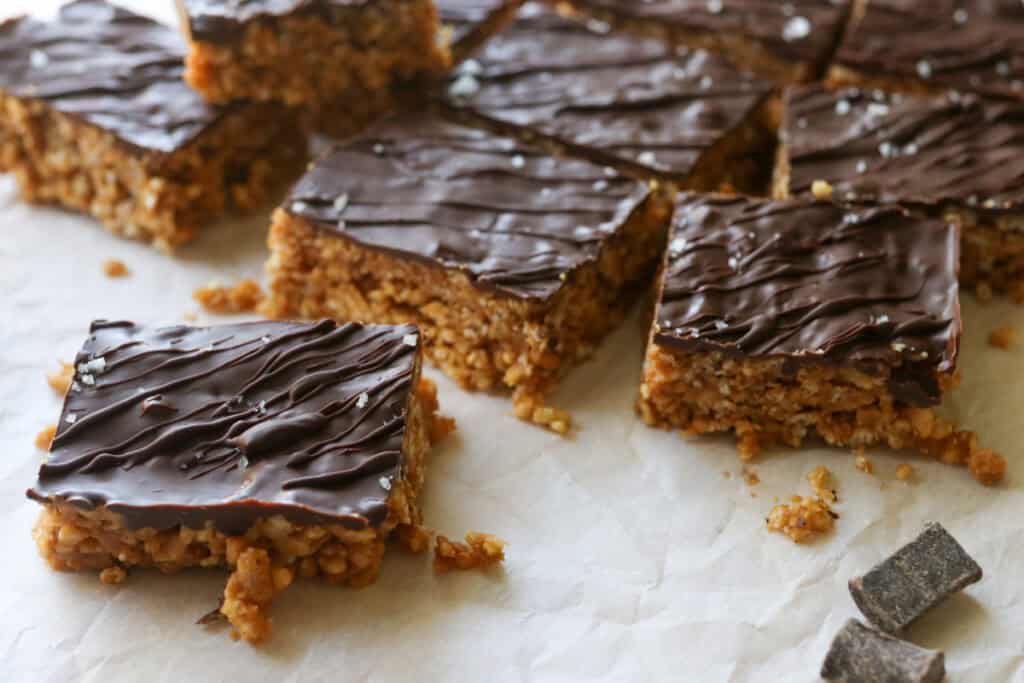
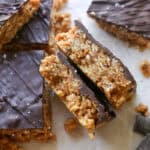
The Best Chocolate Peanut Butter Rice Krispie Bars
This post may contain affiliate links. Please read our Disclosure Policy.
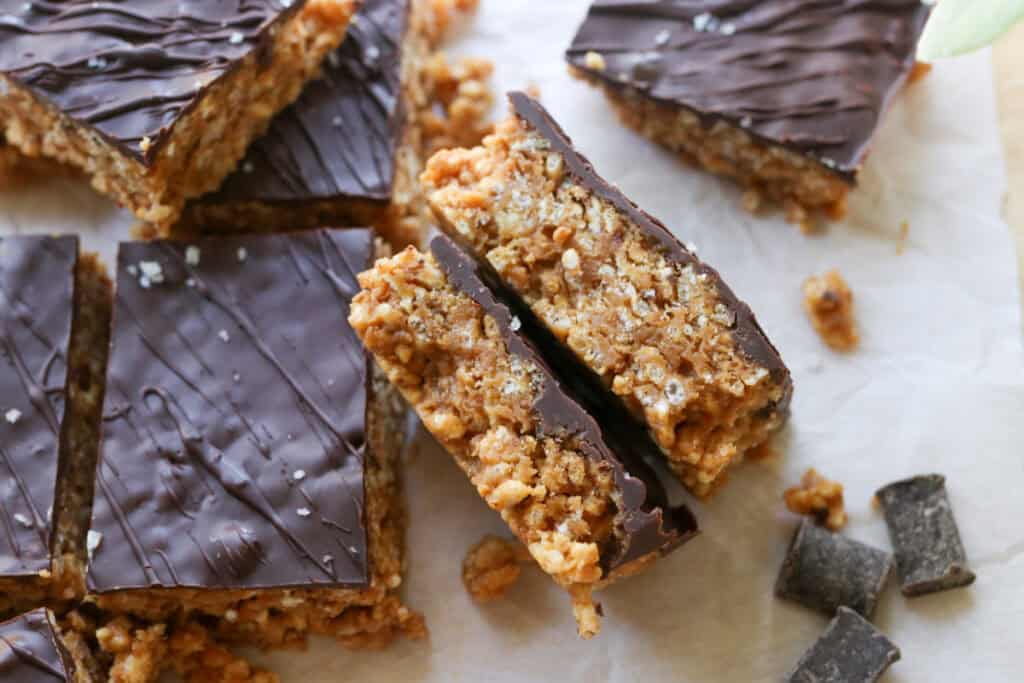
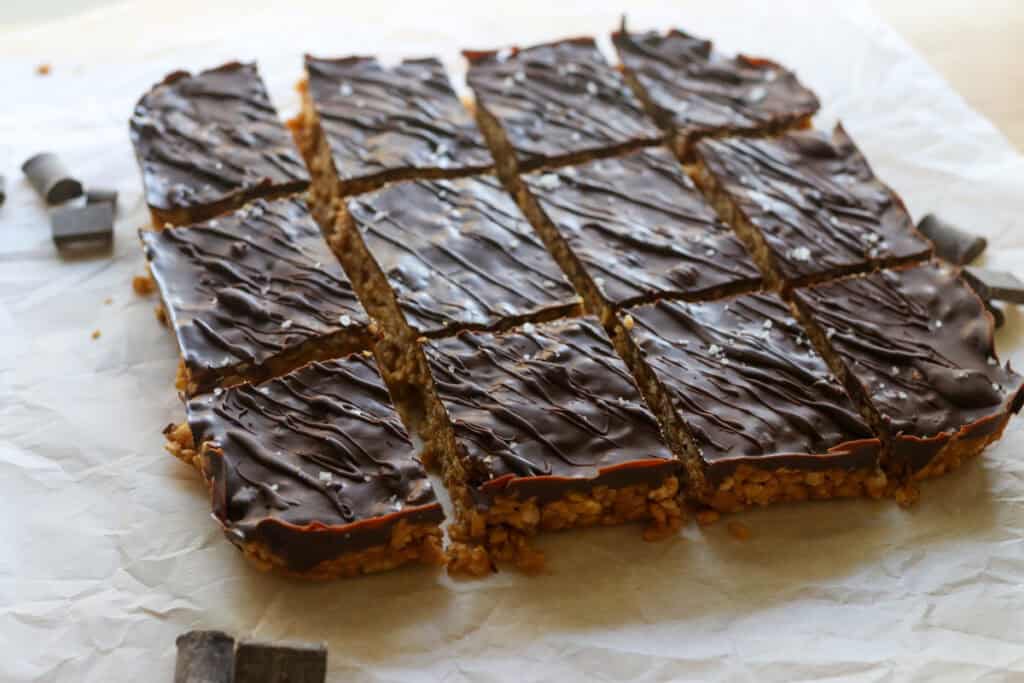
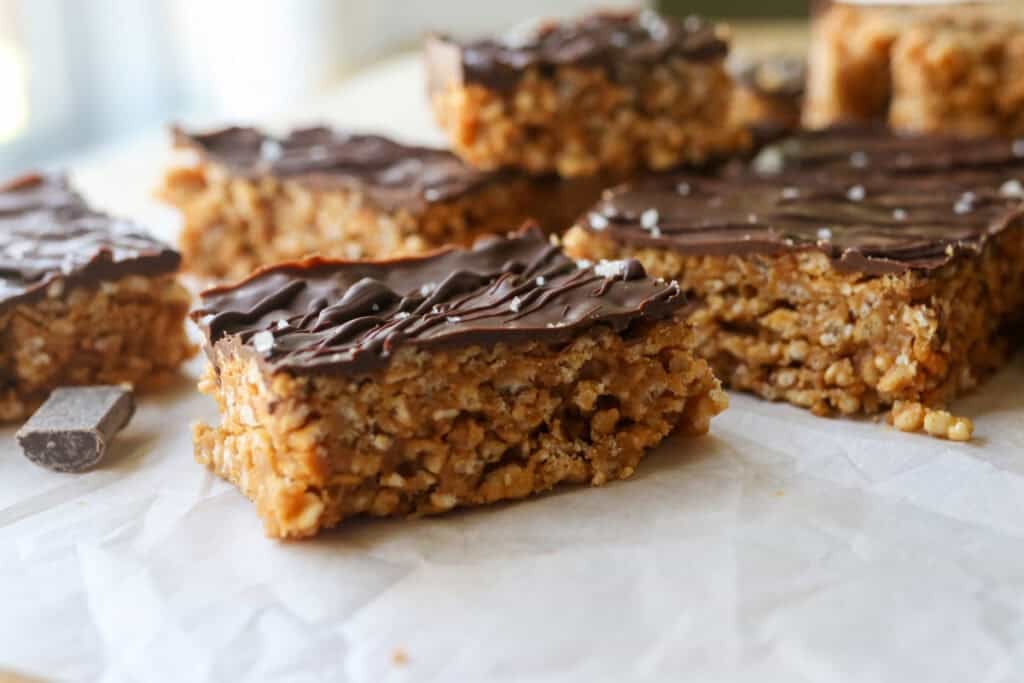
If you adore the joyful crunch of Rice Krispie treats but have a soft spot for peanut butter and chocolate, this recipe is like a little party in your mouth. These Chocolate Covered Peanut Butter Rice Krispie Bars combine that classic cereal crispness with creamy peanut butter and a luscious chocolate top — a combo that might just become your new favorite treat. Whether you’re making a quick snack or a sweet treat to share, this no bake dessert is straightforward but feels like something a bit special. Either way, you’re in for a sweet, satisfying treat that’s probably going to disappear pretty fast.
What Makes This Recipe Great
Classic meets indulgence.
Combining the familiar crunch of classic rice krispie treats with the richness of peanut butter and chocolate delivers the perfect combination for a comforting yet decadent treat that satisfies multiple cravings at once.
Simple but impressive.
This recipe doesn’t require fancy ingredients or techniques, yet it makes a snack that looks and tastes like you spent hours perfecting it. Made with simple ingredients, this easy recipe is perfect for sharing or surprising yourself on a quiet afternoon.
Customizable and forgiving.
Whether you want to swap the chocolate for white or dark, or try almond butter instead of peanut butter, this recipe welcomes your tweaks without losing its charm or texture.
Be sure to try these Homemade Oreos or these Blueberry Nutrigrain Bars for more fresh milled snack recipes!
Overview of Ingredients
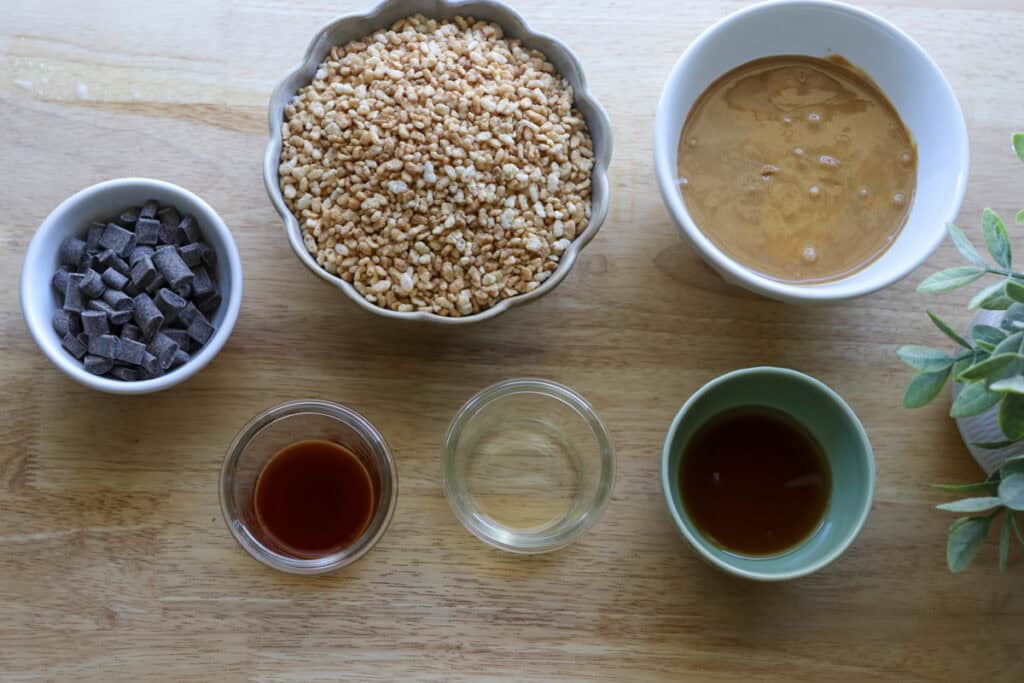
Rice Krispies Cereal
Rice Krispies deliver that light, crispy texture essential to this treat. You could swap them for another puffed rice cereal or crispy corn cereal, but keep in mind that the texture might shift a bit.
Peanut Butter
Creamy, natural peanut butter is ideal here for smooth mixing and rich flavor, but chunky peanut butter adds a fun crunch if you want. For peanut allergies, cashew butter or almond butter are excellent alternatives.
Chocolate
Using semi-sweet or milk chocolate chips for the coating gives the bars a perfect balance of sweetness and cocoa richness. Dark chocolate works too if you prefer a less sweet edge, or white chocolate if you want something extra creamy.
Maple Syrup
With no refined sugar, maple syrup adds the perfect amount of sweetness with a caramel note.
Tips for Success
#1 Use low heat for melting
When melting the peanut butter, coconut oil, and maple syrup, keep the heat low. Stir frequently to keep the mixture smooth and avoid hotspots that can ruin the texture.
#2 Line your pan for easy removal
Place parchment paper or a silicone baking mat in your pan before pressing in the mixture. This little trick makes it so much easier to lift out the bars without breaking them apart, saving you some kitchen frustration.
#3 Press but don’t overdo it
When pressing the rice krispie mixture into the pan, use just enough pressure to make it compact. Pressing too hard makes the bars too dense and less airy, which changes their delightful texture.
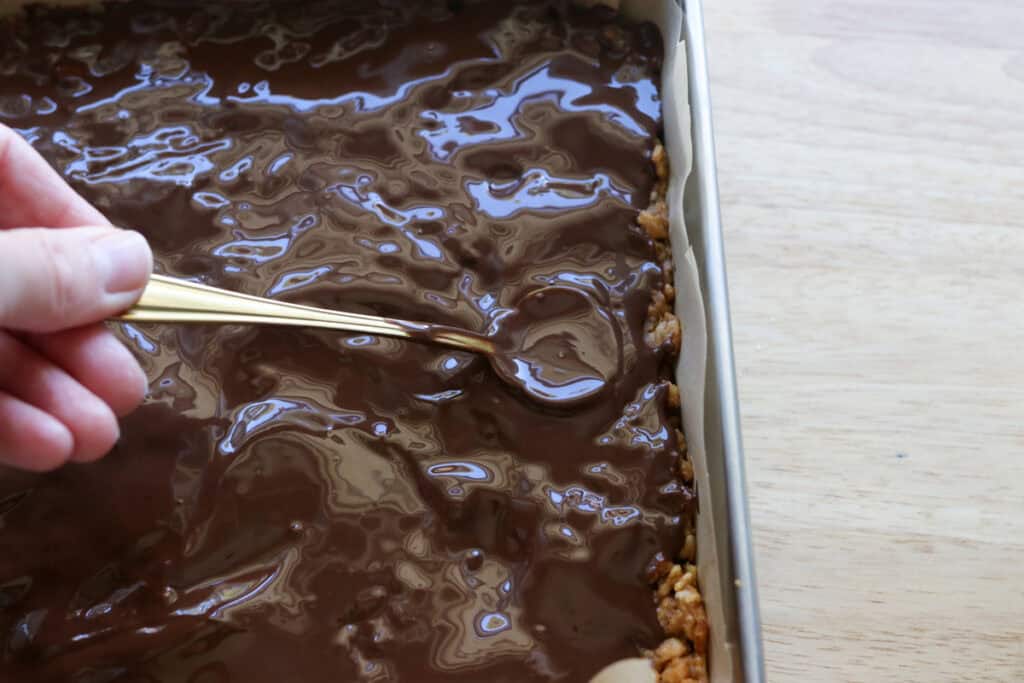
#4 Use a spatula for spreading chocolate
To get a smooth, even layer of chocolate, use an offset spatula or the back of a spoon. The nicer the spread, the more inviting the bars look, and plus, it gives you an excuse to play with your tools a bit.
Helpful Tools & Supplies
Whether you’re just dipping your toes into the world of fresh milled flour or you’re a seasoned home baker, I’ve taken the guesswork out of what you truly need. All of these tools and resources are available in my shop, designed to help your journey be smooth and nourishing:
Grain Mills
- NutriMill Classic Grain Mill – My go-to for fine, consistent milling; perfect for sandwich breads and everyday baking.
- NutriMill Harvest Grain Mill – Stone-ground elegance: this model delivers whole-grain flavor with a beautiful appearance.
Mixers
- Ankarsrum Mixer – A powerhouse kitchen companion with multiple speeds and attachments—ideal for kneading bread dough effortlessly.
Baking & Bread Tools
- Bread Bow Knife – Artisan-made with a high-carbon steel blade and cherry wood handle—this knife slices loaves with ease.
- Sourdough Essentials Kit With Starter – Complete starter kit that includes dehydrated sourdough starter, banneton baskets, a dough whisk, scoring lame, and more.
Cookbooks & eBook Bundles
- Everyday Whole Grains Vol. 1 & 2 (printed & digital) – Packed with 70+ recipes built around fresh milled flour, from breads to snacks and desserts.
- The Fresh Breads Bundle – A comprehensive set including eBooks like The Perfect Loaf, the Cookie Jar, bulk baking guides, and a sourdough mini‑course—all centered on fresh milled flour.
- Freshly Milled Made Simple Guide – A video-based guide that walks you through milling and baking basics, making the process feel easy and approachable.
Specialty Items
- Dehydrated Sourdough Starter – Just add water and flour to rehydrate this starter—perfect for bakers without an active sourdough culture.
- I Knead Fresh Flour Mug – A charming, handmade 12 oz ceramic mug—great for coffee breaks during dough rising!
Why These Are Worth It
Every tool in this collection has been personally vetted to support you in baking with fresh milled flour. From the grain mills that make your flour, to mixers that knead dough, to resources that teach you every step—it’s all here to make sure your homemade bread journey is joyful, nourishing, and successful.
➡️ Explore all of these items and more in the Generation Acres Farm Shop — your one-stop spot for fresh milled flour baking essentials.
Equipment:
8×8 square pan
Large saucepan
Heat Proof mixing bowl
Spatula or wooden spoon
Parchment paper or silicone baking mat
Offset spatula or spoon for spreading chocolate
How to Make the Best Chocolate Peanut Butter Rice Krispie Bars
Ingredients:
- 3 ¼ cups puffed rice crisps or crispy rice cereal (170 grams)
- 1 cup creamy peanut butter (280 grams)
- ⅓ cup maple syrup (113 grams)
- 3 tablespoons coconut oil
- 2 teaspoons vanilla extract
- ⅛ teaspoon salt
Topping:
- ¾ cup semi-sweet chocolate chips (116 grams)
- 1 tablespoon coconut oi
- Flaky salt, optional
Directions:
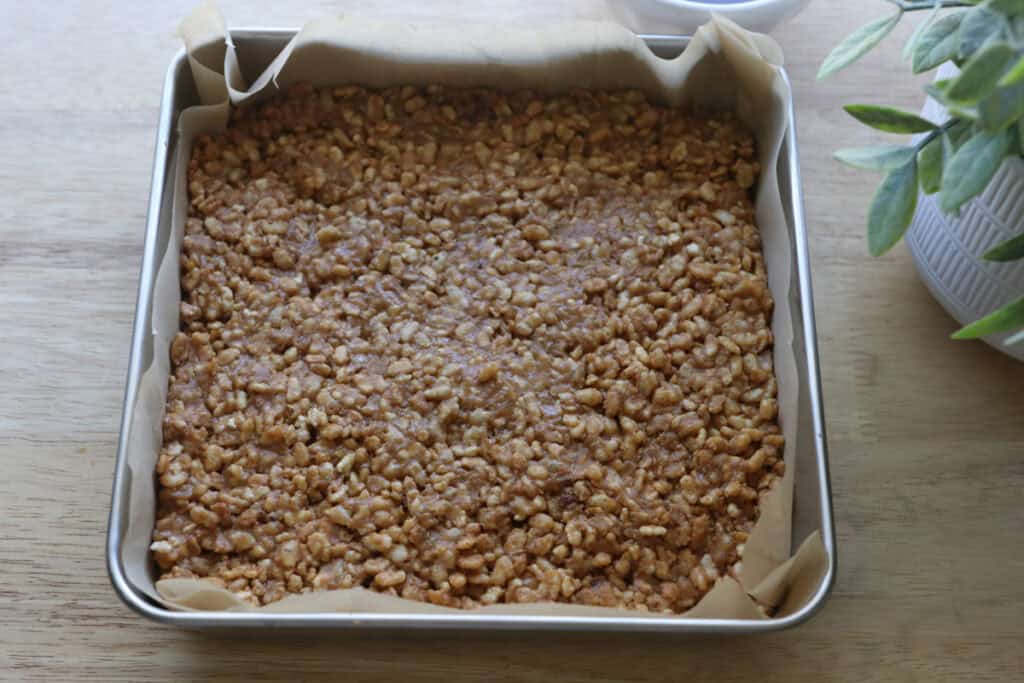
- Line an 8×8 or 9×9 inch pan with parchment paper.
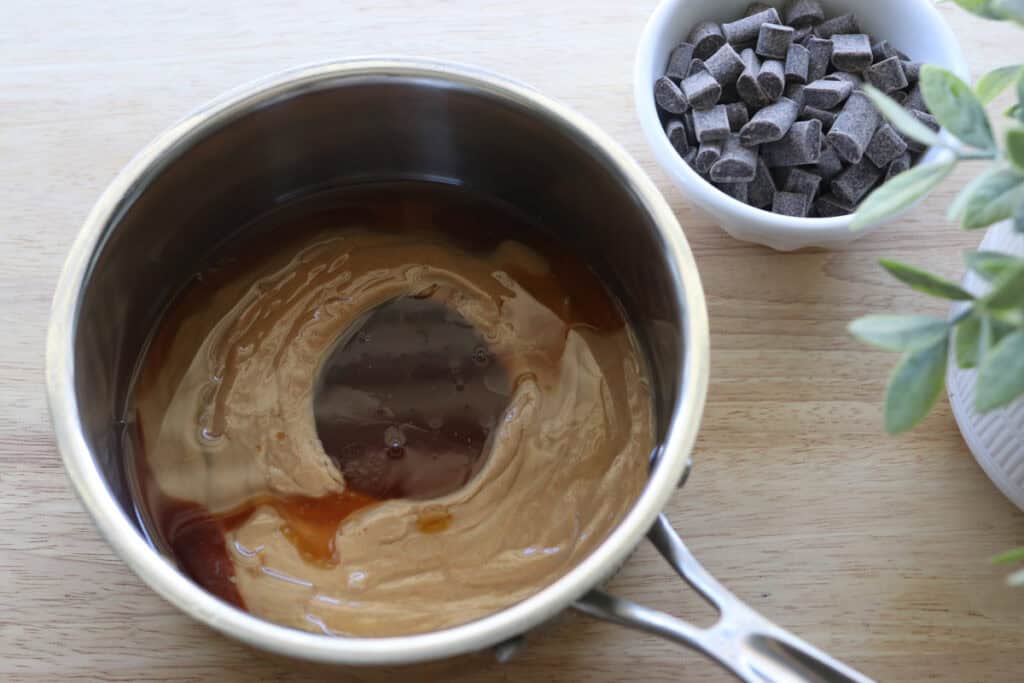
- In a medium saucepan over medium-low heat, combine the peanut butter, maple syrup, coconut oil, vanilla, and salt. Stir until melted.
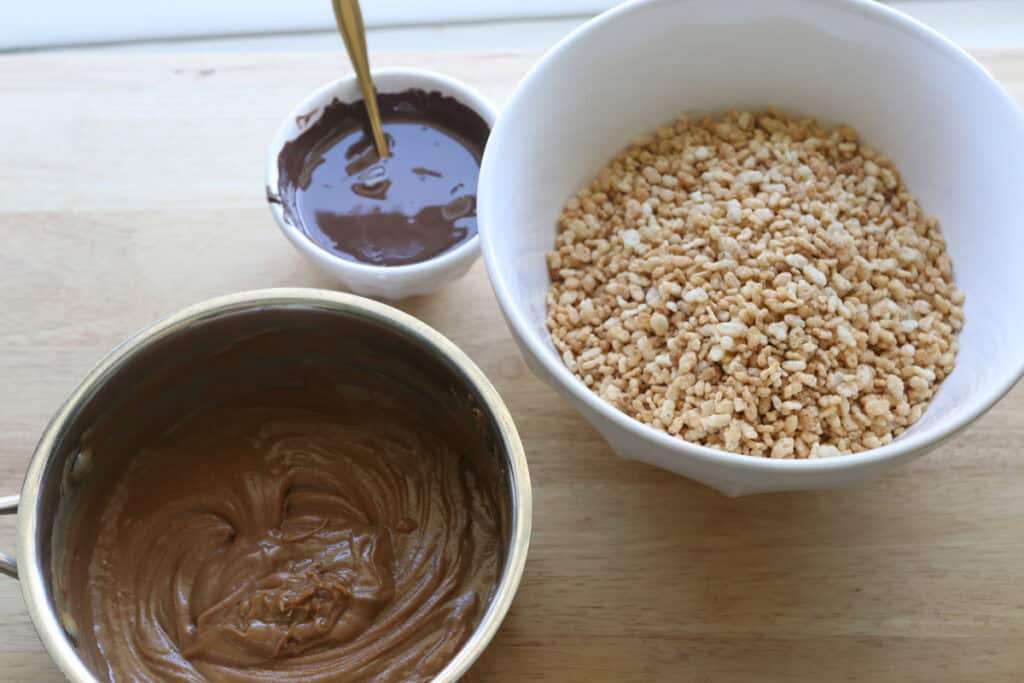
- Pour the rice crisps in a large bowl, then pour the peanut butter mixture over top.
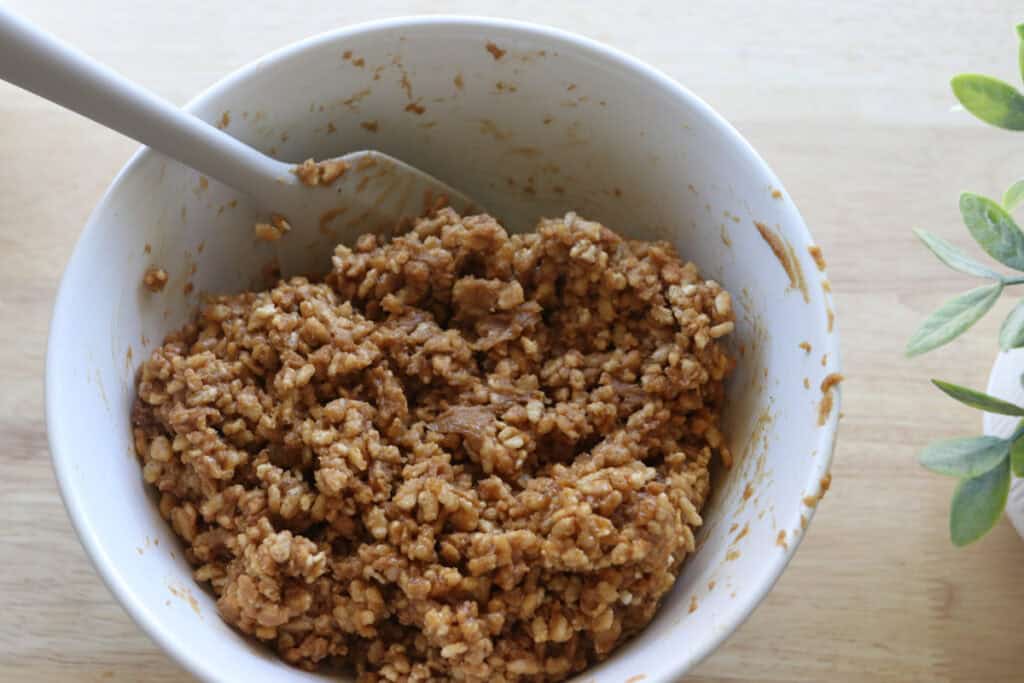
- Stir until completely combined and press the cereal mixture into the bottom of the pan, using your hands or a spatula.
- Melt the chocolate and coconut oil in a microwave-safe bowl and spread over top of the rice krispies.
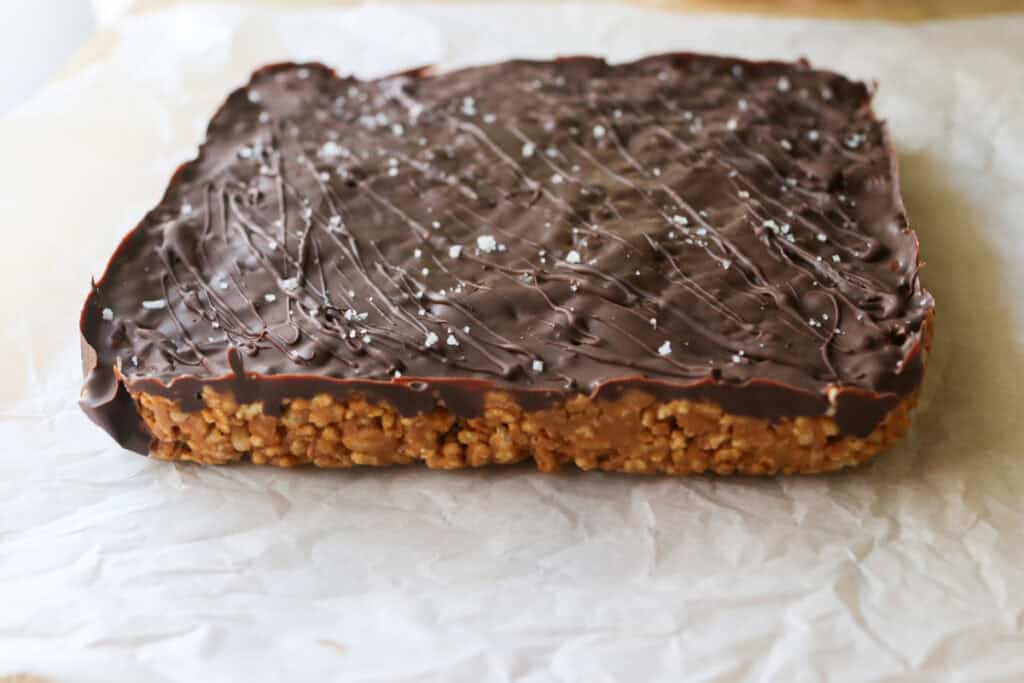
- Sprinkle with flaky salt if desired.
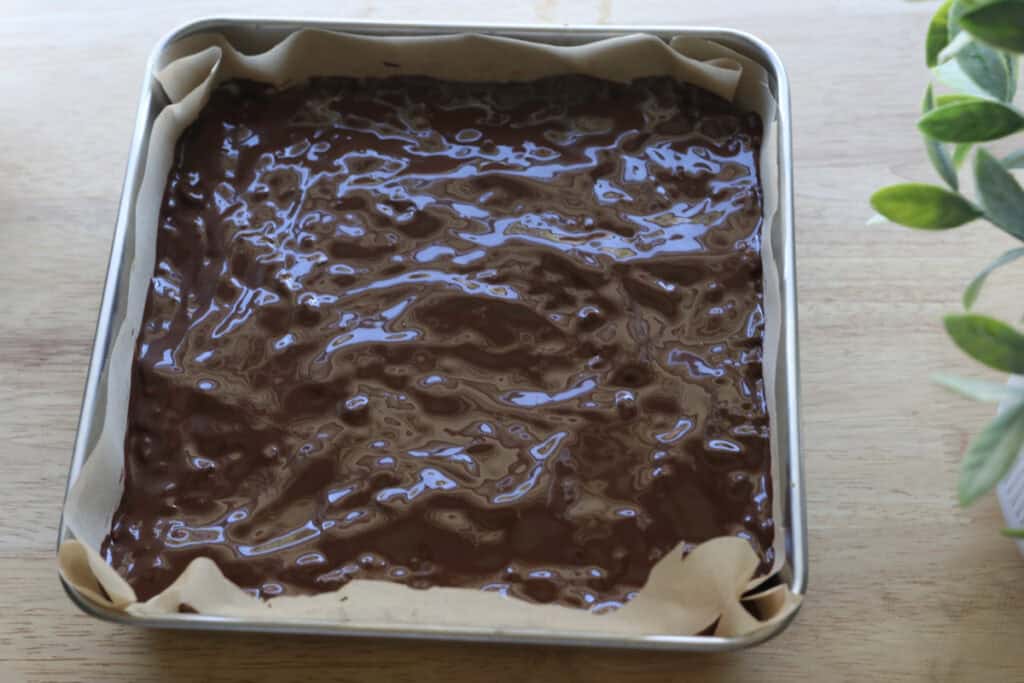
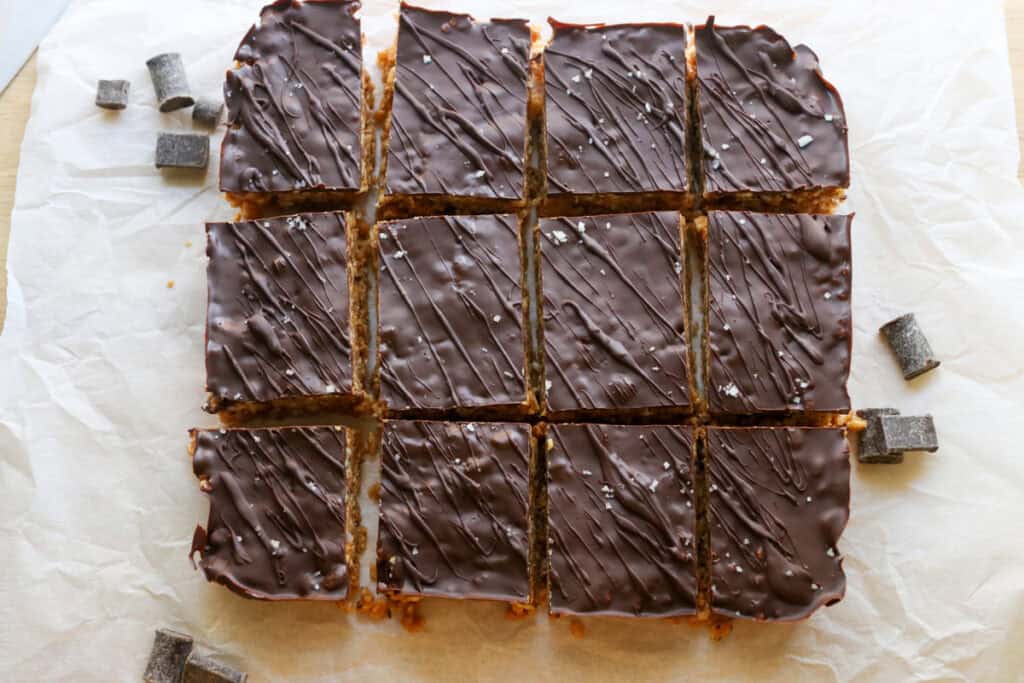
- Place in the fridge to harden, then cut into squares.
- Store in the fridge.
Recipe Variations
Swap the chocolate:
Try white chocolate or dark chocolate depending on your preference. You can even mix in some chopped nuts or coconut flakes into the chocolate layer for extra texture.
Nut-Free Version:
Replace peanut butter with sunflower seed butter or a different nut butter for those with nut allergies. Just be sure your chocolate is allergy-friendly too.
Add a sprinkle:
Once the chocolate layer is still soft, sprinkle sea salt, crushed pretzels, or rainbow sprinkles on top for an unexpected twist that elevates flavor and presentation.
Make mini bars:
Instead of a big pan, use mini muffin tins to create bite-sized versions. They’re perfect for lunchboxes or parties where you want guests to grab a little sweet bite.
Frozen Treats:
After chilling, slice and freeze these bars for a cool, chewy snack on a hot day. Just let them thaw a few minutes before enjoying so the flavor shines.
Troubleshooting Common Problems with this Recipe
Chocolate won’t set
If your chocolate remains runny or dull, ensure the bars are completely cool before spreading and try chilling them longer. If your kitchen is warm, place the pan in the fridge to help the chocolate firm up.
Bars are too crumbly
This usually means not enough peanut butter was used, so the binding wasn’t strong enough. Make sure to measure carefully and melt everything smoothly for best results.
Chocolate cracks or peels off
This can happen if the bars and chocolate layer cool unevenly. Let the chocolate set at room temperature before refrigerating, which can help prevent cracking during chilling.
Uneven chocolate layer
Use an offset spatula or spoon to spread chocolate evenly while still warm and fluid. If chocolate hardens too fast, briefly warm the spatula or spoon to smooth it out.
Freezing & Storing Leftovers
Freezing:
Wrap individual bars or the whole block tightly in plastic wrap and place them in an airtight container or freezer bag. Freeze for up to 2 months. When ready to enjoy, thaw in the fridge or at room temperature for 15-20 minutes.
Storing:
Keep bars in an airtight container at room temperature for up to 3 days or in the fridge for up to a week. Storing in the fridge can help maintain the chocolate’s firmness but might slightly change the texture of the peanut butter layer.
Extra FAQs
Can I make these bars gluten-free?
Absolutely. Just be sure to use gluten-free rice cereal instead of classic rice krispies cereal and check that your other ingredients are gluten-free as well.
What’s the best way to cut the bars without cracking the chocolate?
Use a sharp knife warmed under hot water and dried before slicing. This helps the knife glide through the chocolate smoothly, creating clean edges.
Can I add protein powder to make these bars more filling?
Yes, adding a scoop of your favorite protein powder can work well mixed into the melted peanut butter and marshmallow blend. Just watch the consistency; you might need to adjust the butter or marshmallows slightly.
Do I need to refrigerate these bars?
Not necessarily, but refrigeration helps keep the chocolate hard and the bars fresh longer, especially in warmer climates. Just store them in an airtight container.
Can I double the recipe for a larger batch?
Definitely. Use a larger pan or two pans, and keep an eye on cooking times and cooling to ensure the chocolate sets well on the bigger batch.
Chocolate Peanut Butter Rice Krispie Bars
Ingredients
- 3 ¼ cups puffed rice crisps 170 grams
- 1 cup creamy peanut butter 280 grams
- ⅓ cup maple syrup 113 grams
- 3 tablespoons coconut oil
- 2 teaspoons vanilla
- ⅛ teaspoon salt
Topping:
- ¾ cup semi-sweet chocolate chips 116 grams
- 1 tablespoon coconut oil
- Flaky salt optional
Instructions
- Line an 8×8 or 9×9 inch pan with parchment paper.
- In a medium saucepan over low heat, combine the peanut butter, maple syrup, coconut oil, vanilla, and salt. Stir until melted.
- Pour the rice crisps in a large bowl, then pour the peanut butter mixture over top.
- Stir until completely combined and press into the bottom of the prepared pan, using your hands or a spatula.
- Melt the chocolate and coconut oil and spread over top of the rice krispies.
- Sprinkle with flaky salt if desired.
- Place in the fridge to harden, then cut into squares.
- Store in the fridge.
Nutrition