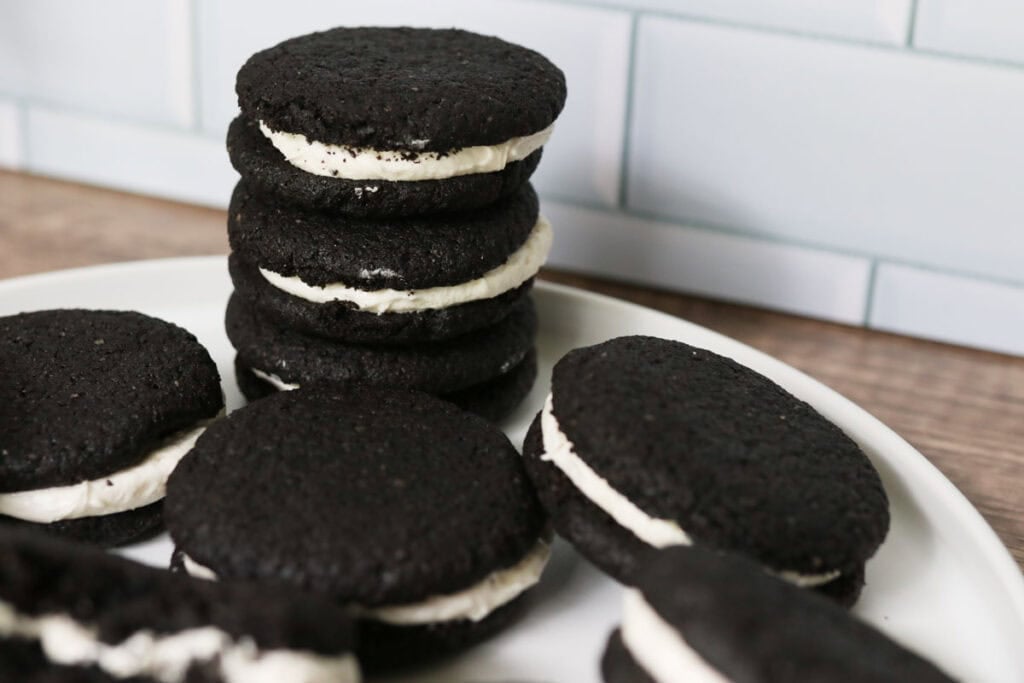
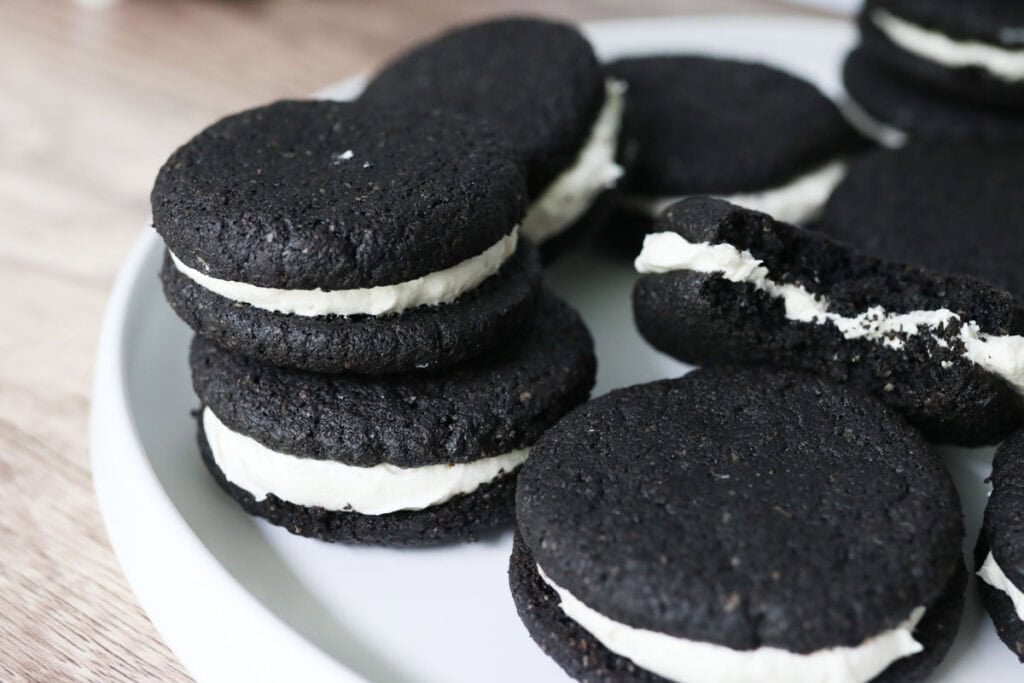
Delicious Homemade Oreos with Freshly Milled Flour
This post may contain affiliate links. Please read our Disclosure Policy.
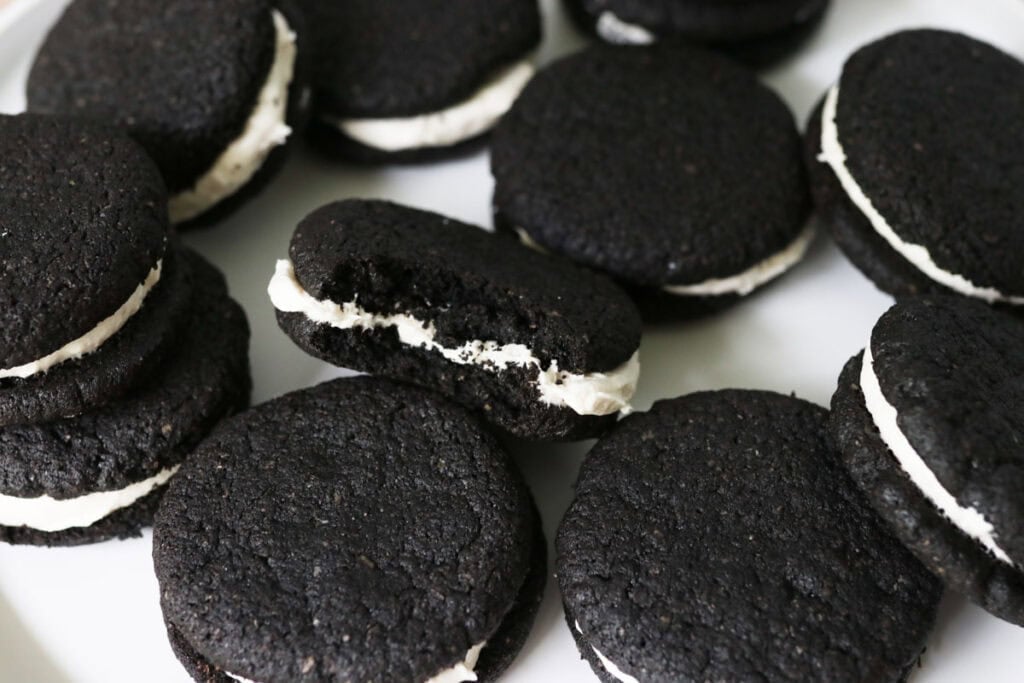
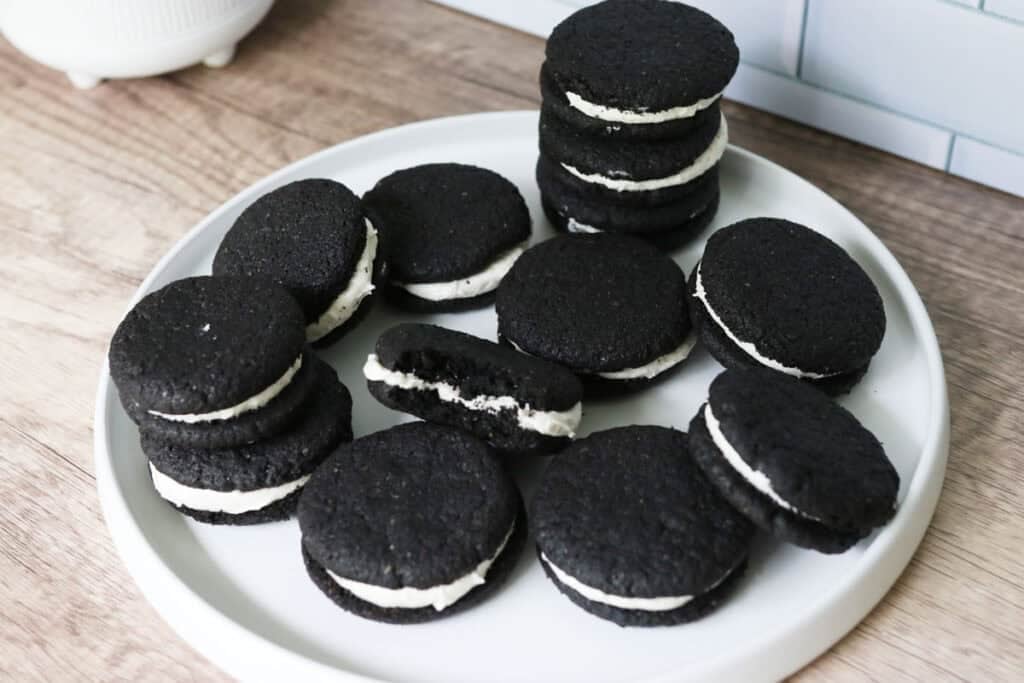
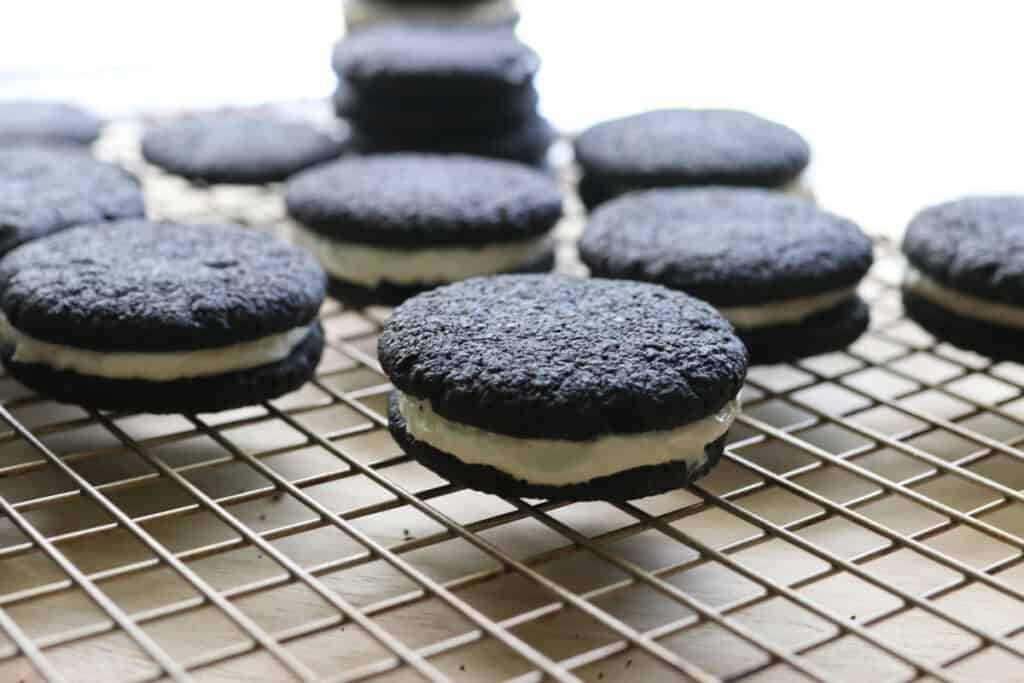
Sometimes, the quest for the perfect Oreo cookie leads us down a deliciously unexpected path. Imagine biting into a soft, tender sandwich cookie that still carries the classic chocolate flavor you love, but with a fresh twist—literally. Using fresh milled flour gives this homemade Oreo recipe a unique texture and aroma that you won’t find in the store-bought version. Filled with a sweet, fluffy filling, these homemade Oreos are sure to satisfy your craving for something sweet. It’s a little kitchen adventure that turns baking into something really special and surprisingly simple. Whether you’re sharing them with friends, treating family, or just sneaking a few bites yourself, these cookies invite you to savor every soft, chocolatey moment. Stick around and let’s dive into this recipe that could very well become your new favorite sweet treat.
What Makes This Recipe Delicious
Soft and Tender Texture.
Unlike the traditional crunchy Oreo, these homemade versions come out soft and delightfully chewy. The freshly milled flour plays a big role here, lending a gentle crumb that feels like a hug from the inside.
Freshly Milled Flour Advantage.
Grinding your own flour might sound fancy, but it’s actually the most rewarding thing about this recipe. It’s a game changer for flavor and texture in baking. The fresh flour keeps all those beautiful wheat oils intact, making every bite taste richer and more aromatic.
No Preservatives, No Mystery Ingredients.
Making Oreos from scratch means you know exactly what’s going into them. Unlike a store-bought Oreo, there are no weird preservatives, corn syrup, or artificial flavors—just wholesome ingredients you can feel good about sharing with family and friends.
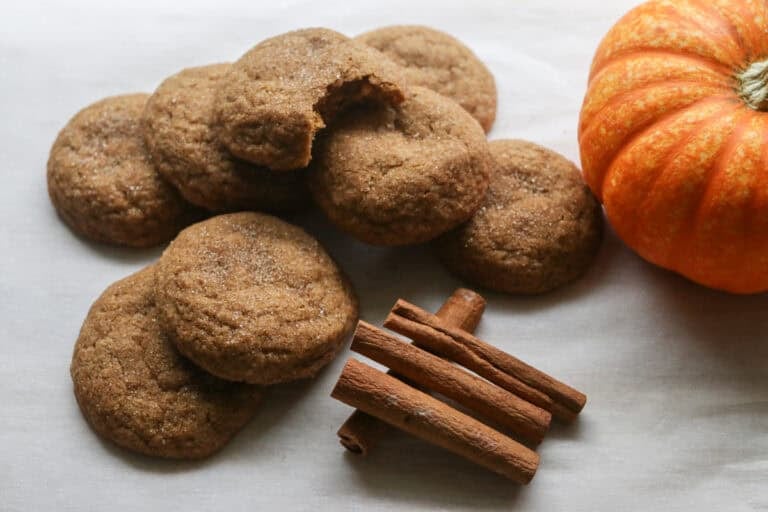
For more freshly milled desserts, try these delicious oatmeal cream pies or these carrot cake cookies with cream cheese icing!
Overview of Core Ingredients and Substitutions
Freshly Milled Flour
Using freshly milled flour introduces a bright, natural flavor and soft texture to your cookies that you won’t get from store-bought all-purpose flour. If you don’t have a grain mill handy, using high-quality, lightly processed whole wheat flour as a substitute will still bring excellent flavor.
Cocoa Powder
This recipe calls for dutch-processed black cocoa powder to deliver that iconic Oreo chocolate taste and color. If you don’t have that, unsweetened cocoa powder can be used, but remember it won’t have the same dark color as a traditional Oreo.
Butter
Butter gives the cookies a rich flavor and tender crumb.
Powdered Sugar
Powdered sugar contributes to the smooth texture and rich flavor of the filling sandwiched between the two layers of soft cookies.
Vanilla Extract
Vanilla adds a lovely depth to the cookie dough’s flavor.
Baking Soda & Baking Powder
These leavening agents help the cookies rise just enough to maintain that soft texture with a little lift. Make sure your baking soda is fresh for the best effect.
Tips for Making Delicious Oreos
#1 Sift Your Cocoa and Flour Together
Completely optional, but sifting these dry ingredients can help prevent clumps and ensures an even distribution of the cocoa throughout the dough.
#2 Chill the Dough Before Baking
Refrigerating the dough for at least 20 minutes helps develop flavor and prevents the cookies from spreading too much in the oven. It’s a neat trick to keep those classic Oreo shapes that don’t run all over the baking sheet.
#3 Use Parchment Paper or Silicone Mats
This avoids sticking and allows the cookies to bake evenly on the bottom. Plus, cleanup feels way less like a chore afterward—a win-win.
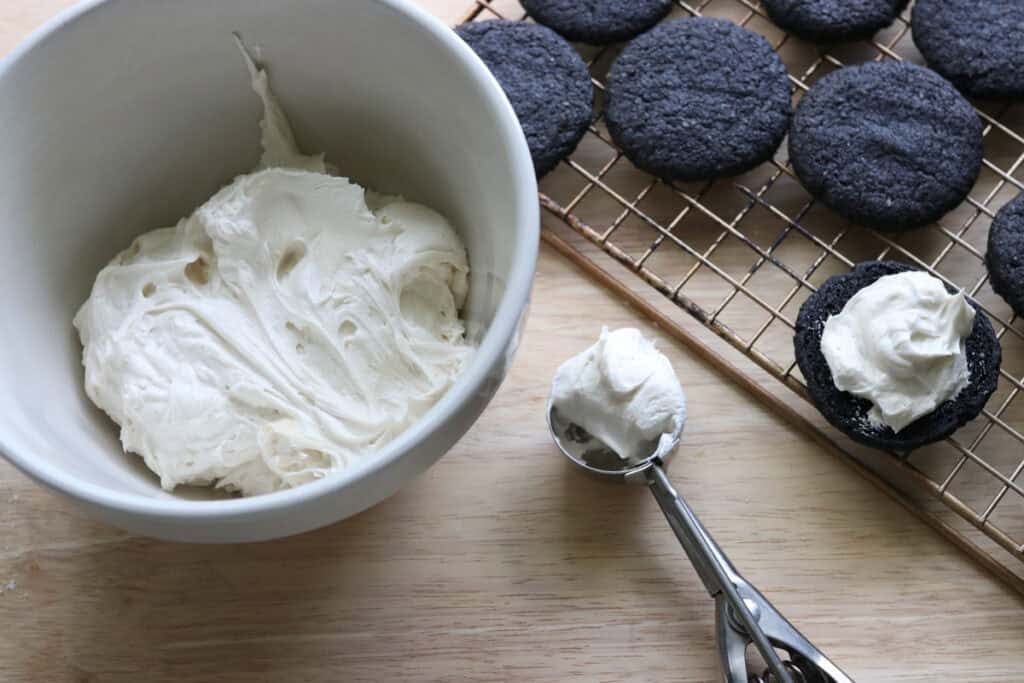
#4 Pipe the Filling for a Neat Look
When it comes to sandwiching your cookies, using a piping bag for the filling makes the whole cookie look professionally polished. It’s a simple step that adds a touch of elegance. Another option is to use a small cookie scoop.
#5 Don’t Overbake
Pull the cookies out once their edges are just set but the centers might still feel a bit soft. They’ll firm up as they cool, keeping that soft bite we’re after.
Helpful Tools & Supplies
Whether you’re just dipping your toes into the world of fresh milled flour or you’re a seasoned home baker, I’ve taken the guesswork out of what you truly need. All of these tools and resources are available in my shop, designed to help your journey be smooth and nourishing:
Grain Mills
- NutriMill Classic Grain Mill – My go-to for fine, consistent milling; perfect for sandwich breads and everyday baking.
- NutriMill Harvest Grain Mill – Stone-ground elegance: this model delivers whole-grain flavor with a beautiful appearance.
Mixers
- Ankarsrum Mixer – A powerhouse kitchen companion with multiple speeds and attachments—ideal for kneading bread dough effortlessly.
Baking & Bread Tools
- Bread Bow Knife – Artisan-made with a high-carbon steel blade and cherry wood handle—this knife slices loaves with ease.
- Sourdough Essentials Kit With Starter – Complete starter kit that includes dehydrated sourdough starter, banneton baskets, a dough whisk, scoring lame, and more.
Cookbooks & eBook Bundles
- Everyday Whole Grains Vol. 1 & 2 (printed & digital) – Packed with 70+ recipes built around fresh milled flour, from breads to snacks and desserts.
- The Fresh Breads Bundle – A comprehensive set including eBooks like The Perfect Loaf, the Cookie Jar, bulk baking guides, and a sourdough mini‑course—all centered on fresh milled flour.
- Freshly Milled Made Simple Guide – A video-based guide that walks you through milling and baking basics, making the process feel easy and approachable.
Specialty Items
- Dehydrated Sourdough Starter – Just add water and flour to rehydrate this starter—perfect for bakers without an active sourdough culture.
- I Knead Fresh Flour Mug – A charming, handmade 12 oz ceramic mug—great for coffee breaks during dough rising!
Why These Are Worth It
Every tool in this collection has been personally vetted to support you in baking with fresh milled flour. From the grain mills that make your flour, to mixers that knead dough, to resources that teach you every step—it’s all here to make sure your homemade bread journey is joyful, nourishing, and successful.
➡️ Explore all of these items and more in the Generation Acres Farm Shop — your one-stop spot for fresh milled flour baking essentials.
Equipment:
Mixing Bowls
Mixer (Hand or Stand)
Baking Sheets
Parchment Paper or Silicone Baking Mats
Cookie Scoop
How to Make the Most Delicious Homemade Oreos
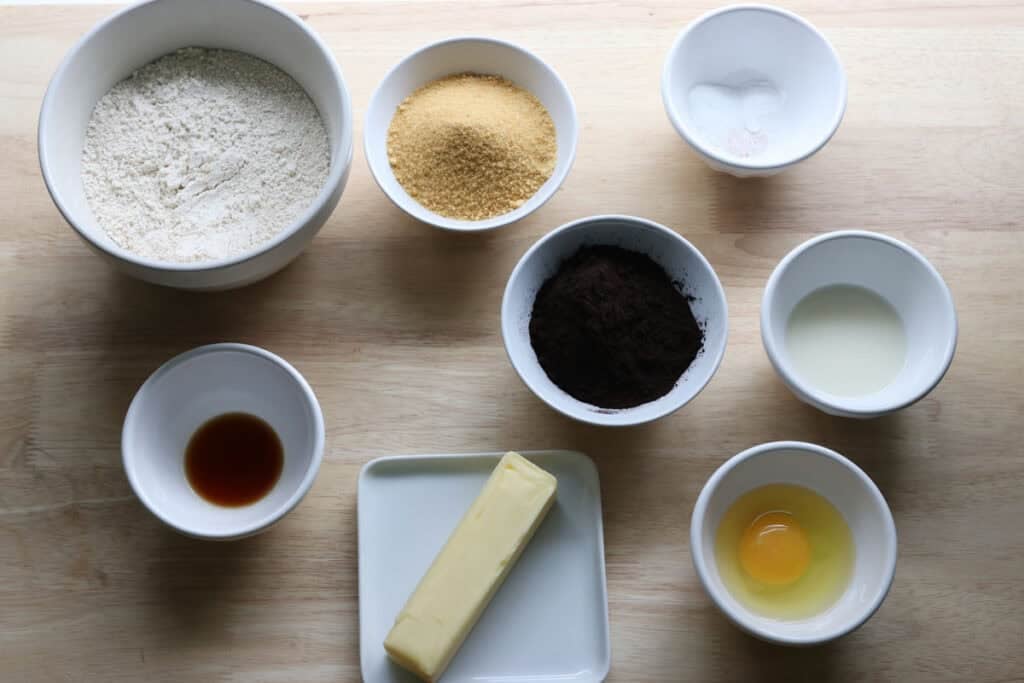
Cookie Dough:
- 1 ¾ cups freshly milled soft white wheat flour, finely milled (200 grams)
- ½ teaspoon baking powder
- 1 teaspoon baking soda
- ¼ teaspoon salt
- ½ cup dutch processed black cocoa (can use normal unsweetened cocoa powder, but it will not look like the traditional dark oreo)
- ½ cup softened butter (115 grams)
- ¾ cup maple sugar or sugar (120 grams)
- 1 egg
- 1 teaspoon vanilla
- 2 tablespoons milk
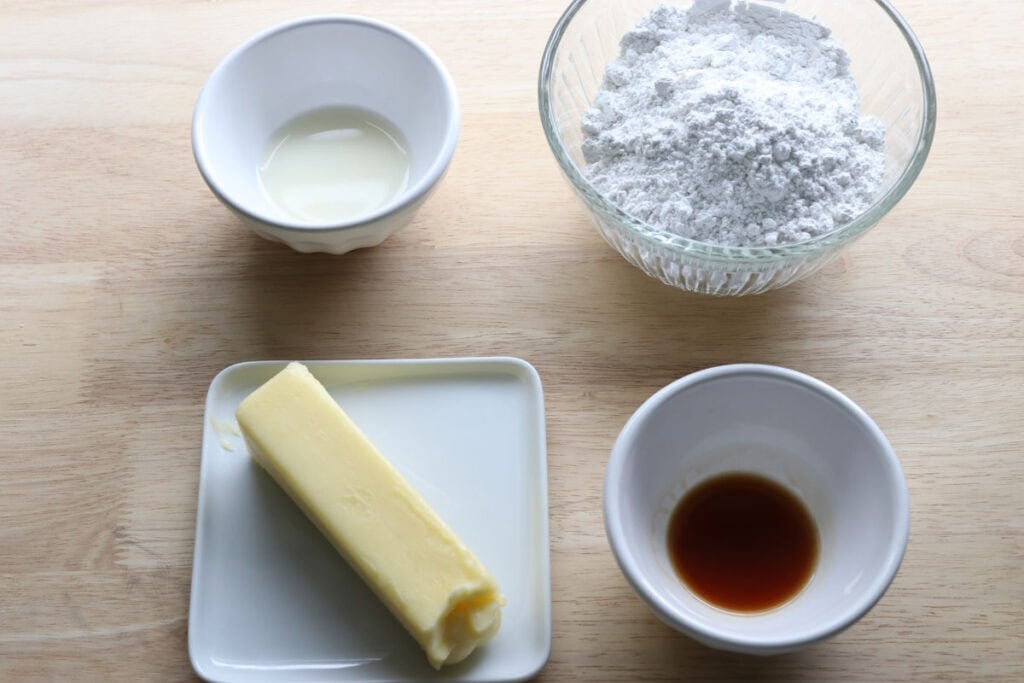
Icing:
- 1 ½ cups powdered sugar (150 grams)
- ½ cup softened butter
- 2-3 teaspoons milk
- 1 teaspoon vanilla
Directions:
- Preheat the oven to 350 degrees F.
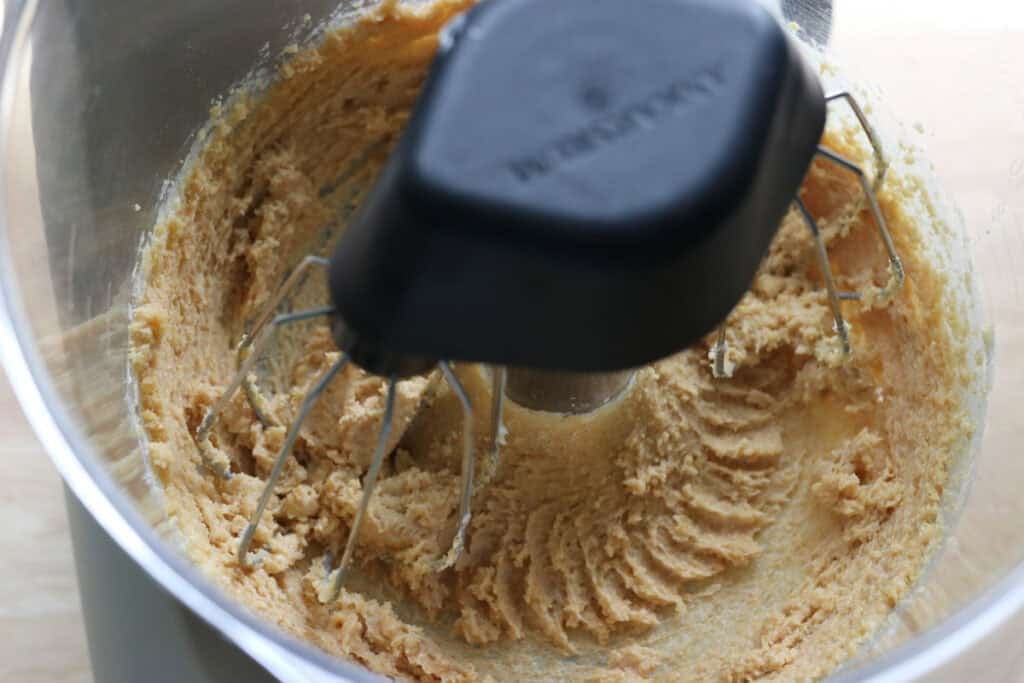
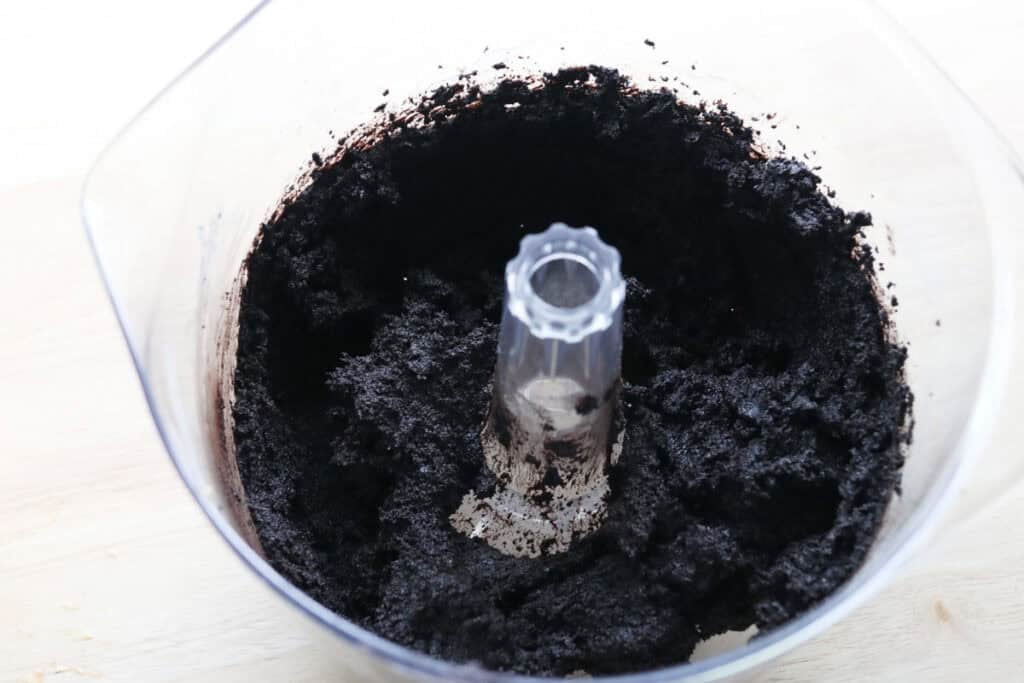
- In the bowl of a stand mixer, cream the butter and sugar together on medium speed.
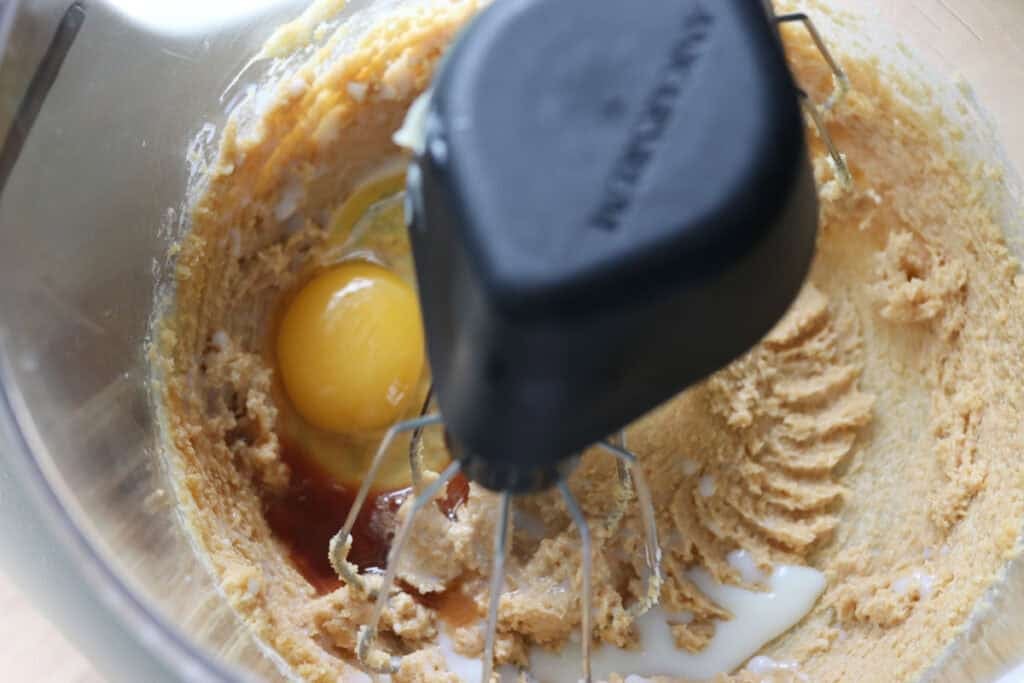
- Add the egg, vanilla, and milk and combine.
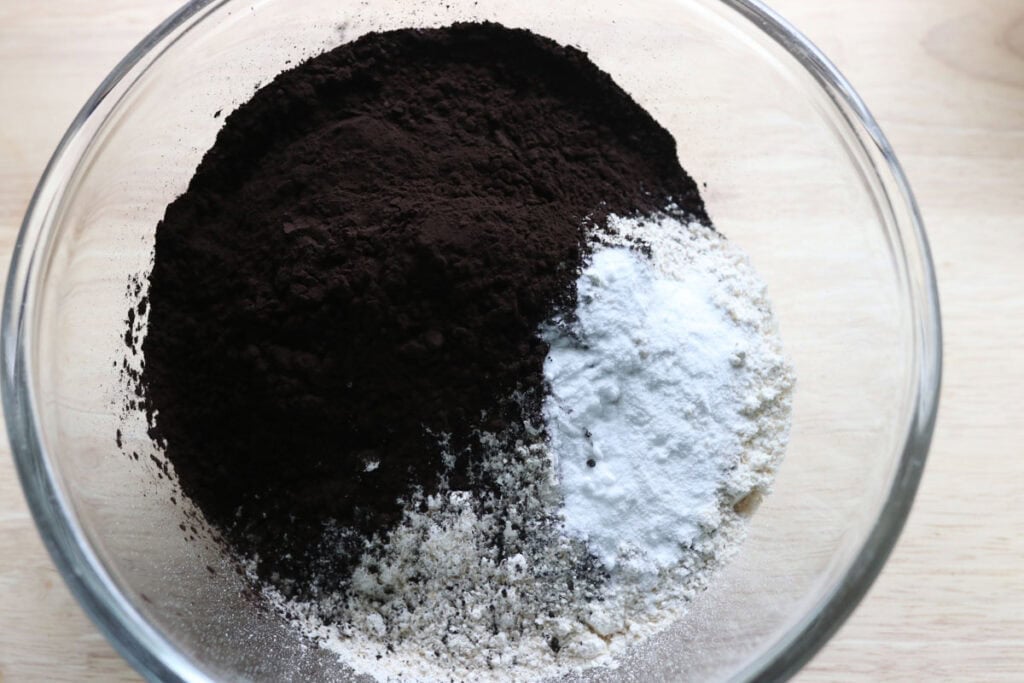
- In a separate bowl, combine the flour, baking powder, baking soda, salt, and cocoa powder.
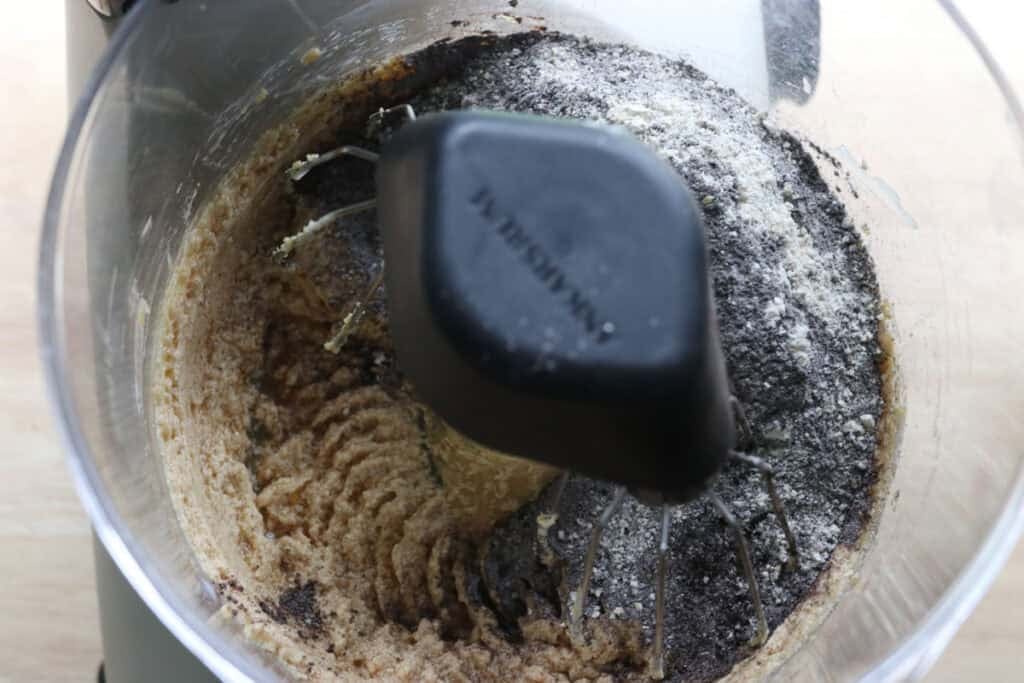
- Add the dry ingredients into the wet ingredients and mix until combined.
- Use a 1 tablespoon cookie scoop to scoop the cookie dough out onto a baking sheet lined with parchment paper.
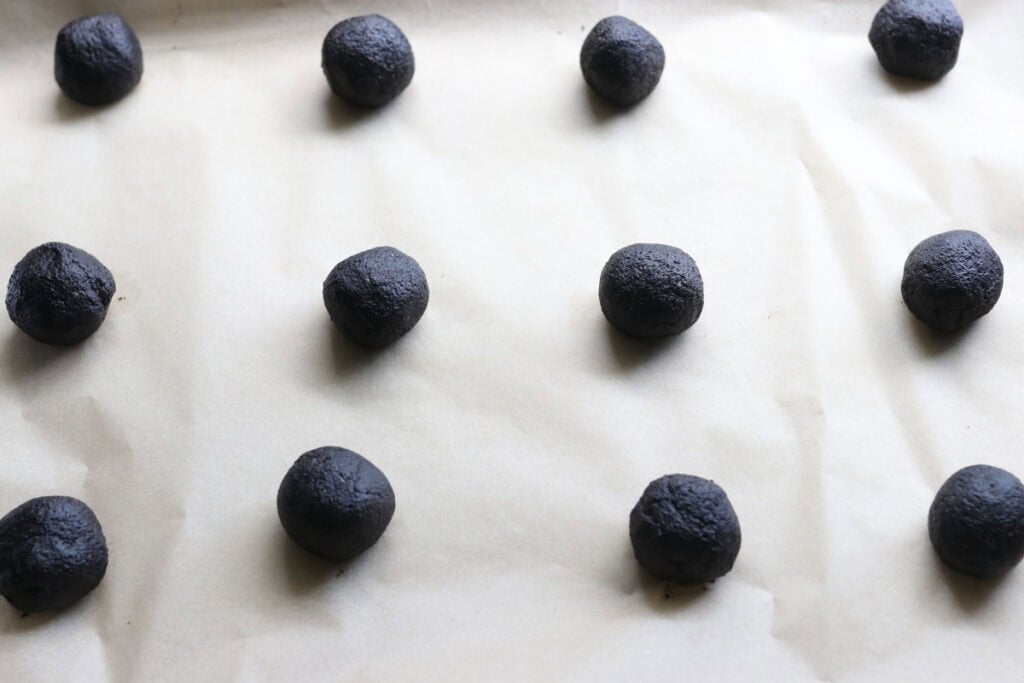
- Roll each cookie into a smooth ball.
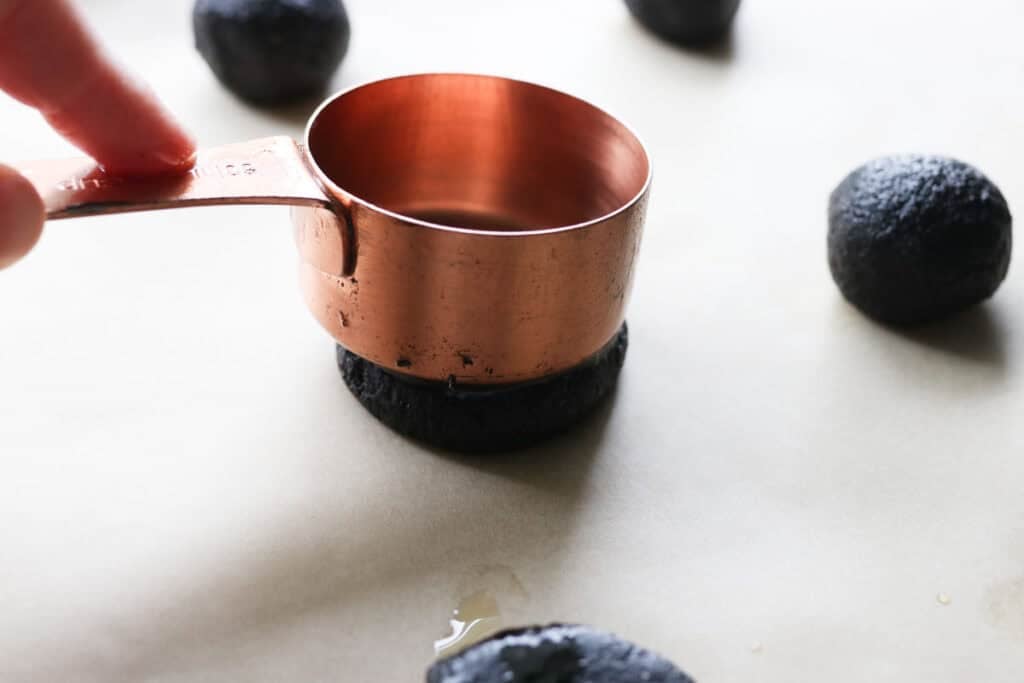
- Spray the back of a measuring cup with grease and use it to gently flatten each cookie dough ball into a disc.
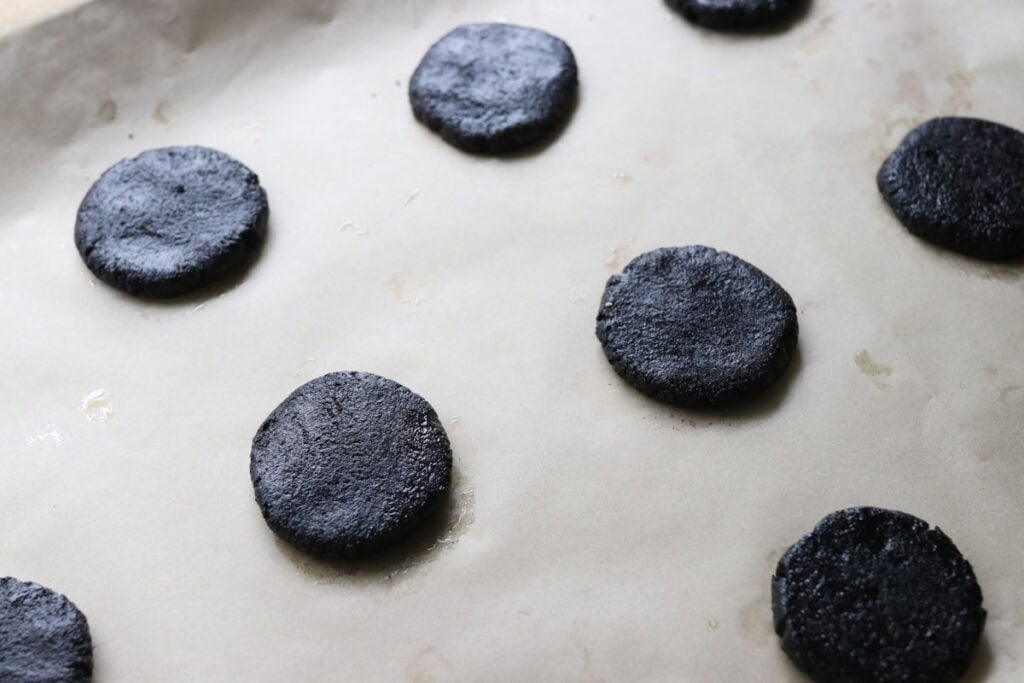
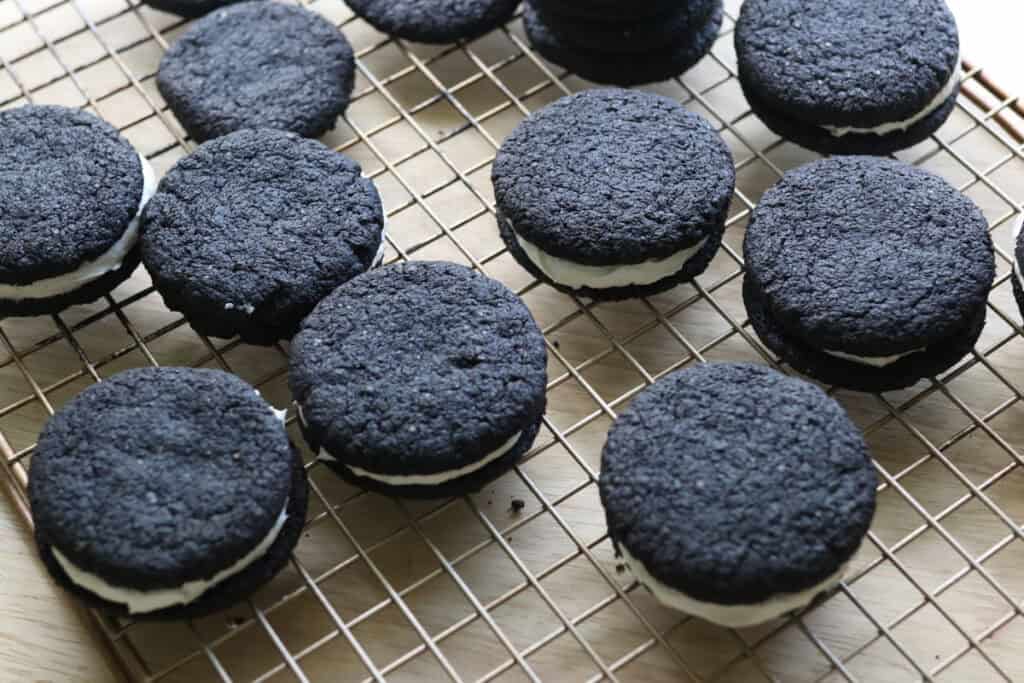
- Refrigerate the dough for 20 minutes, then bake for 6 minutes.
- Prepare the icing while the cookies cool.
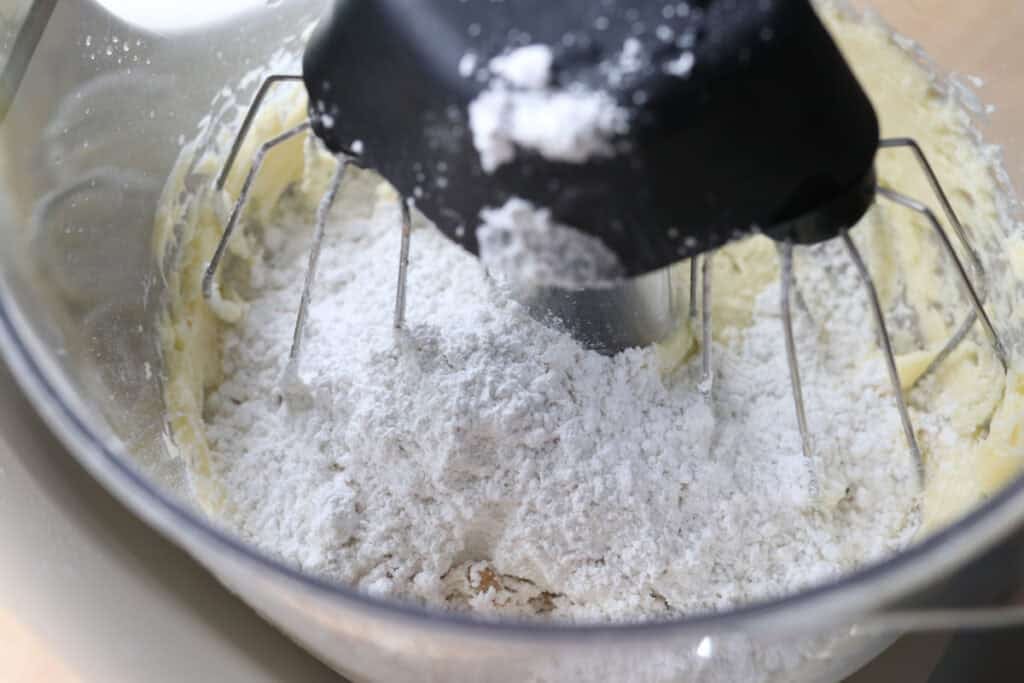
- Beat the butter in the bowl of a stand mixer.
- Add the powdered sugar, vanilla, and milk. Beat until fluffy.
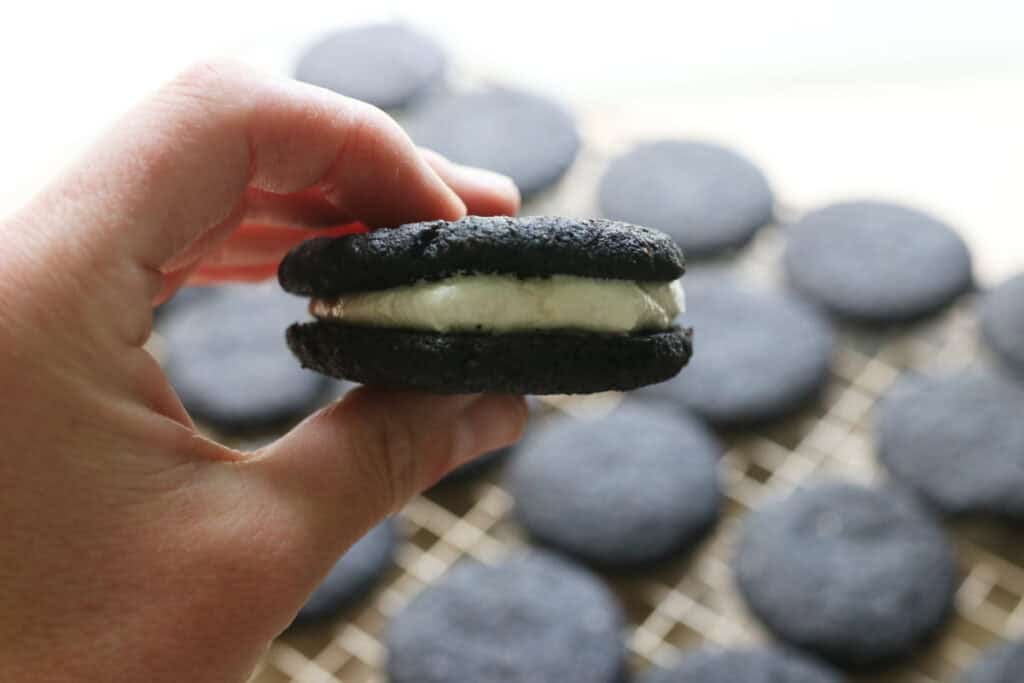
- Scoop a heaping tablespoon of the icing on one side of the cookie and sandwich it together with another cookie.
Recipe Variations
Chocolate Filling: Try a richer chocolate cream filling instead of the classic vanilla for a double chocolate delight.
Add Spices: A pinch of cinnamon or espresso powder in the dough adds an unexpected depth that elevates the cookie flavor.
Gluten-Free Version: Swap freshly milled wheat flour for freshly milled gluten-free grains like buckwheat or oat flour to accommodate dietary needs.
Mini Oreos: Make smaller cookie rounds for a cute, bite-sized treat that’s perfect for parties or snack packs.
Flavor Boosters
Brown Butter in the Dough
Using browned butter brings a nutty richness that intensifies the cookie’s flavor and adds a subtle caramel note.
Extract Play
Add a hint of almond or peppermint extract to the cream filling for an intriguing flavor contrast that surprises the palate.
Sea Salt Sprinkle
A light sprinkle of flaky sea salt on the dough before baking enhances the chocolate flavor and balances sweetness.
Roast Your Cocoa
Lightly toasting cocoa powder in a dry pan can bring out deeper, almost smoky notes that add complexity to the cookie.
Mix in Mini Chocolate Chips
For extra pockets of melty chocolate in every bite, fold a small handful of mini chocolate chips into the dough.
What To Serve With Delicious Homemade Oreos
Cold Milk
The classic Oreo pairing is just as wonderful with homemade Oreo cookies. Cold milk makes a refreshing, simple dip.
Ice Cream
Soft Oreos crumbled over vanilla or chocolate ice cream add a fun, textural contrast that makes dessert feel extra special.
Coffee or Hot Cocoa
These cookies complement a warm beverage perfectly, making them great for cozy afternoons or after-dinner sweets.
Fresh Berries
Balancing the rich chocolate with some tart berries on the side adds a fresh brightness to your treat.
Troubleshooting Common Problems with this Recipe
Cookies Spread Too Much
If your cookies are flattening too much, chill the dough longer or check if your butter is too soft. Also, make sure you’re measuring flour correctly; too little makes the dough too loose.
Cookies Are Too Dry or Crumbly
This can happen if the dough was over-mixed or if the flour was packed too tightly. Try mixing just until combined and use a light hand when measuring flour.
Filling Is Too Runny
If your filling feels soft, try chilling it longer or adding a bit more powdered sugar to thicken. Cream cheese or marshmallow cream can also help stabilize the filling.
Cookies Are Tough
Overbaking or using too much flour can make the cookies less tender. Keep an eye on the baking time and opt for gently mixed dough to preserve softness.
Freezing & Storing Leftovers
Freezing:
Once your Oreos are completely cooled, place them in an airtight container or freezer bag layered with parchment paper to prevent sticking. Freeze for up to 2 months. When ready to enjoy, let them thaw at room temperature for about 20 minutes and prepare the icing.
Storing:
Store these cookies in an airtight container at room temperature for up to 4 days. To keep them soft longer, add a slice of bread or an apple slice in the container to maintain moisture in the cookies.
Extra FAQs
Can I use store-bought flour instead of freshly milled flour?
Yes, you can use high-quality all-purpose or whole wheat flour if you don’t have freshly milled flour, though the texture and flavor may not be quite the same.
How can I make the cookie filling dairy-free?
Try using a dairy-free butter substitute and powdered sugar mixed with a splash of vanilla extract for a simple vegan filling.
Is it necessary to chill the dough?
Chilling helps prevent spreading and develops deeper flavors but isn’t absolutely required if you’re in a hurry—just watch your cookies closely while baking.
Can I make these cookies gluten-free?
Yes, using a gluten-free freshly milled grain or gluten-free flour blend will work, but expect some differences in texture.
What’s the best way to store these cookies if I want to keep them soft?
An airtight container at room temperature with a slice of fresh bread or apple inside will help keep the cookies soft longer

Delicious Homemade Oreos with Freshly Milled Flour
Ingredients
Cookie Dough:
- 1 ¾ cups freshly milled soft white wheat flour finely milled (200 grams)
- ½ teaspoon baking powder
- 1 teaspoon baking soda
- ¼ teaspoon salt
- ½ cup dutch processed black cocoa can use normal unsweetened cocoa powder, but it will not look like the traditional dark oreo
- ½ cup softened butter 115 grams
- ¾ cup maple sugar or sugar 120 grams
- 1 egg
- 1 teaspoon vanilla
- 2 tablespoons milk
Icing:
- 1 ½ cups powdered sugar 150 grams
- ½ cup softened butter
- 2-3 teaspoons milk
- 1 teaspoon vanilla
Instructions
- Preheat the oven to 350 degrees F.
- In the bowl of a stand mixer, cream the butter and sugar together.
- Add the egg, vanilla, and milk and combine.
- In a separate bowl, combine the flour, baking powder, baking soda, salt, and cocoa powder.
- Add the dry ingredients into the wet ingredients and mix until combined.
- Use a 1 tablespoon cookie scoop to scoop the cookie dough out onto a baking sheet lined with parchment paper. Roll each cookie into a smooth ball.
- Spray the back of a measuring cup with grease and use it to gently flatten each cookie dough ball into a disc.
- Refrigerate the dough for 20 minutes, then bake for 6 minutes.
- Prepare the icing while the cookies cool.
- Beat the butter in the bowl of a stand mixer.
- Add the powdered sugar, vanilla, and milk. Beat until fluffy.
- Scoop a heaping tablespoon of the icing on one side of the cookie and sandwich it together with another cookie.