
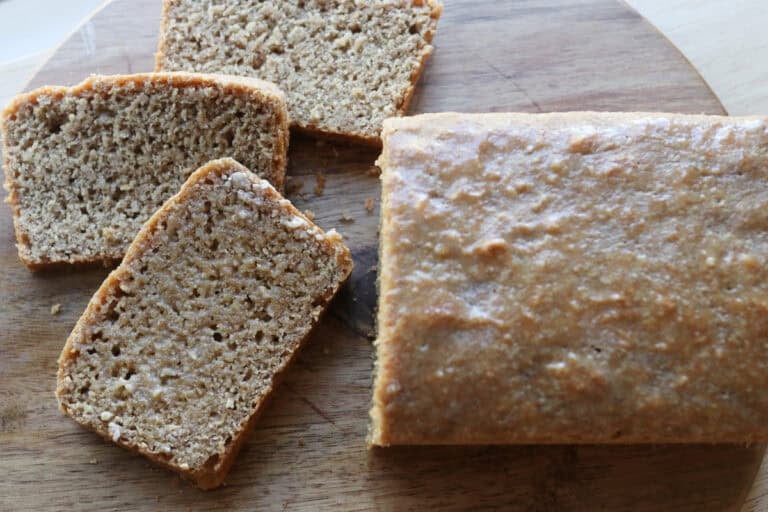
Soft and Fluffy Sandwich Bread Recipe: Your Guide to Perfect Homemade Loaves
This post may contain affiliate links. Please read our Disclosure Policy.
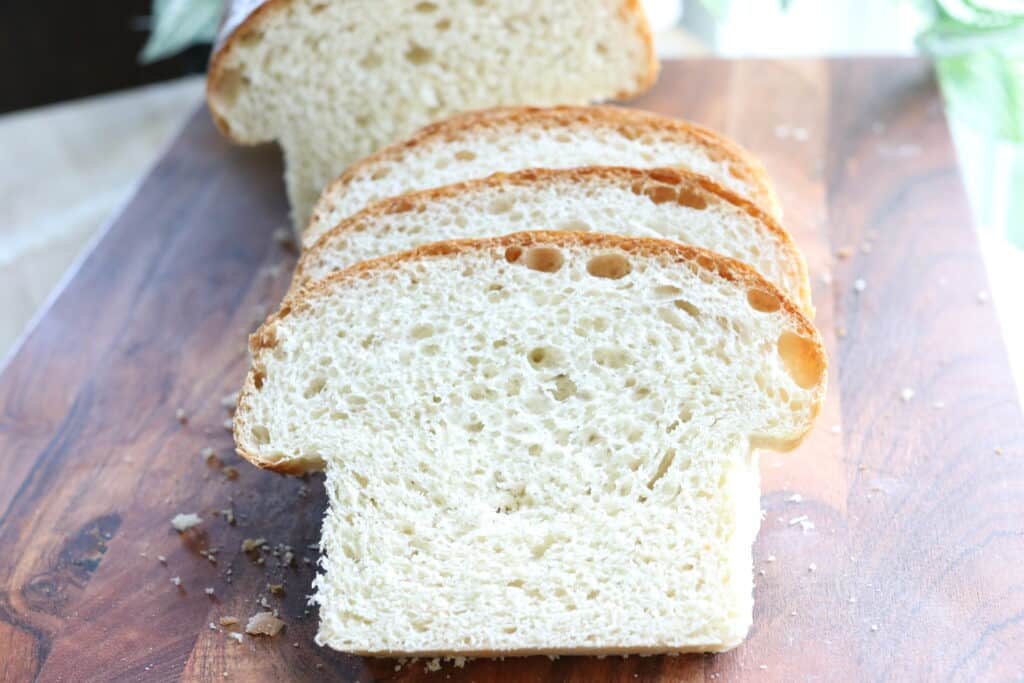
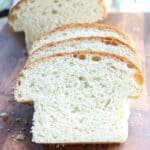
I’ve always cherished the aroma of freshly baked bread wafting through a kitchen. There’s something remarkably comforting about that scent, and it promises something homey and delicious. The texture of bread can really make a difference in your meal—the difference between a good sandwich and a great one often lies in the bread. That’s why I’ve taken it upon myself to perfect a soft and fluffy homemade sandwich bread recipe. It’s the kind that sinks slightly under the gentle pressure of your fingers and springs right back—a sign of a truly light and airy loaf.
Achieving that perfect texture isn’t as daunting as it may seem. It’s about understanding the simple science of bread-making and the role each ingredient plays. In the mixing process, for instance, using the right amount of flour is crucial for a tender crumb. Add to that the delicate balance of fats and the precise, yet patient, proofing times that allow the bread to develop its characteristic softness.
It’s also important to me that the steps for creating this comforting staple are clear and concise. Homemade sandwich bread shouldn’t be a luxury; it should be a feasible, enjoyable venture for anyone interested in baking. With the right instructions and a few tips I’ve gathered over time, like ensuring the yeast is properly activated and allowing the dough to rise in a warm, draft-free place, anyone can turn flour, water, and yeast into delightful slices of comfort perfect for the everyday sandwich or a simple piece of buttered toast.
Ingredients Selection
When I bake soft and fluffy sandwich bread, the quality and type of ingredients can make a significant difference in the taste and texture of the final loaf. The right flour, yeast, fats, and liquids are crucial components that interact to create the perfect bread.
Choosing the Right Flour
For this recipe, I am using organic unbleached all-purpose flour. I have been asked by my lovely followers to create a fluffy sandwich bread recipe that uses all store-bought ingredients – so here it is!
Many people love using bread flour for their sandwich bread recipes, but I don’t find it to be necessary.
Yeast: Active Dry vs. Instant
The choice between active dry yeast and instant yeast doesn’t have to be complicated. Instant yeast can be mixed directly with your flour because it’s more consistent and has a longer shelf life. Active dry yeast, on the other hand, should be dissolved in warm water (about 110°F) to “wake it up” before being added to the other ingredients.
I much prefer instant yeast and that is what I use and always recommend to you guys. It’s an extra step to wake up the active dry yeast, so I avoid it whenever possible.
Lipids in Bread: Oil and Butter
Fats like oil and butter are vital for a tender crumb and flavor. Butter will give your bread a rich taste, while oils such as olive oil, vegetable oil, or avocado oil will add a subtle flavor and make your bread softer. I use salted butter for its flavor.
Liquids: Water and Milk Options
Liquids activate the yeast and combine with flour to form the dough. Water creates a crisper crust, while milk, especially whole milk, enriches the dough for a softer loaf. If this loaf was any softer it would fall apart, so we are using warm water in this recipe. Milk is not necessary.
Mixing and Kneading the Dough
Properly mixing and kneading the dough are crucial steps to achieve a soft and fluffy sandwich bread. These processes develop the gluten structure that gives the bread its essential texture.
Using a Stand Mixer
I find that using a stand mixer is the most efficient method for mixing and kneading bread dough. My favorite mixer is the Ankasrum mixer, but many people love and have success with a kitchen aid mixer and dough hook. I start by adding the ingredients into the mixer bowl and then mixing at a low speed to incorporate them. Once the ingredients are combined, I increase the speed to medium and let the mixer work the dough for about 6 to 8 minutes. This should be enough to develop a smooth and elastic dough.
Kneading by Hand
When I knead dough by hand, I start on a lightly floured surface and use the heels of my hands to press and stretch the dough away from me, then fold it back over itself, giving it a quarter turn each time. This process usually takes about 10 minutes, but I always go by feel; the dough should be smooth and spring back slightly when poked.
Understanding Dough Consistency
The right consistency of the dough is paramount. I always keep in mind that the dough should not be too sticky nor too dry. While kneading—whether by mixer or hand—I add a little flour at a time if the dough is sticking too much. Conversely, if the dough feels stiff and tough, I might add a teaspoon of water to adjust. It’s the tactile experience that guides me; the dough should be tacky but not stick to my hands excessively.
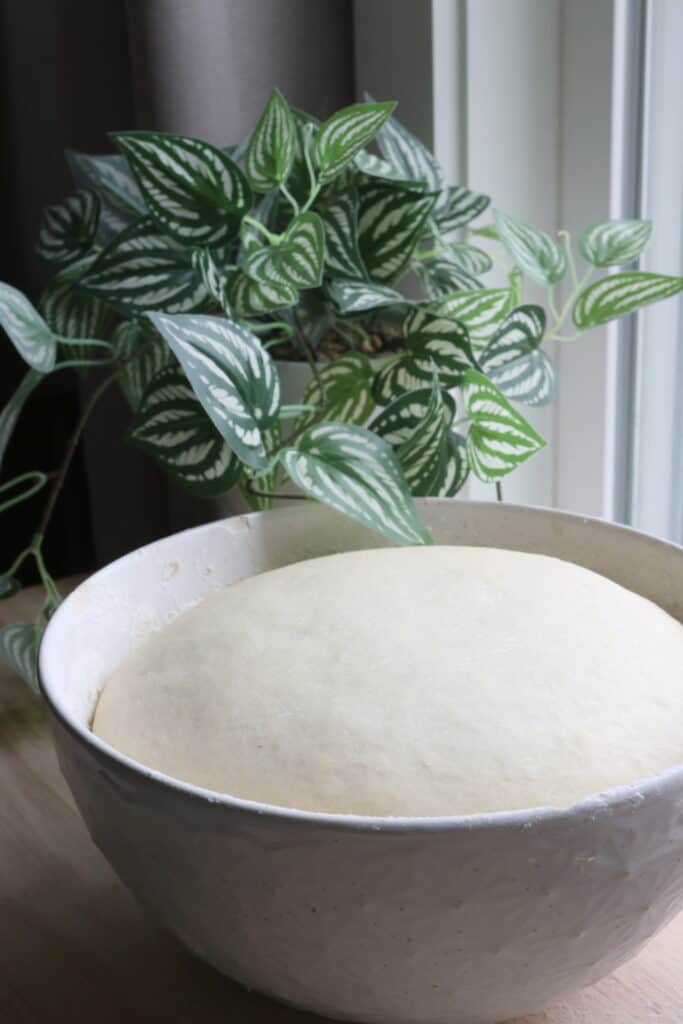
First Proofing: Letting the Dough Rise
In bread baking, the first rise is crucial for developing the bread’s structure and flavor. During this stage, the yeast works through the dough, creating gases that cause the dough to expand.
You can allow the dough to rise in a large bowl at room temperature or you can heat your oven to a very low temperature, like 100 degrees F. and allow the dough to proof in there. It will rise much more quickly in a warm place.
Covering and Placing the Dough
After mixing my ingredients into a smooth dough, I place it in a greased bowl large enough to accommodate the dough’s expansion. To prevent a skin from forming, I cover the bowl loosely with plastic wrap or a clean, damp tea towel. The dough then goes to rest in a draft-free spot. A warm environment, ideally around 78 degrees, speeds up fermentation, so I might place my bowl in an off oven with the light on, or any other spot that maintains a warm and steady temperature.
Recognizing When the Dough Has Doubled
I keep an eye on my dough to ensure I catch it when it has doubled in size, which is a clear indicator that my first proof is complete. This typically takes about 1 to 2 hours, but can vary. To test, I gently press it with my finger; if the indentation remains, it has risen enough. It’s important not to let it rise for too long as this can exhaust the yeast and result in a dense loaf.
Shaping and Second Proofing
After the initial rise has contributed to the bread’s flavor and structure, the steps that follow are crucial for achieving a picture-perfect loaf. I’ll guide you through forming the loaf and ensuring it’s ready for the oven with the perfect second rise.
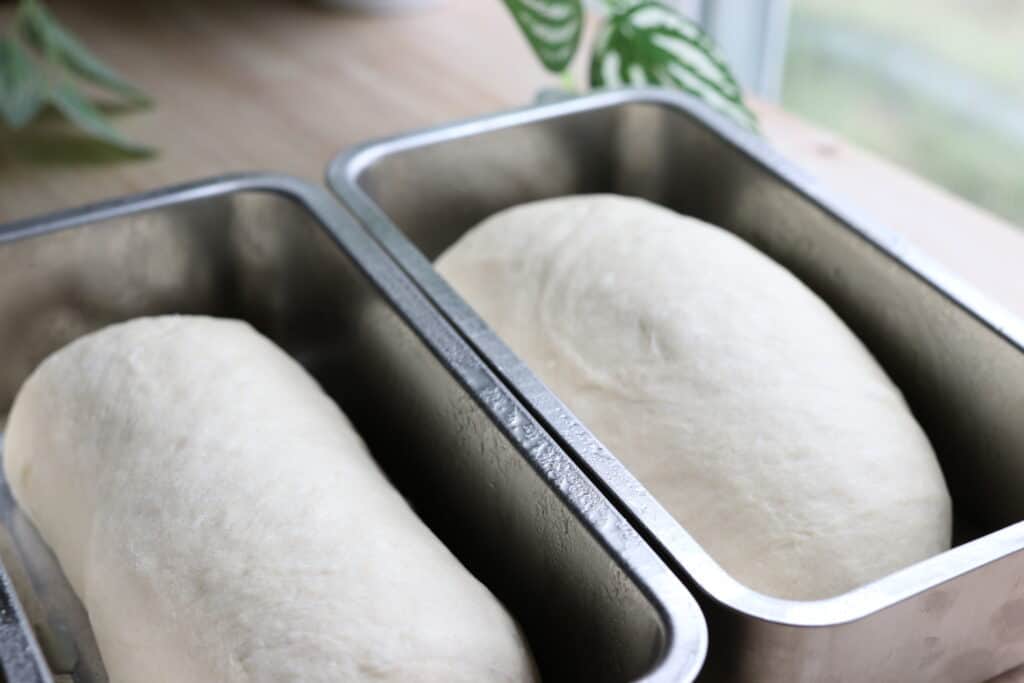
Forming the Loaf
I begin by punching down the dough which releases any excess gas and redistributes the yeast, allowing for even fermentation. Next, I transfer the dough onto a lightly floured surface to start shaping. The goal is to shape the dough into a rectangle that’s approximately the length of the loaf pan I’ll be using.
- Flatten the dough gently into a rectangle, avoiding overworking it.
- Starting at one of the short ends, I roll the rectangle tightly into a cylinder.
- I make sure to pinch the seams to seal the dough, preventing unseemly gaps after baking.
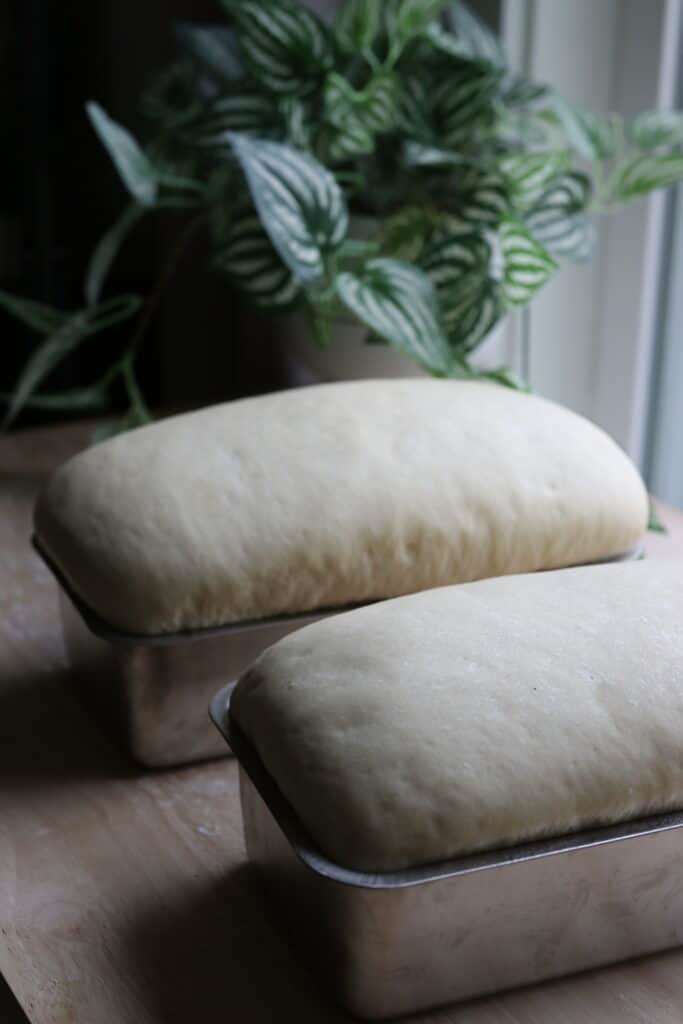
Preparing for the Oven: Second Rise
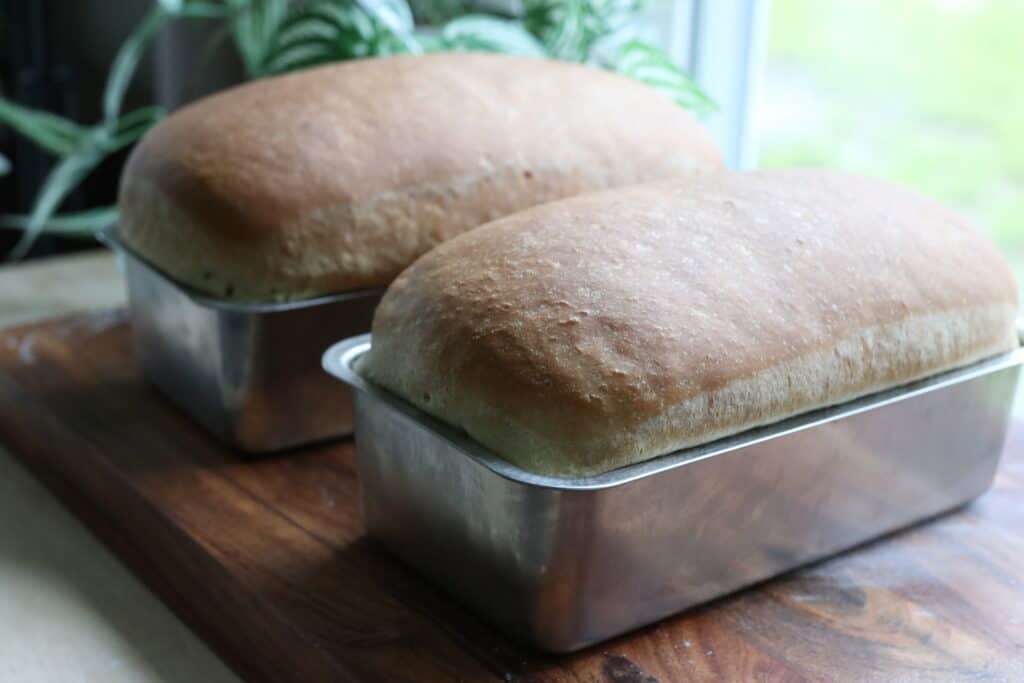
Before the loaf pan sees the warmth of the oven, a second rise is vital. This rise is what makes a loaf truly soft and fluffy.
- I carefully place the shaped dough into a greased loaf pan.
- It’s crucial to let the dough rise again, covered, in a warm environment, until it crests above the rim of the pan.
During this second rise, patience is key — I make sure it doesn’t overproof, which can lead to an over-expanded loaf that collapses.
Remember, by giving the loaf its shape and the right environment for the second rise, I’m setting the stage for a deliciously baked masterpiece.
Baking and Cooling
When I bake bread, precision is key to achieve a perfect loaf. The bake transforms the dough into a golden brown delight, and proper cooling and storage are just as important to maintain that homemade quality.
Achieving the Perfect Bake
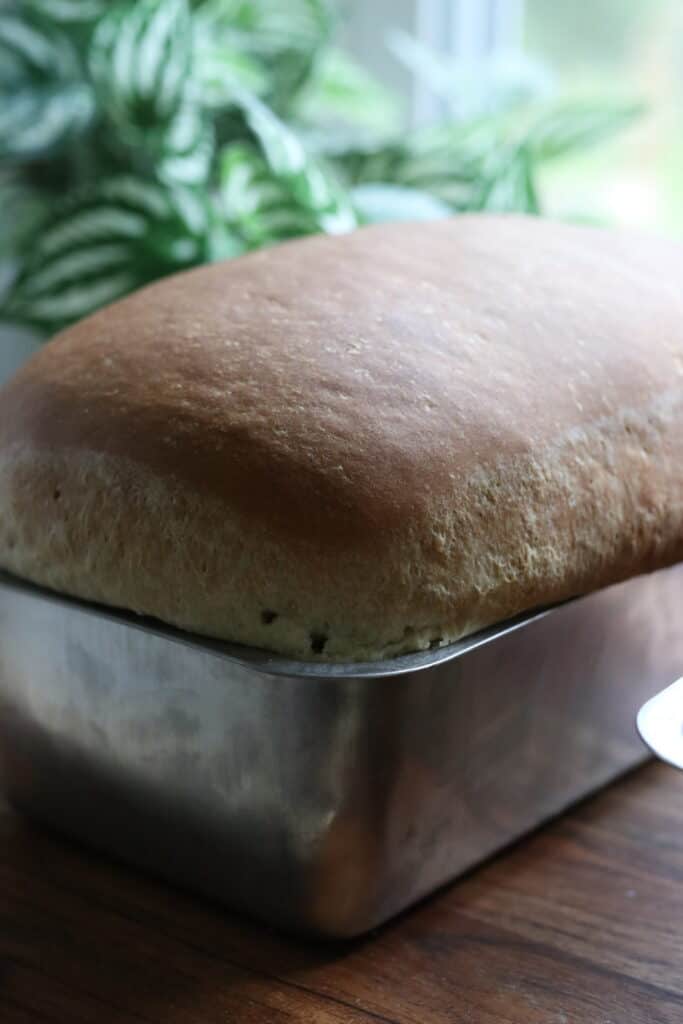
To ensure my bread bakes evenly, I preheat my oven to the temperature specified by my bread recipe, which is often around 350°F to 375°F. I use loaf pans that have been well-greased or lined with parchment paper to prevent sticking. As the bread bakes, I look for a golden brown crust, a sign that it’s done. This usually takes about 30 minutes. It’s important not to open the oven frequently, as this can affect the temperature and disturb the rise.
Storing Homemade Bread
Once my bread is baked, I let it cool in the pan for a set amount of time, typically around 10 to 15 minutes, before transferring it to a wire rack to cool completely. To store, I keep my bread on my counter in a cake stand – it keeps the bread fresh, soft and ready for immediate use.
For longer storage, freezing is an effective method. I place the cooled loaf of bread in a freezer-safe bag, squeezing out excess air.
Ingredients for Soft and Fluffy Sandwich Bread Recipe
2 cups warm water
2 teaspoon salt
1/4 cup butter, melted
1/4 cup honey
2 teaspoons instant yeast
5 1/2 – 6 1/2 cups all purpose flour
- In the bowl of a stand mixer or a large bowl, combine warm water, salt, honey and melted butter. Mix until well combined and the salt begins to dissolve.
- Add 4 cups of flour and mix.
- Next add the yeast, stir.
- Add 1 1/2 cups more flour and mix until a soft dough forms. Reserve the last cup of flour for adding while kneading. Dough should be shaggy, lose and pulling easily away the sides of the bowl. Not too sticky.
- Onto a clean, floured surface, turn out the dough. If using a mixer, turn the speed to medium, attach the dough hook and knead for 6-8 minutes.
- Begin kneading the dough and adding flour from the reserved cup as needed if it sticks to the counter or your hands.
- Knead the dough until it is smooth and elastic – about 8-10 minutes by hand or 5-6 in a stand mixer.
- Warm your oven to about 100 degrees F. we will place the dough here as a nice warm, draft free spot for it to go for it’s first rise. It will drastically reduce the rise time.
- Place dough in a bowl and into the 100 degree oven. Turn the oven off.
- Check the dough periodically. We are looking for it to double in size.
- Once it has doubled in size, prepare 2 baking pans by greasing them with cooking spray or oil.
- Turn dough onto floured surface, divide the dough in half and shape into loaves.
- Place back in the warmed oven until the dough begins to rise over the brim of the pans.
- Remove from the oven and preheat to 350 degrees F.
- Bake bread for around 30 minutes or until the tops are browned and the internal temperature reaches about 180 degrees F.
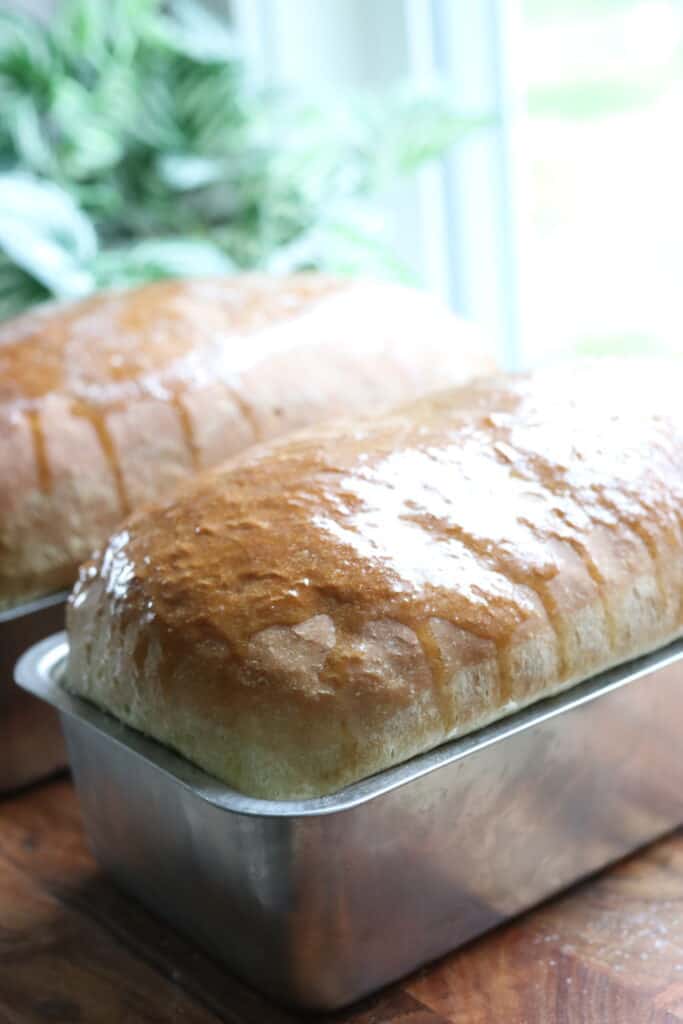
- Rub butter over the tops if desired, allow to cool and then slice.
Soft and Fluffy Sandwich Bread Recipe: Your Guide to Perfect Homemade Loaves
Ingredients
- 2 cups warm water
- 2 teaspoon salt
- 1/4 cup butter melted
- 1/4 cup honey
- 2 teaspoons instant yeast
- 5 1/2 – 6 1/2 cups all purpose flour
Instructions
- In the bowl of a stand mixer or a large bowl, combine warm water, salt, honey and melted butter. Mix until well combined and the salt begins to dissolve.
- Add 4 cups of flour and mix.
- Next add the yeast, stir.
- Add 1 1/2 cups more flour and mix until a soft dough forms. Reserve the last cup of flour for adding while kneading. Dough should be shaggy, lose and pulling easily away the sides of the bowl. Not too sticky.
- Onto a clean, floured surface, turn out the dough. If using a mixer, turn the speed to medium, attach the dough hook and knead for 6-8 minutes.
- Begin kneading the dough and adding flour from the reserved cup as needed if it sticks to the counter or your hands.
- Knead the dough until it is smooth and elastic – about 8-10 minutes by hand or 5-6 in a stand mixer.
- Warm your oven to about 100 degrees F. we will place the dough here as a nice warm, draft free spot for it to go for it’s first rise. It will drastically reduce the rise time.
- Place dough in a bowl and into the 100 degree oven. Turn the oven off.
- Check the dough periodically. We are looking for it to double in size.
- Once it has doubled in size, prepare 2 baking pans by greasing them with cooking spray or oil.
- Turn dough onto floured surface, divide the dough in half and shape into loaves.
- Place back in the warmed oven until the dough begins to rise over the brim of the pans.
- Remove from the oven and preheat to 350 degrees F.
- Bake bread for around 30 minutes or until the tops are browned and the internal temperature reaches about 180 degrees F.
- Rub butter over the tops if desired, allow to cool and then slice.


Hey, Kristin
Would this recipe work in the Zojirushi bread machine? Or do I follow the bread machine recipe instead?
Thank you.
Is this made with fresh milled flour?
No, upon request I shared a non-fresh milled recipe for those that are not milling
I have found that the amount of flour called for in recipes varies quite a bit depending on both the brand and the measuring method. Could you please provide the weight of flour you use? Thanks!
Yes we are working on converting all recipes to grams
Did you get a response? I also am looking for a sandwich bread recipe for my zojirushi. Can I half this recipe for one loaf in my machine?
I have a bread machine recipe on my blog
Kristen! This recipe is “The One” I have been searching and trying for! My bread turned out perfect. Your directions and suggestions were easy to follow and turned out a great sandwich bread for my family. Thank you!
amazing! so happy to hear!
If you were going to mill your own flour for this recipe would you still do a hard red/hard white 50/50 split? I am just getting into all of this and made your other sandwich bread recipe – which I loved – but my picky 3 year old won’t eat it – I think because it leans on the wheat bread side of things?? So I am looking for more of a white bread option – but I started following you and got rid of my store bought flour 🤣
I would suggest trying the fresh milled sandwich recipe but use all hard white wheat, or do hard white and all purpose flour to try to slowly introduce your little one to the flavors.
What size loaf pans are you using for this recipe?
9 1/4 x 5″
So did you freshly mill you all purpose flour and remove the germ and bran?
Hi, no. This is an all purpose flour recipe because I had people asking for one. For those who are not milling yet
What kind of yeast do you use?
instant yeast, always
Can’t wait to try this out! Can I use bread flour instead of AP?
I’ve never tried bread flour
Tried this recipe this afternoon and it’s the bread recipe that I’ve been looking for!!! Thank you for explaining the importance of kneading and making sure to pay attention to when it doubles the first proof and how much to let it rise before baking. I’m in love with this recipe🥰
So happy to hear it!! Hooray!
I love this recipe so much!! What kind of salt should I use? Sea salt, coarse, iodized?
So glad you love it! I use and love redmond’s real salt for all of my cooking and baking!
In direction 5. It says if using a mixer knead for 6-8 min, but in direction 7. It says 5-6 min. Which do I do?
Honestly, it depends on your mixer and your dough. Just knead until it’s smooth and elastic.
Perfect texture super soft wıth a subtle sweet taste, 5 star from me
I do love how much easier this recipe is and also less time it takes. Can’t wait to see how my bread turns out once it’s done!
Had this bread at my daughter’s it was delicious. If you use oil instead of butter would the measurement be the same
Should be the same!
After trying a dozen crumbly bread recipes this one finally delivered a soft and squishy loaf that we all LOVE!
Thanks for this recipe and the great blog post!
So happy to hear this!
Any suggestions for substituting honey? I have a little one under 1, so no honey. I really want to stay away from sugar as well.
Thanks!
I’ve had people tell me they use maple syrup 1:1 in this recipe, though I haven’t tried it myself. I imagine it would impart quite a bit of flavor though – that is the downside